

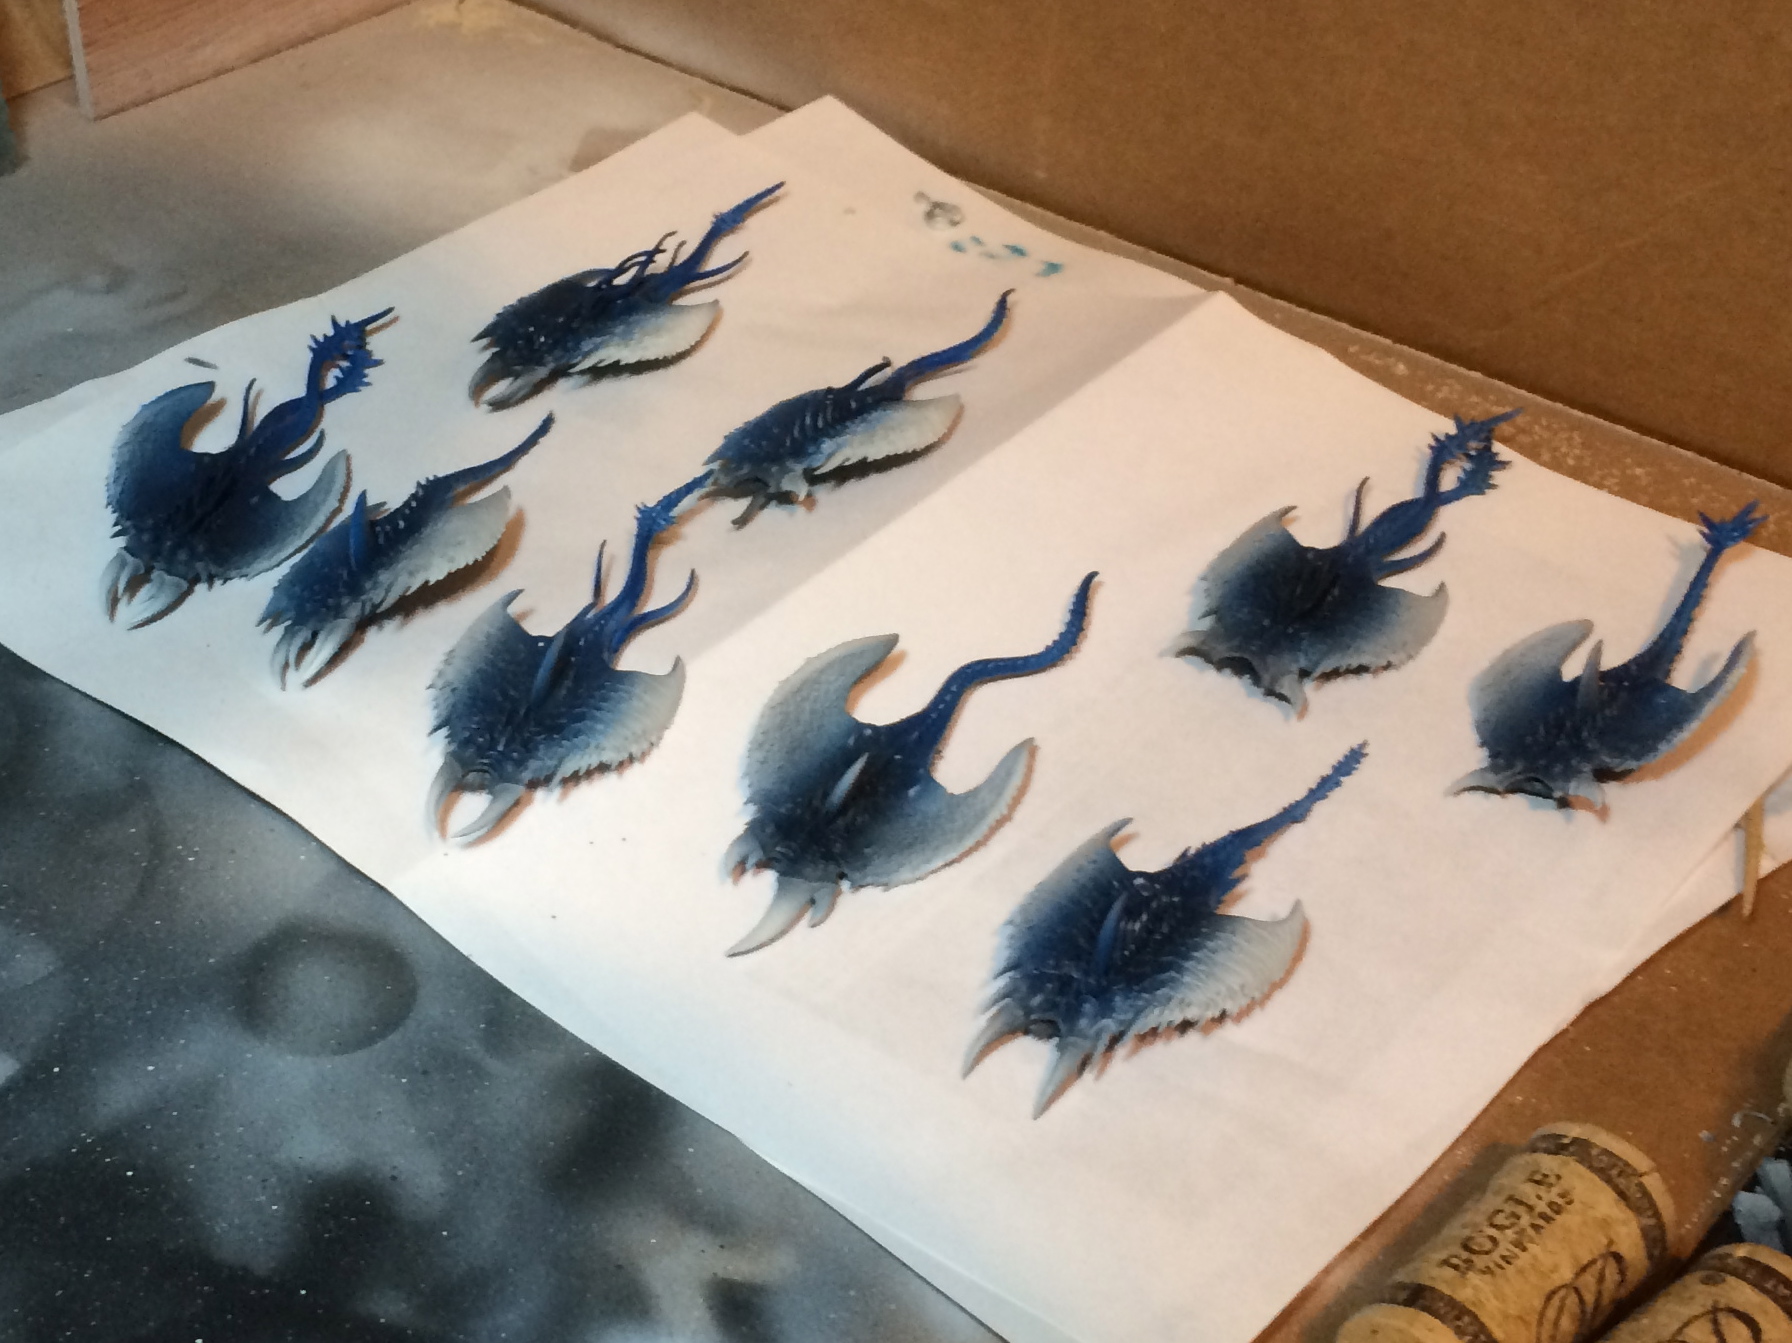
Ihad been holding off on painting my new plastic Screamers for some time (I actually painted them last September and have been searching for pictures I took ever since). I won two boxes of three at the Nor Cal Team Tournament in Stockton, CA at Heroes on Paper in early 2013. A painting award at Olde World Gaming in Elk Grove in mid 2013 netted me another box of three. I love all my metal screamers for their sleek simplicity, but I also love the detail and ability to customize the new plastic kit. I was able to assemble all nine screamers without any two models having the same options; love it!
They say mimicry is the greatest form of compliment. This tutorial is my slight twist on one already published by Element Games. You can find their tutorial linked just below. The color scheme is the same, the general approach is the same, I’ve just made some slight modifications to technique, order, basing and a few other minor things here and there.
http://www.elementgames.co.uk/forums/1-day-daemons-painting-screamers-t236.html
Modelling Supplies (in the order used):
Testor’s Model Master Plastic Cement
120-200 grit sandpaper
Citadel Grass Tufts
Gorilla Glue
PVA Glue
Woodland Scenics Fine Ballast – Buff
Various skulls and other bits
Paint Supplies (in the order used):
Vallejo Acrylics Surface Primer – Black
Vallejo Acrylics Surface Primer – Grey
Vallejo Acrylics Surface Primer – White
Liquitex Airbush Medium
Regal Blue
Enchanted Blue
Ice Blue
Skull White
Liche Purple
Warlock Purple
Leviathan Purple
Asurmian Blue
Dheneb Stone
Blazing Orange
Sunburst Yellow
Gryphone Sepia
Chaos Black
Argrax Earthshade
Graveyard Earth
Assembly:
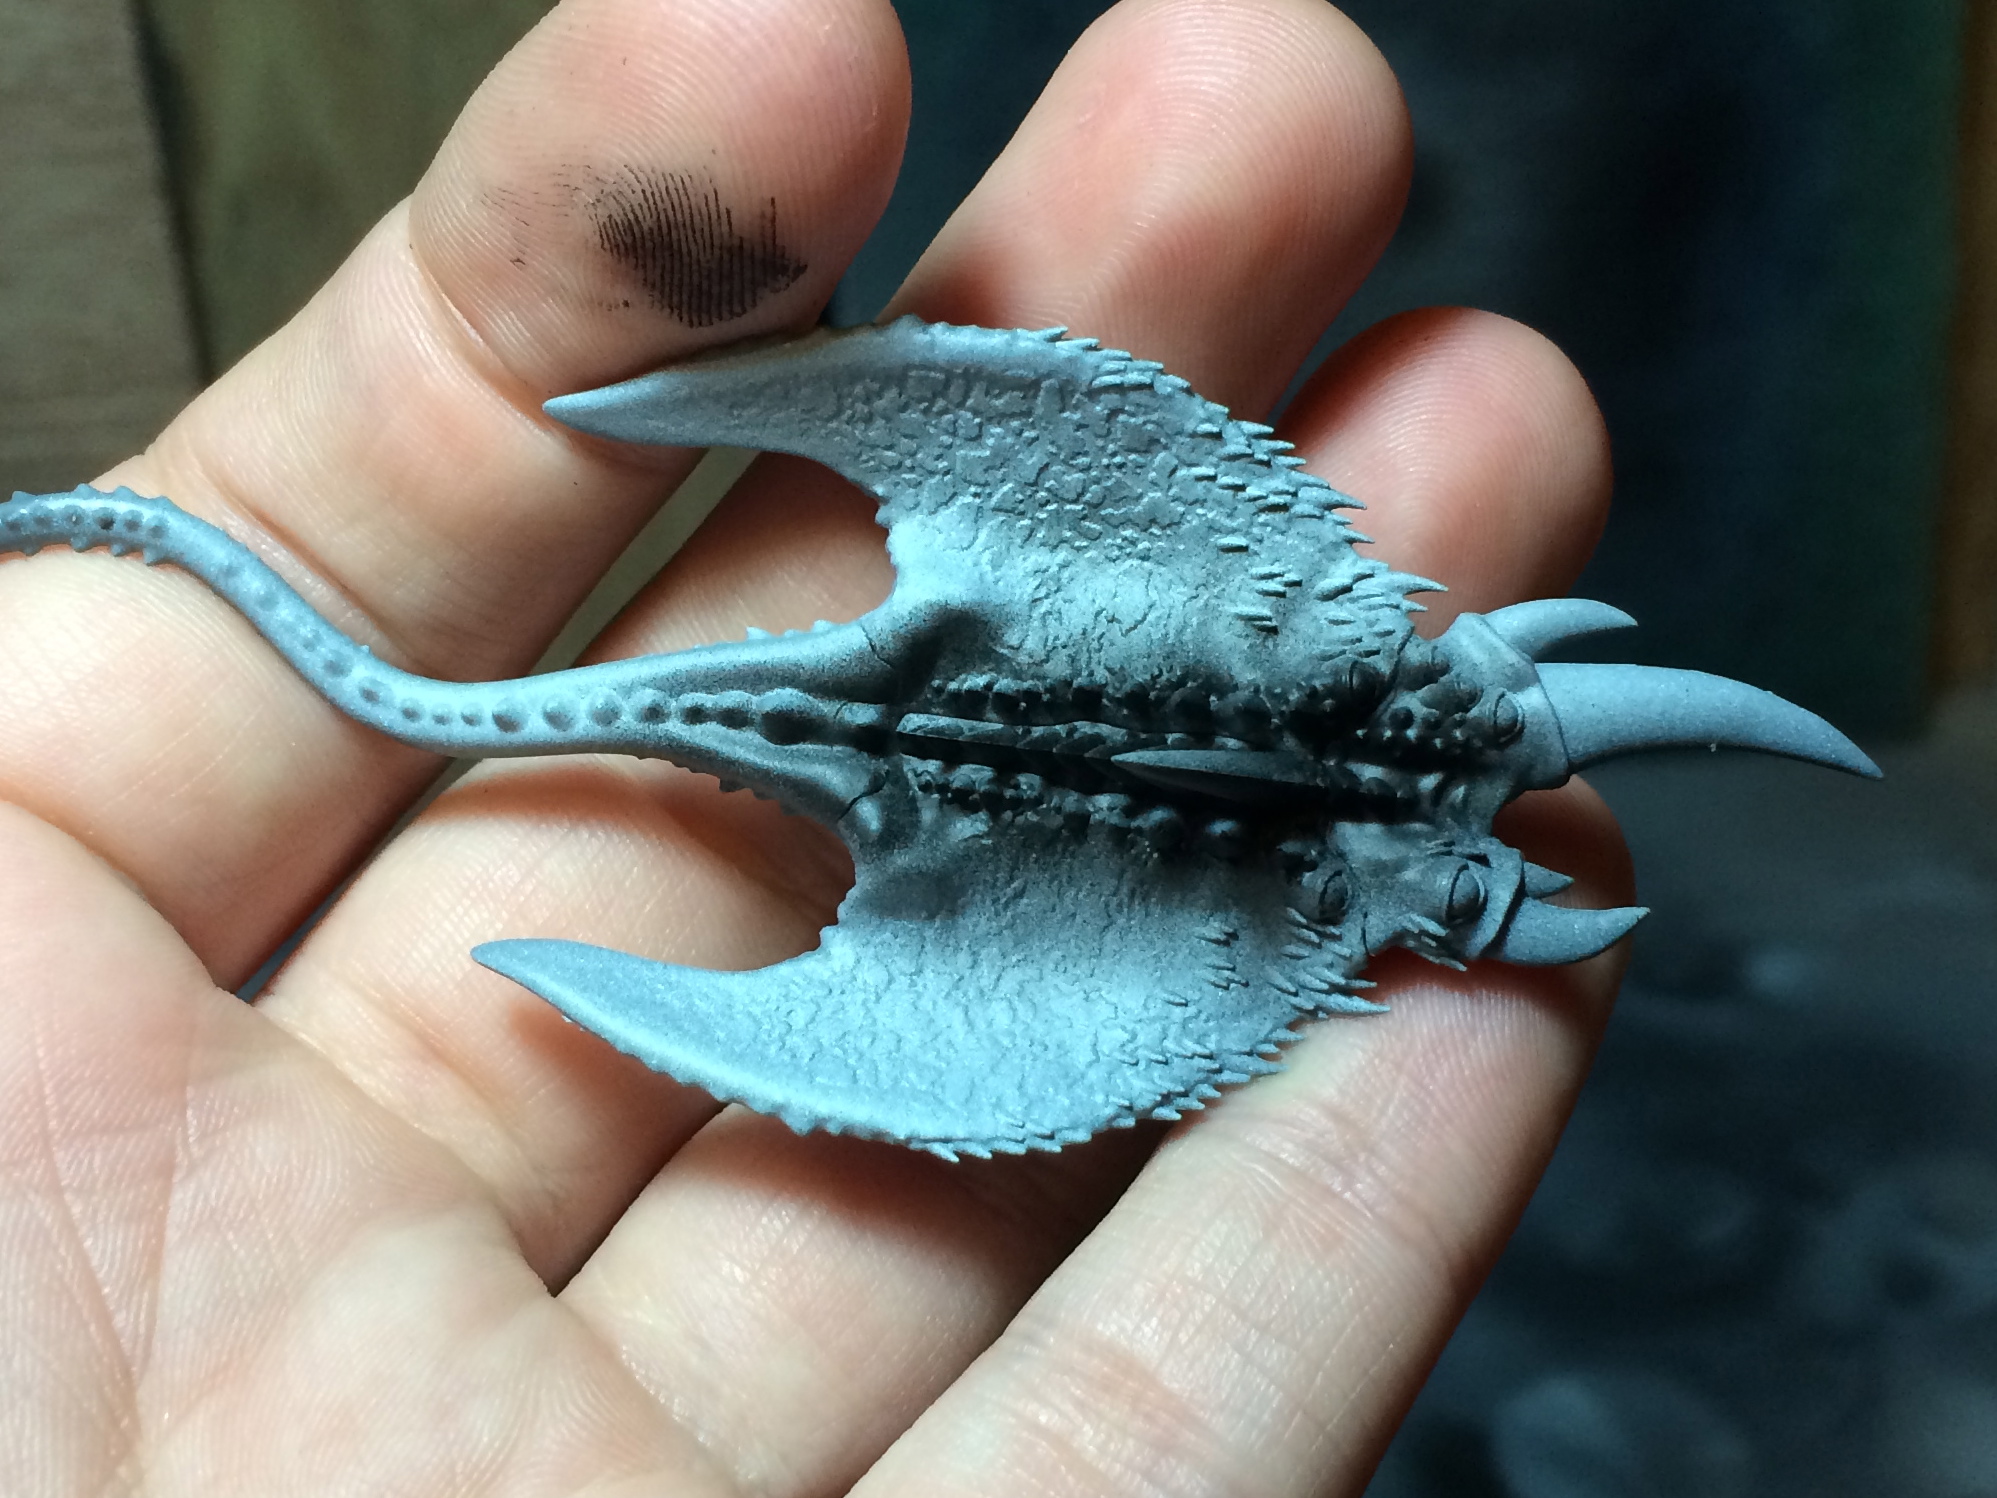
I didn’t take pictures during assembly. This is a painting tutorial, but I do want to mention that this is a great kit. Very little need to clean up mold lines, every custom part can fit every model. Goes together very easily, just be sure to attach the jaw and tail before the dorsal fin(s). I suggest not glueing the flight stand at this point. You’ll see why down below.
Priming:
I use Vallejo Model Air primer. It comes in Black, Grey and White. The 200ml bottles are the best price point and have lasted me for two entire armies and I still have some left. I normally use a Zenithal priming process on models, but the Screamers need something more to have the colors pop. Sad but true, bright colors (and boobies) win painting awards.
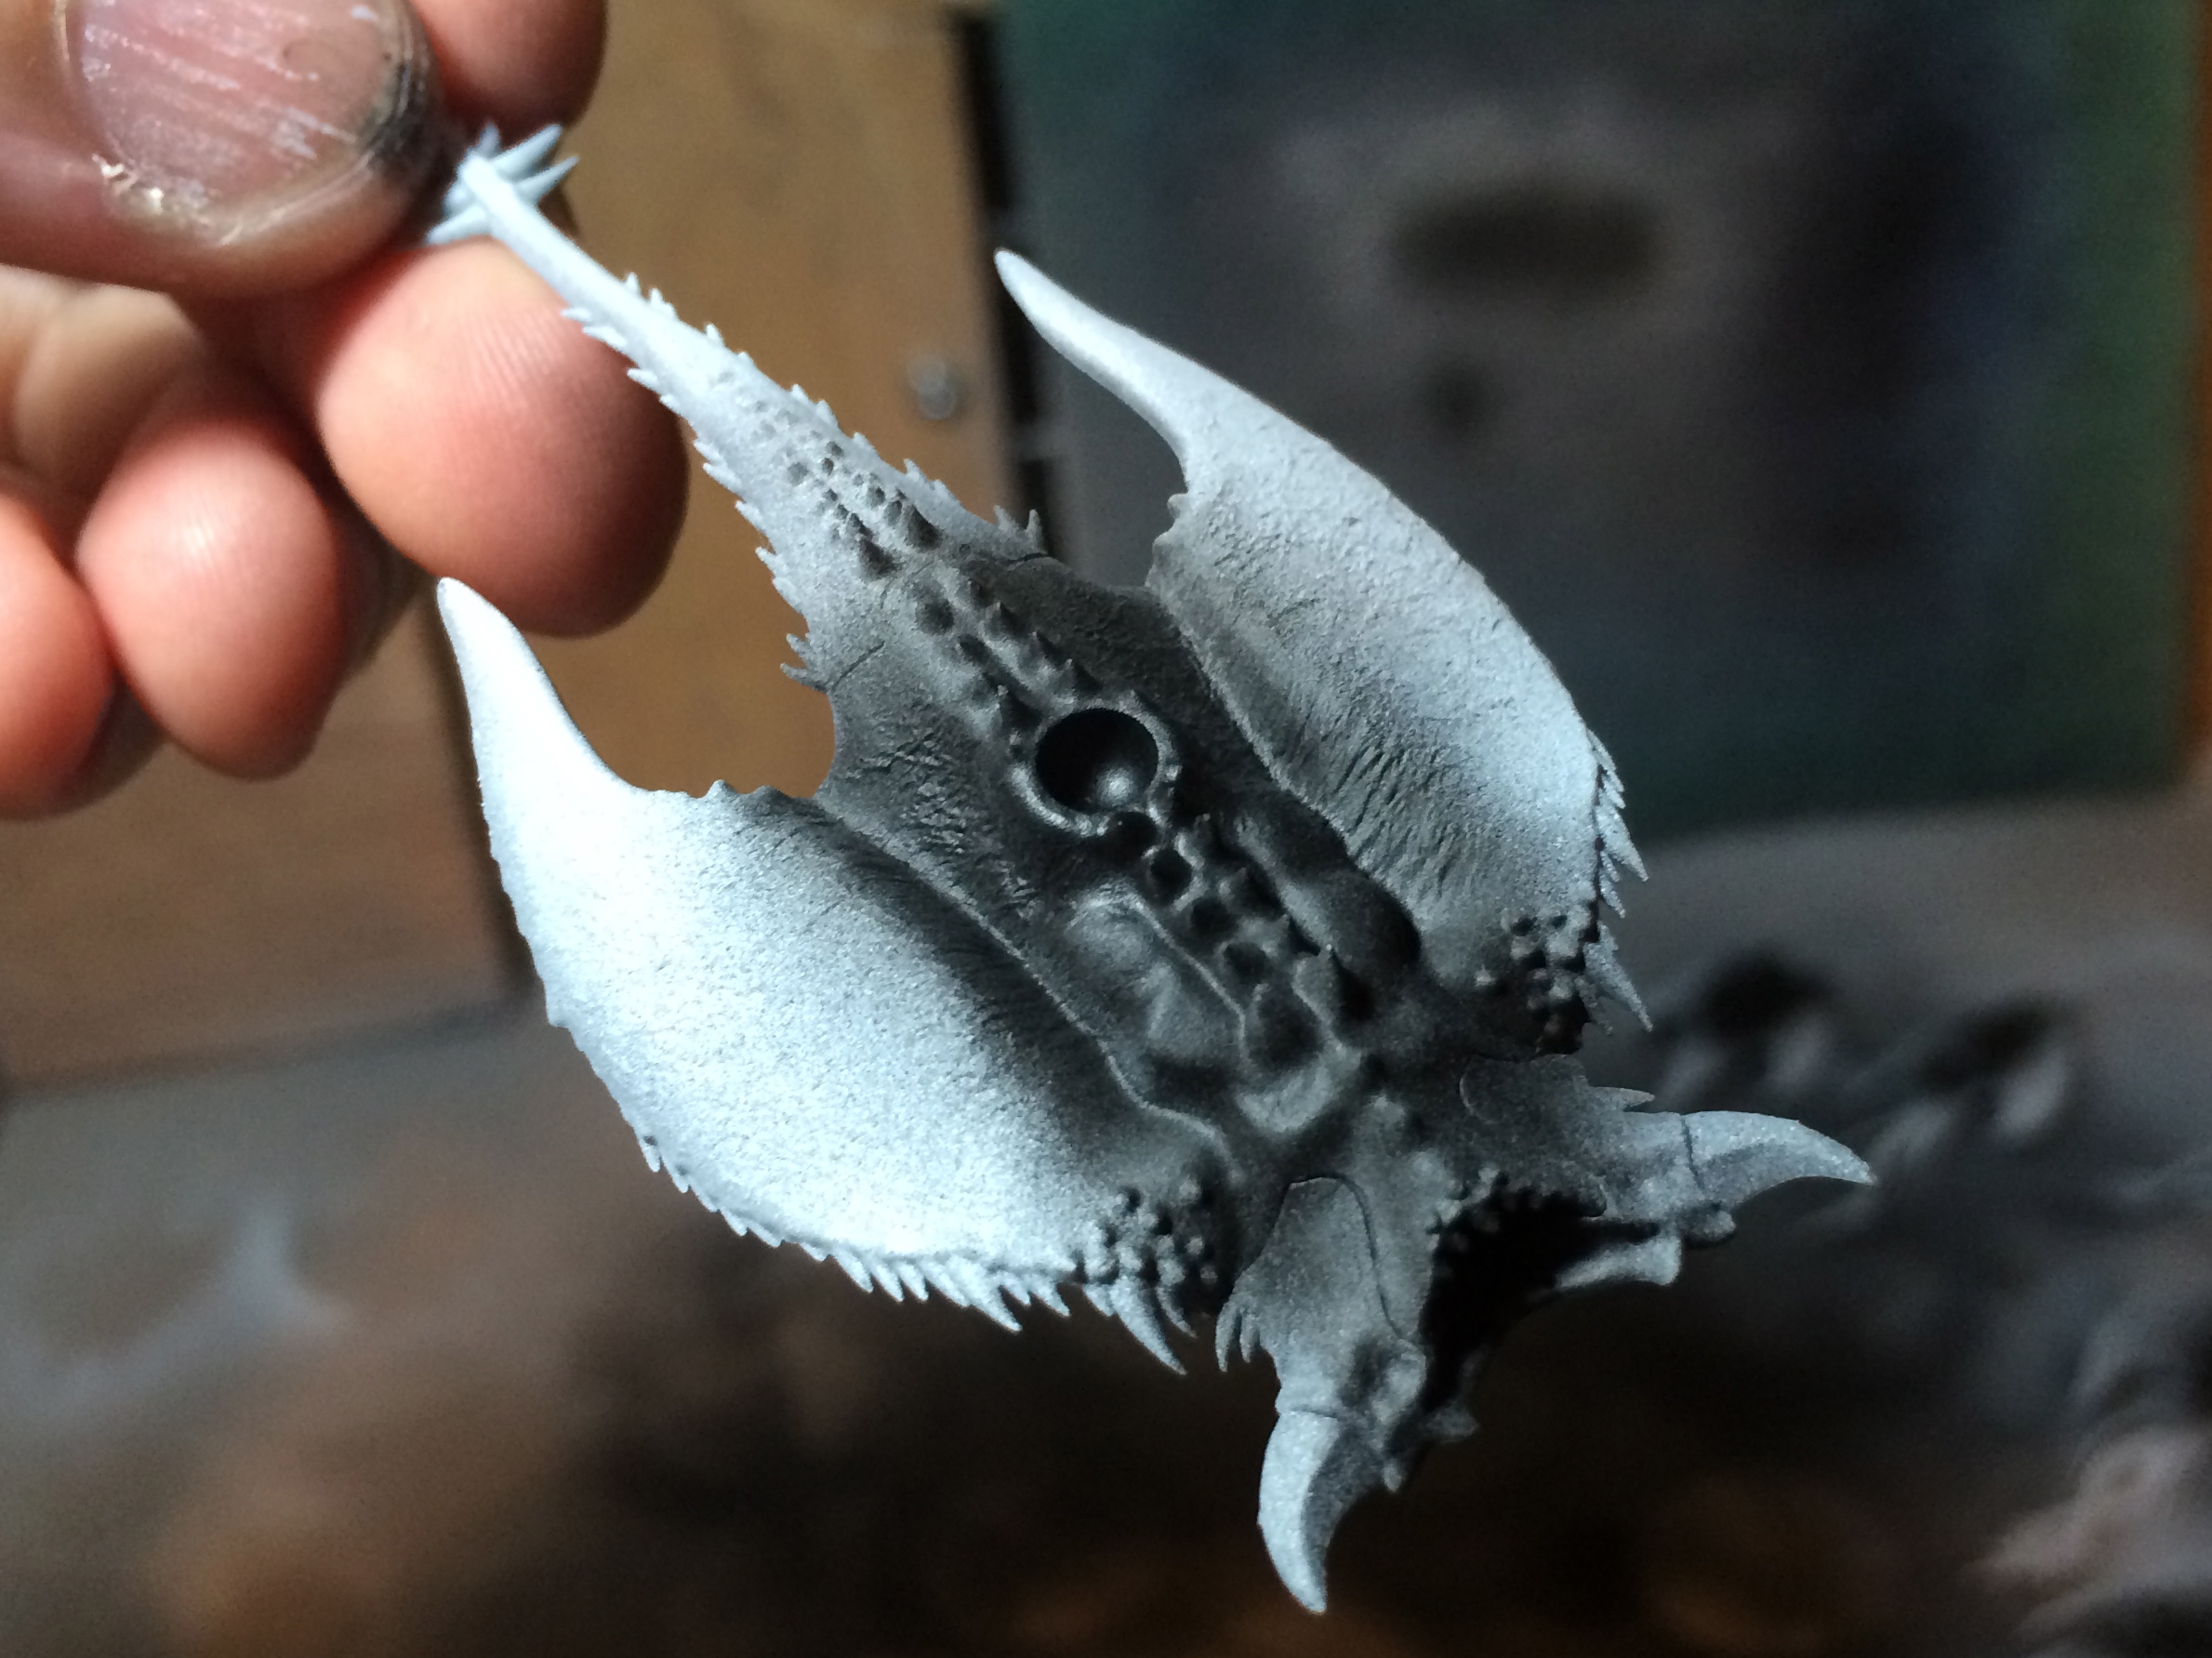
I normally start with a black surface priming and work my way up to white. However, I did it a bit differently on this one. I primed the entire model white. This took two passes, since you have to hold the model by the tail to start and then switch to the jaw once the paint has dried. Luckily airbrush primer dries super quick. I also like white primer because it helps you easily see any mold lines or other details that you may have missed during the model assembly and clean-up process.
Pro-tip: Always have models waiting to prime. I always have a back log of models that I am working on, so when I’m priming or base coating, if I end up with paint left in the airbrush I just spray it on something that also needs attention.
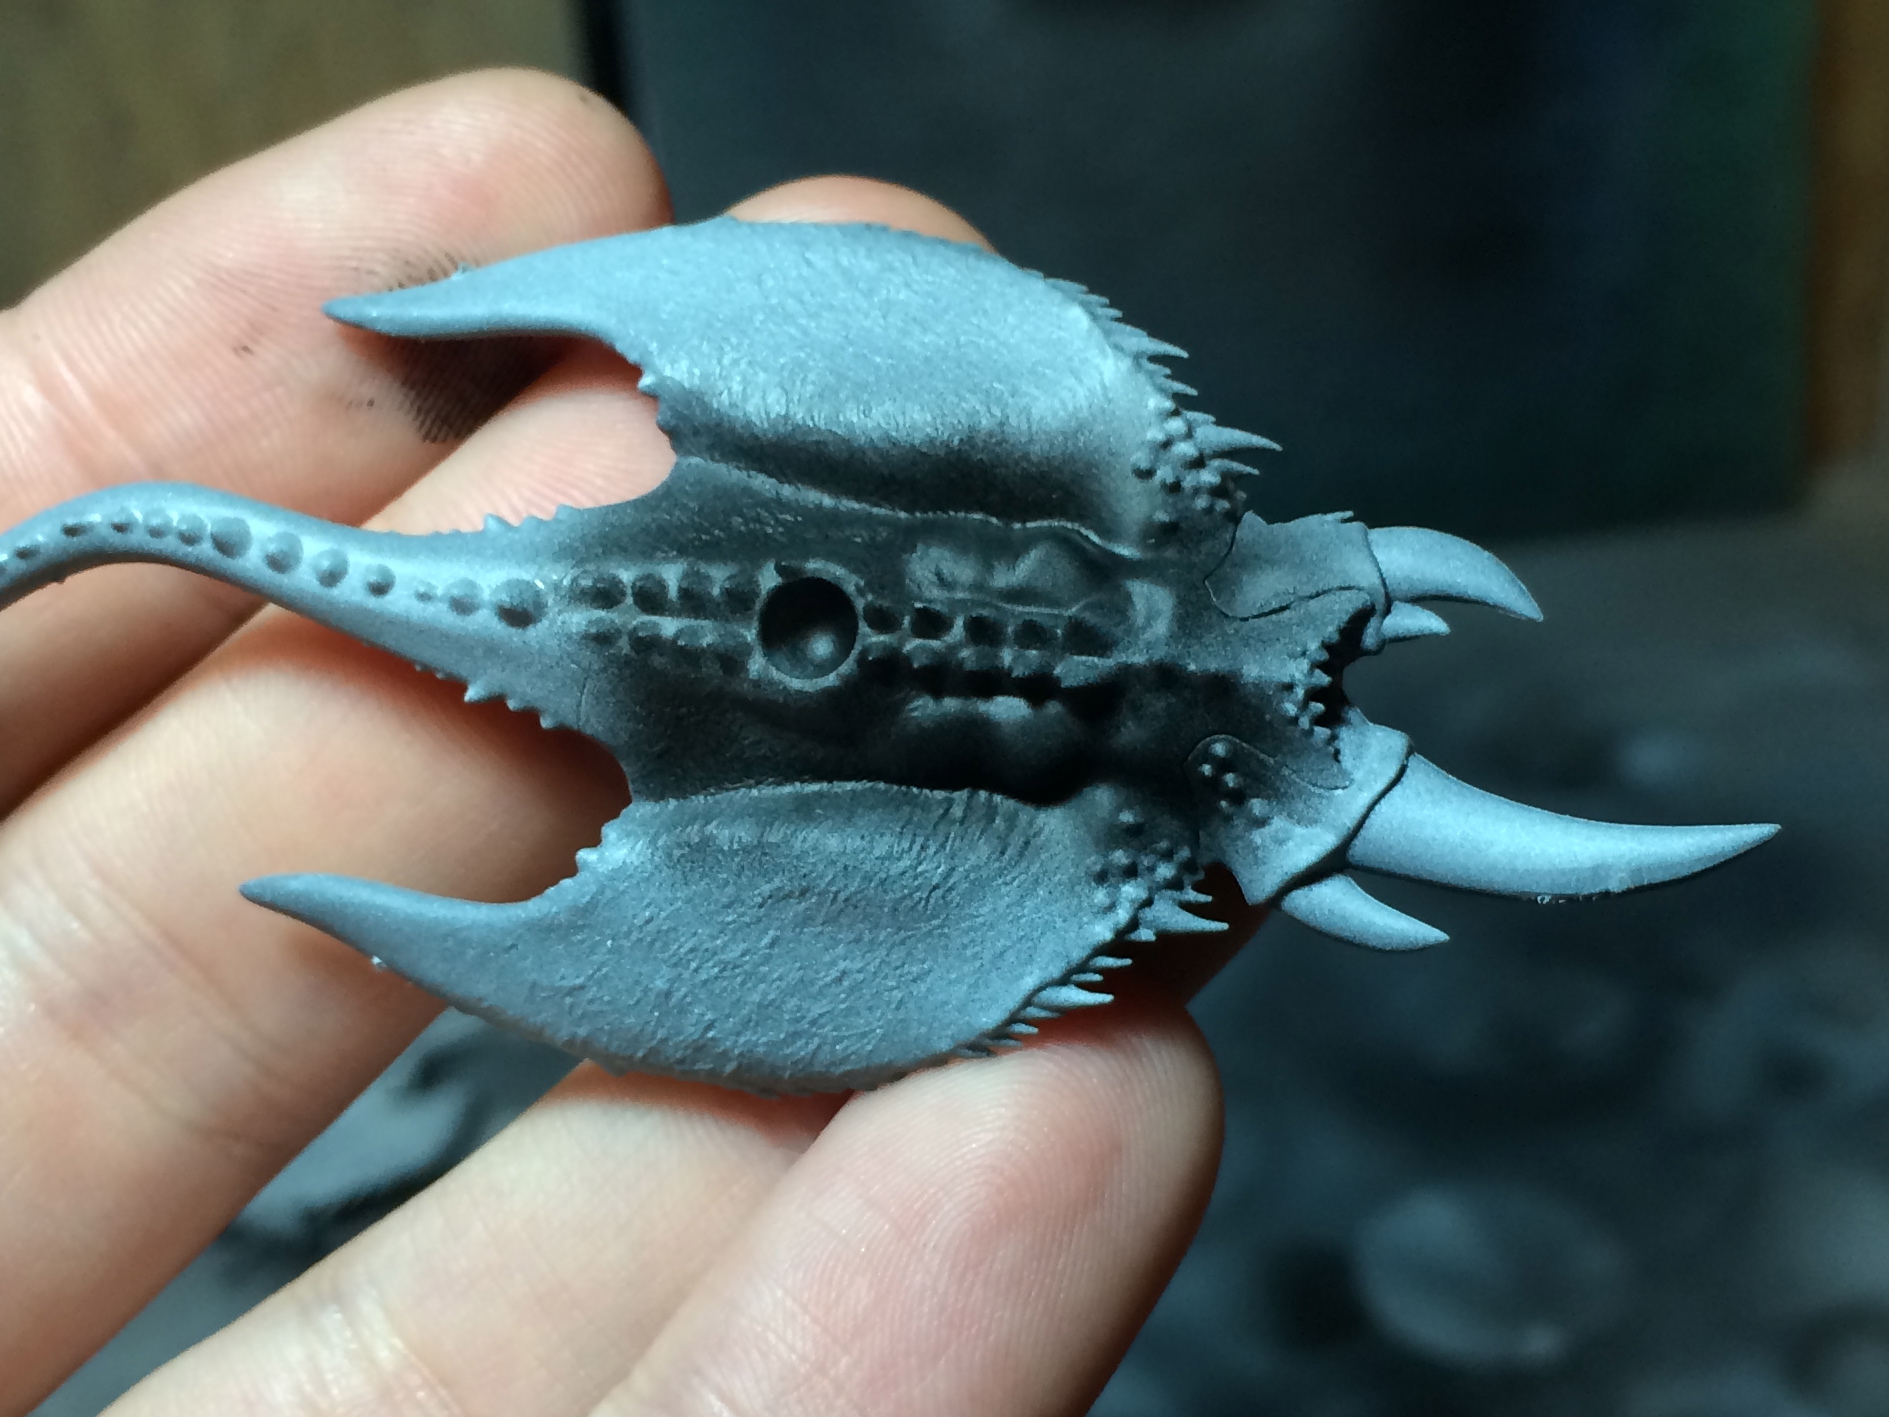
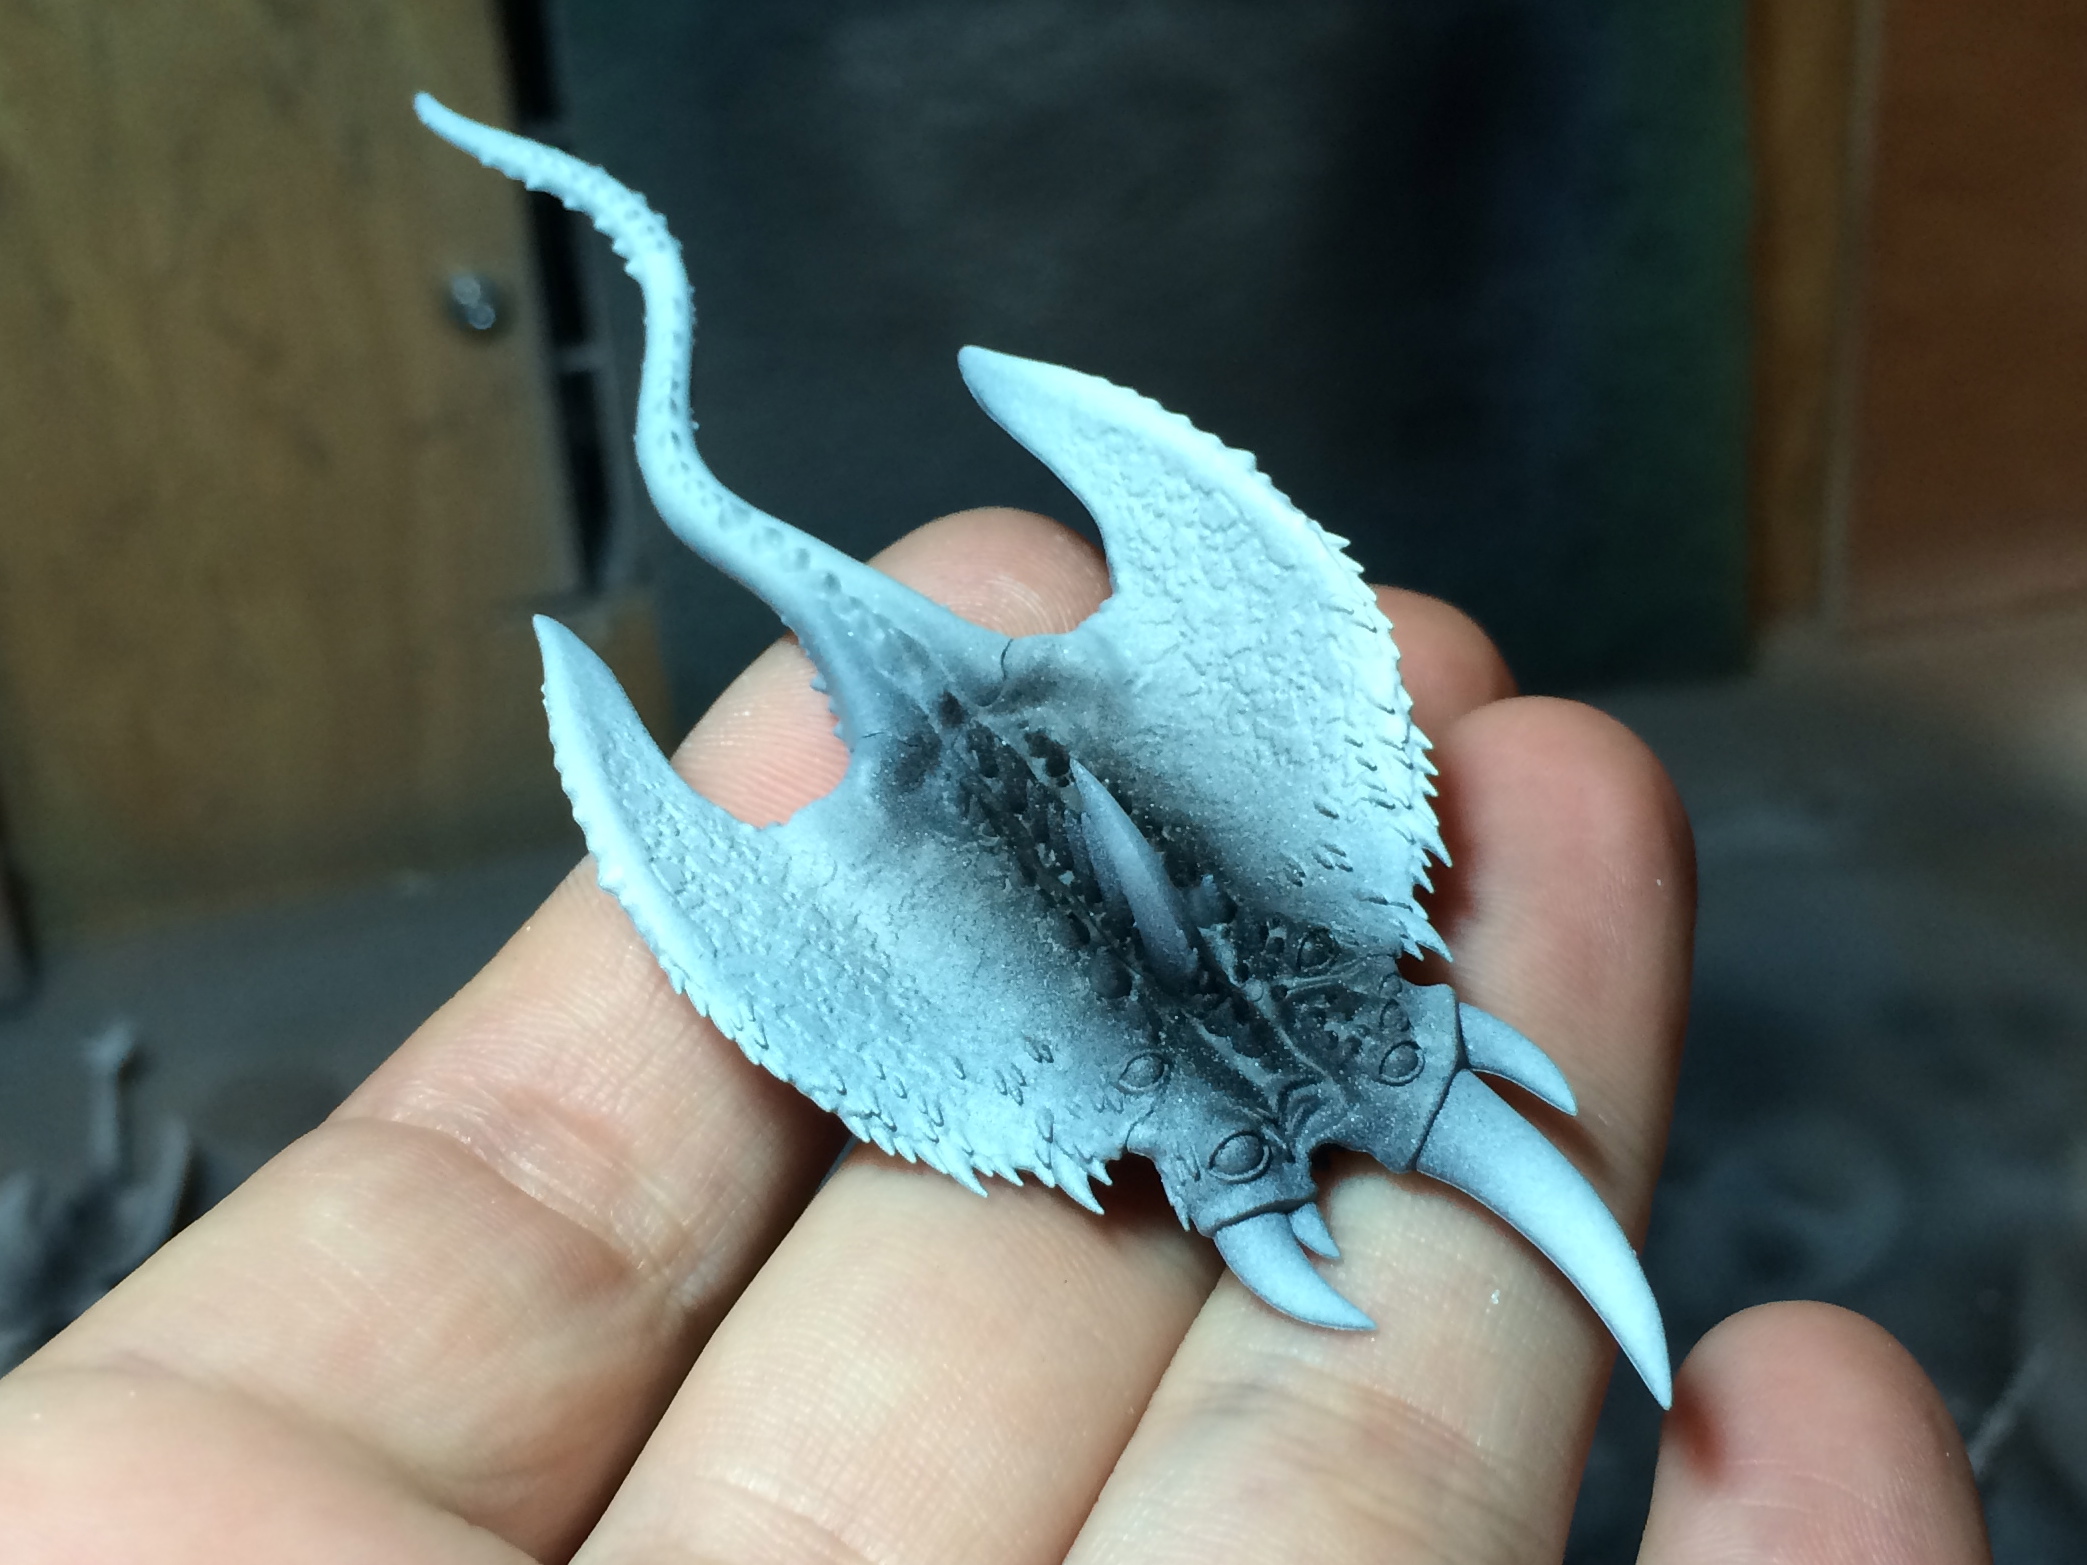
Once the white was dry I switched to black. I shot the black onto the top and bottom of the model, holding the airbrush perpendicular to the model and only sprayed the center. This focused the black paint in the recesses of the center of the model. By the time I had finished the ninth model the first was ready for grey primer, but I had some black left so I started the bases.
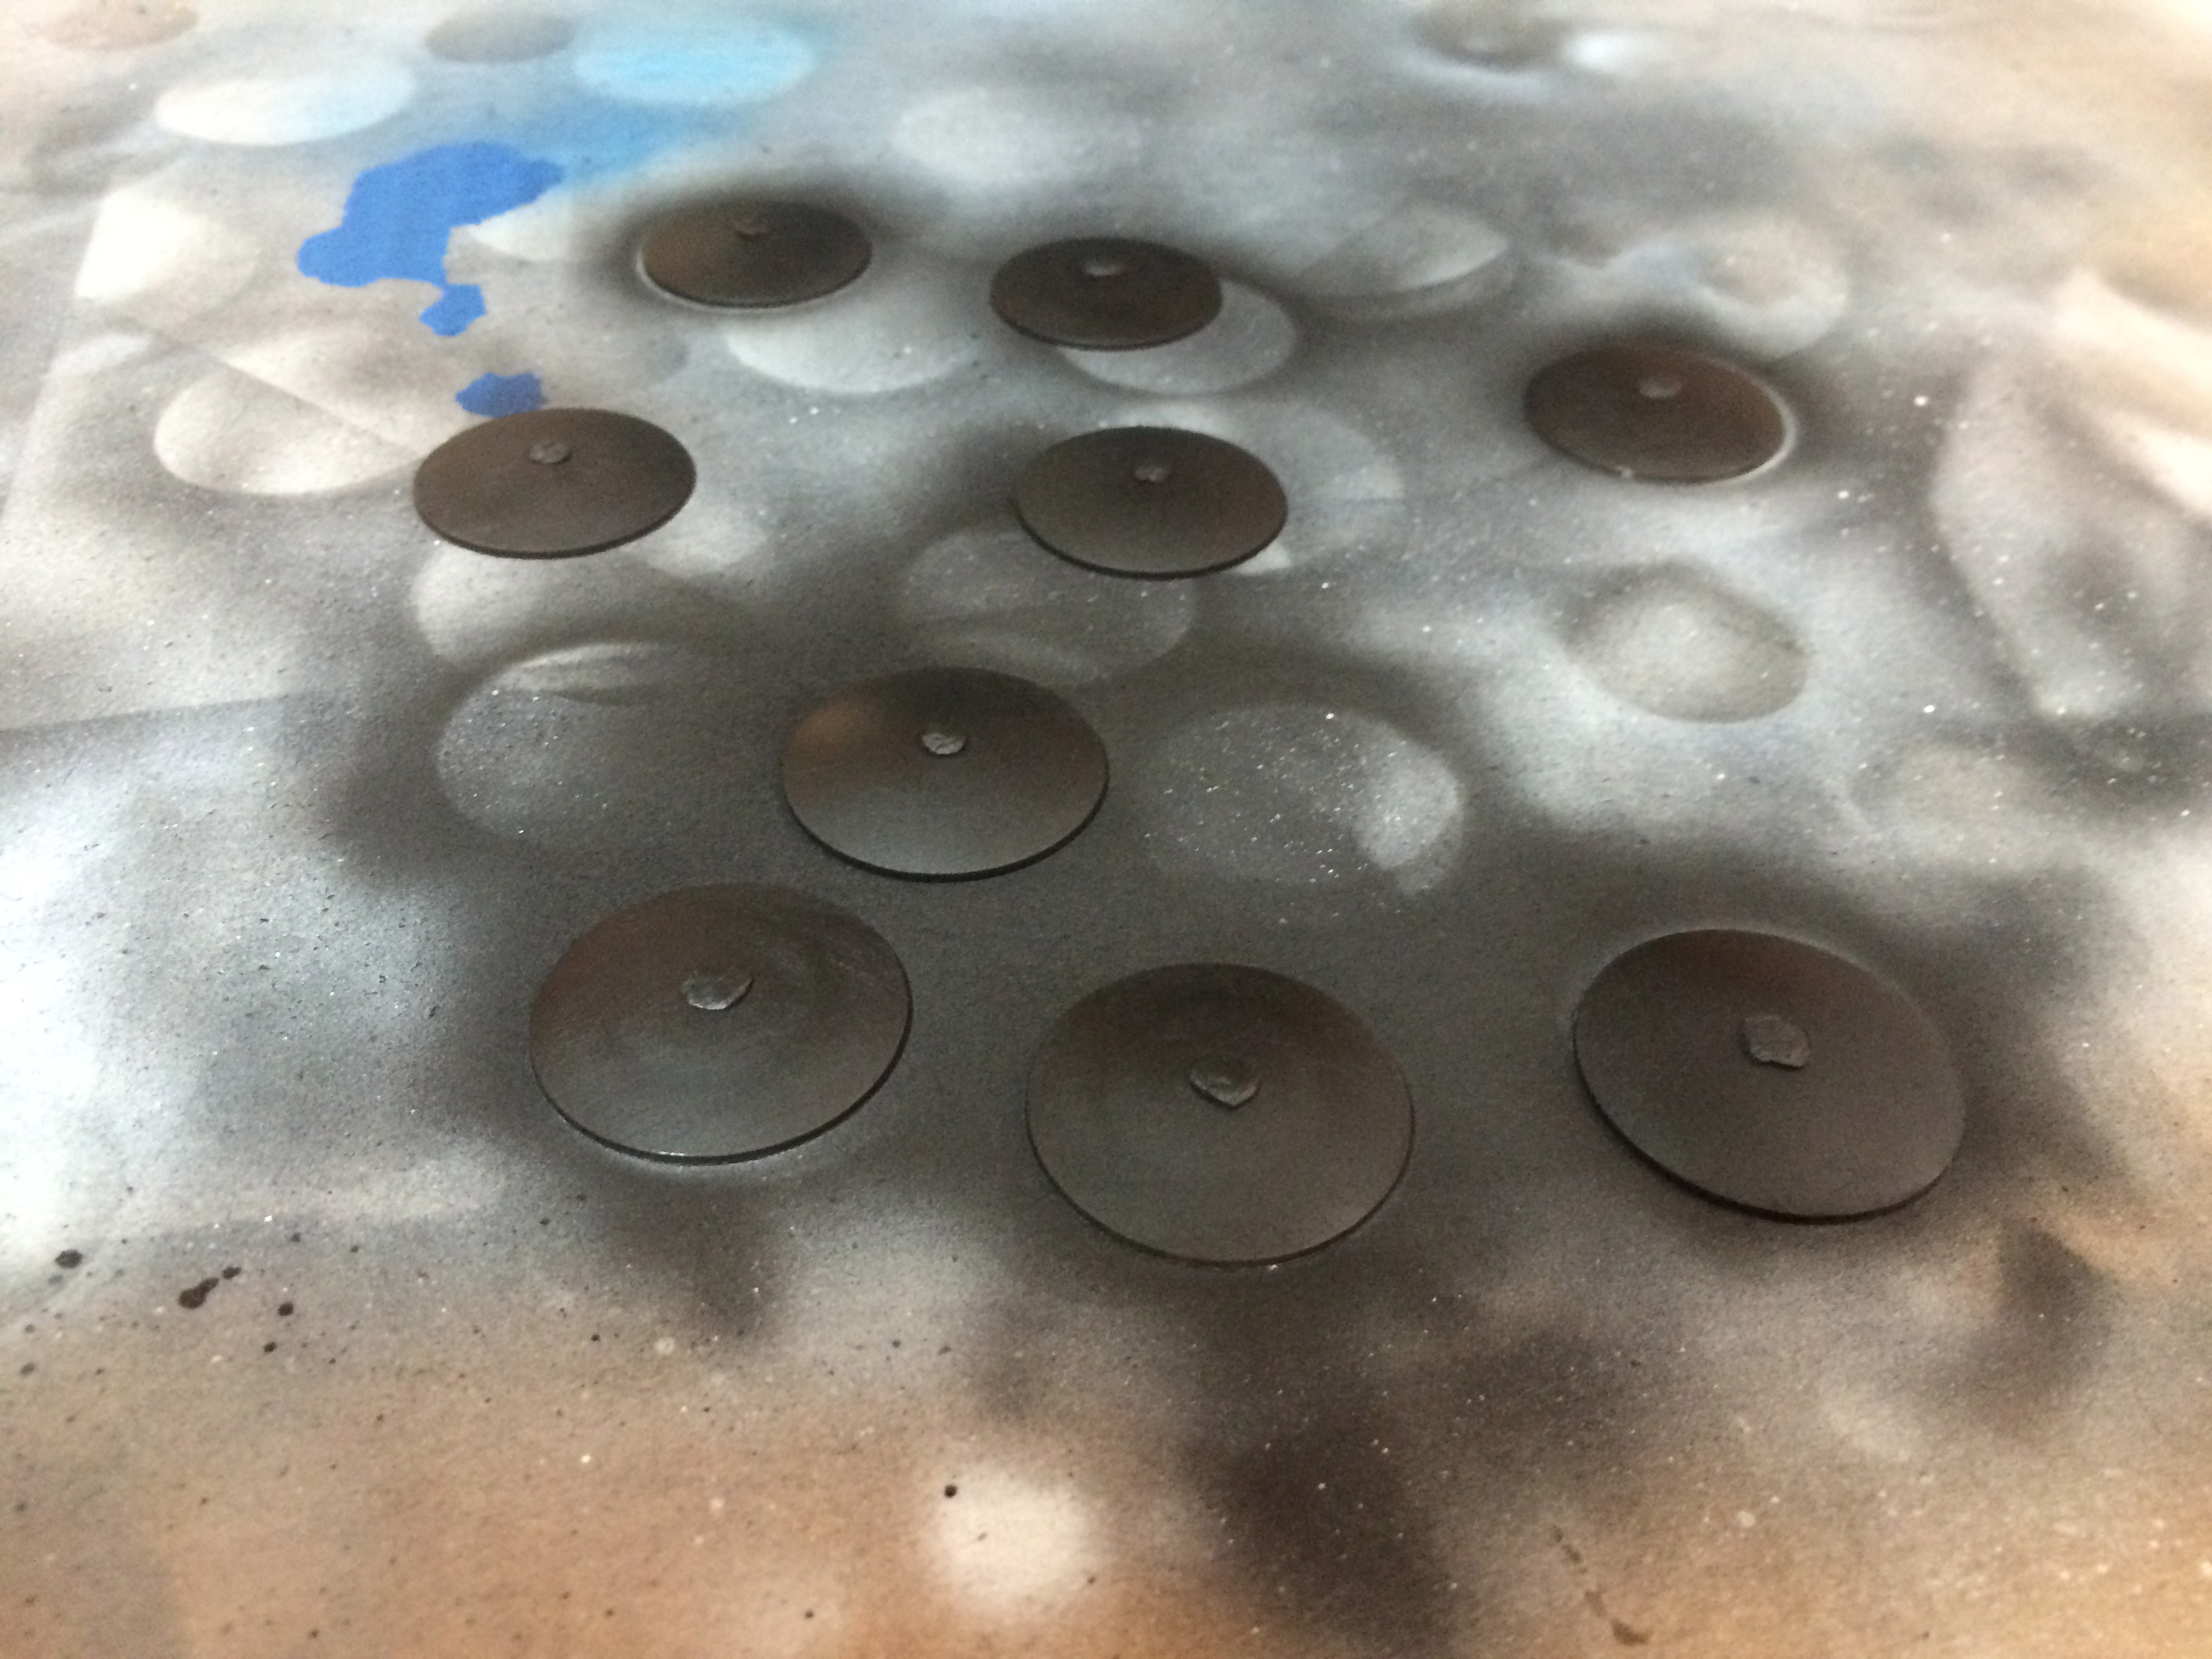
 At this point I also hit the flying bases with a light sandpaper on both the top and bottom. I followed this up by wiping the bases clean, removing all the sanding bits. Then I applied a small amount of white tac into the flying stand hole and primed the tops of the bases black.
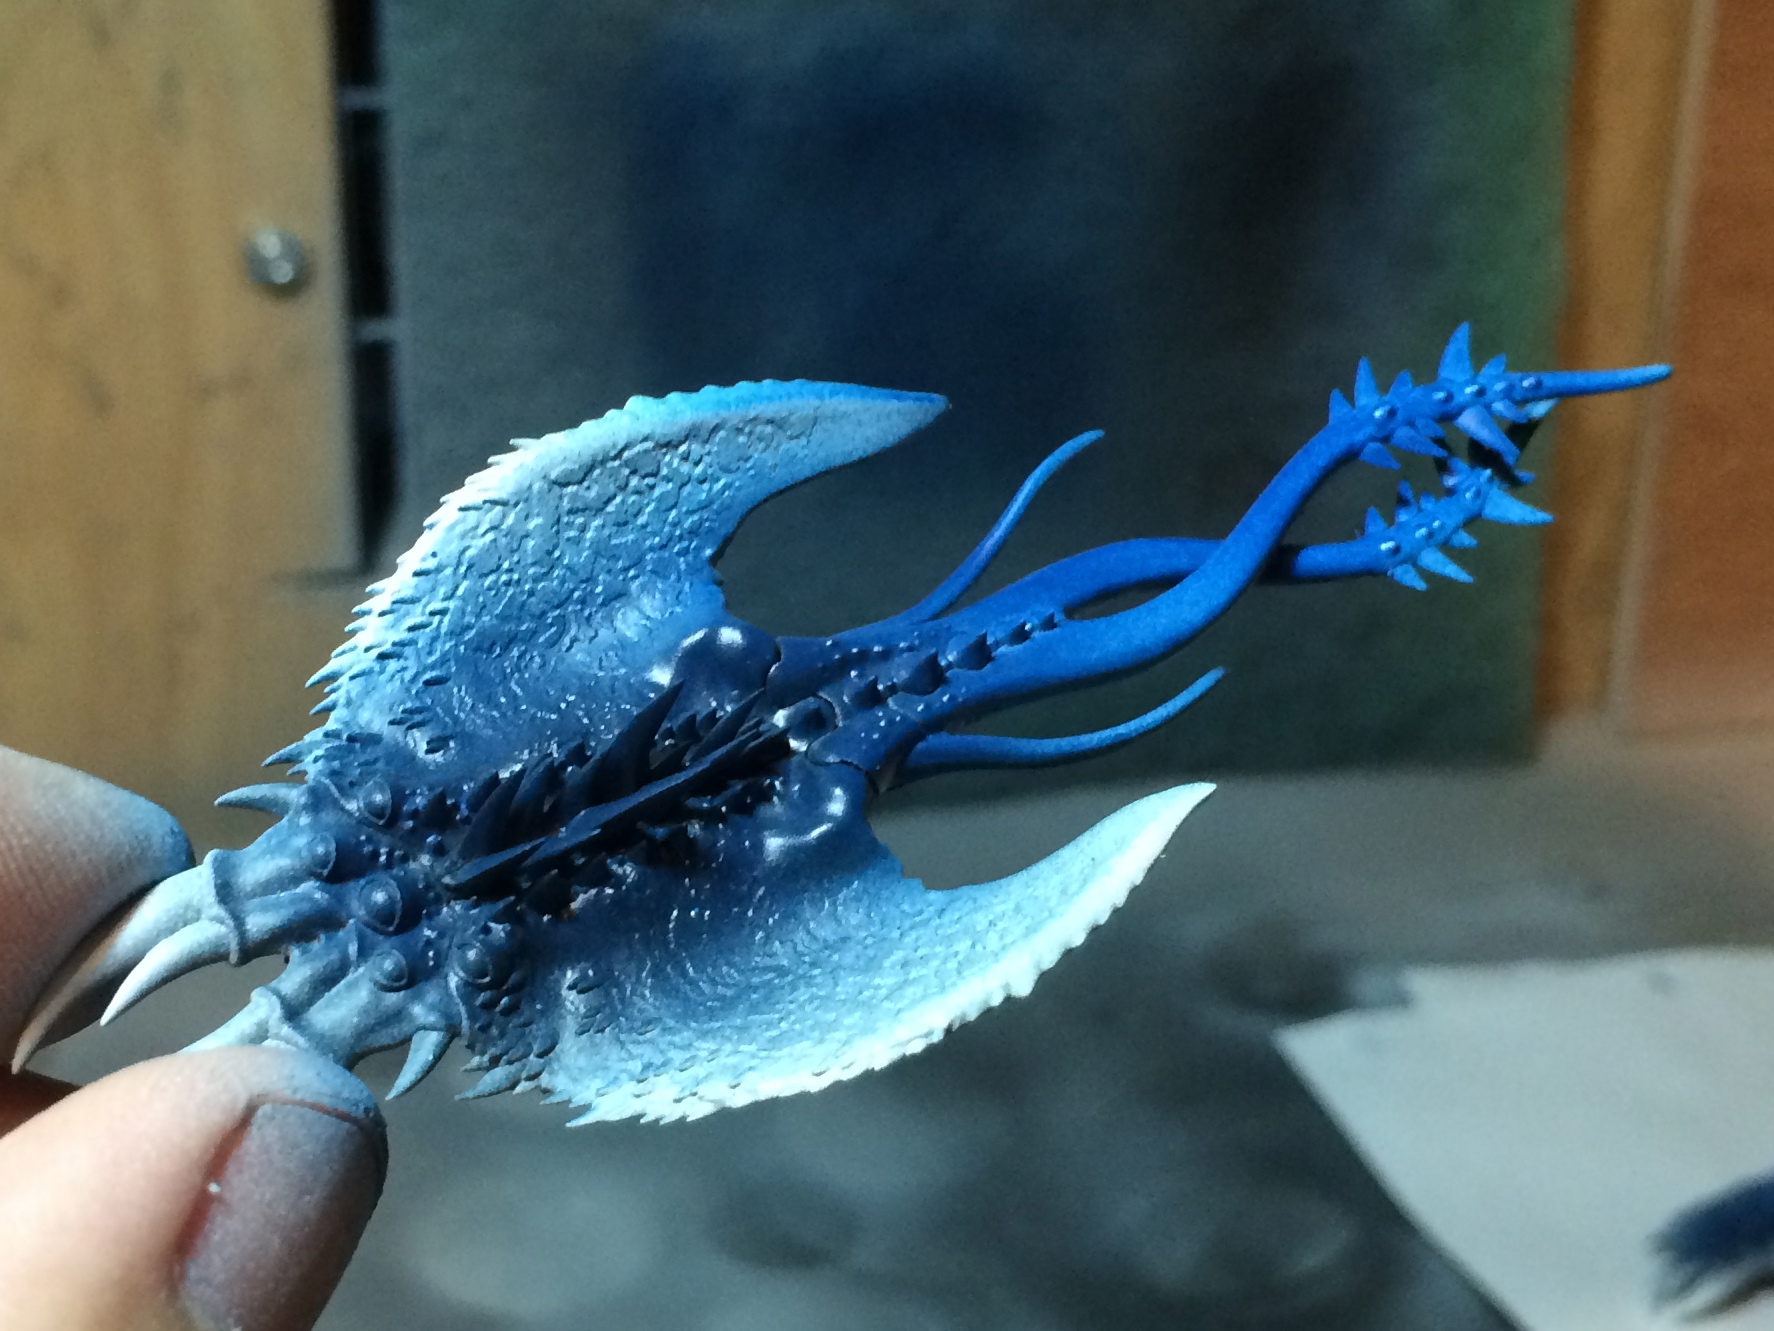
 I applied gray primer between the black and white, to feather the transition of colors. I also hit some of the high points of the body to lighten the black. It is important not to apply grey over the white tips of the wings. The width of your grey section will determine how fast or slow the paint transitions from dark to light.
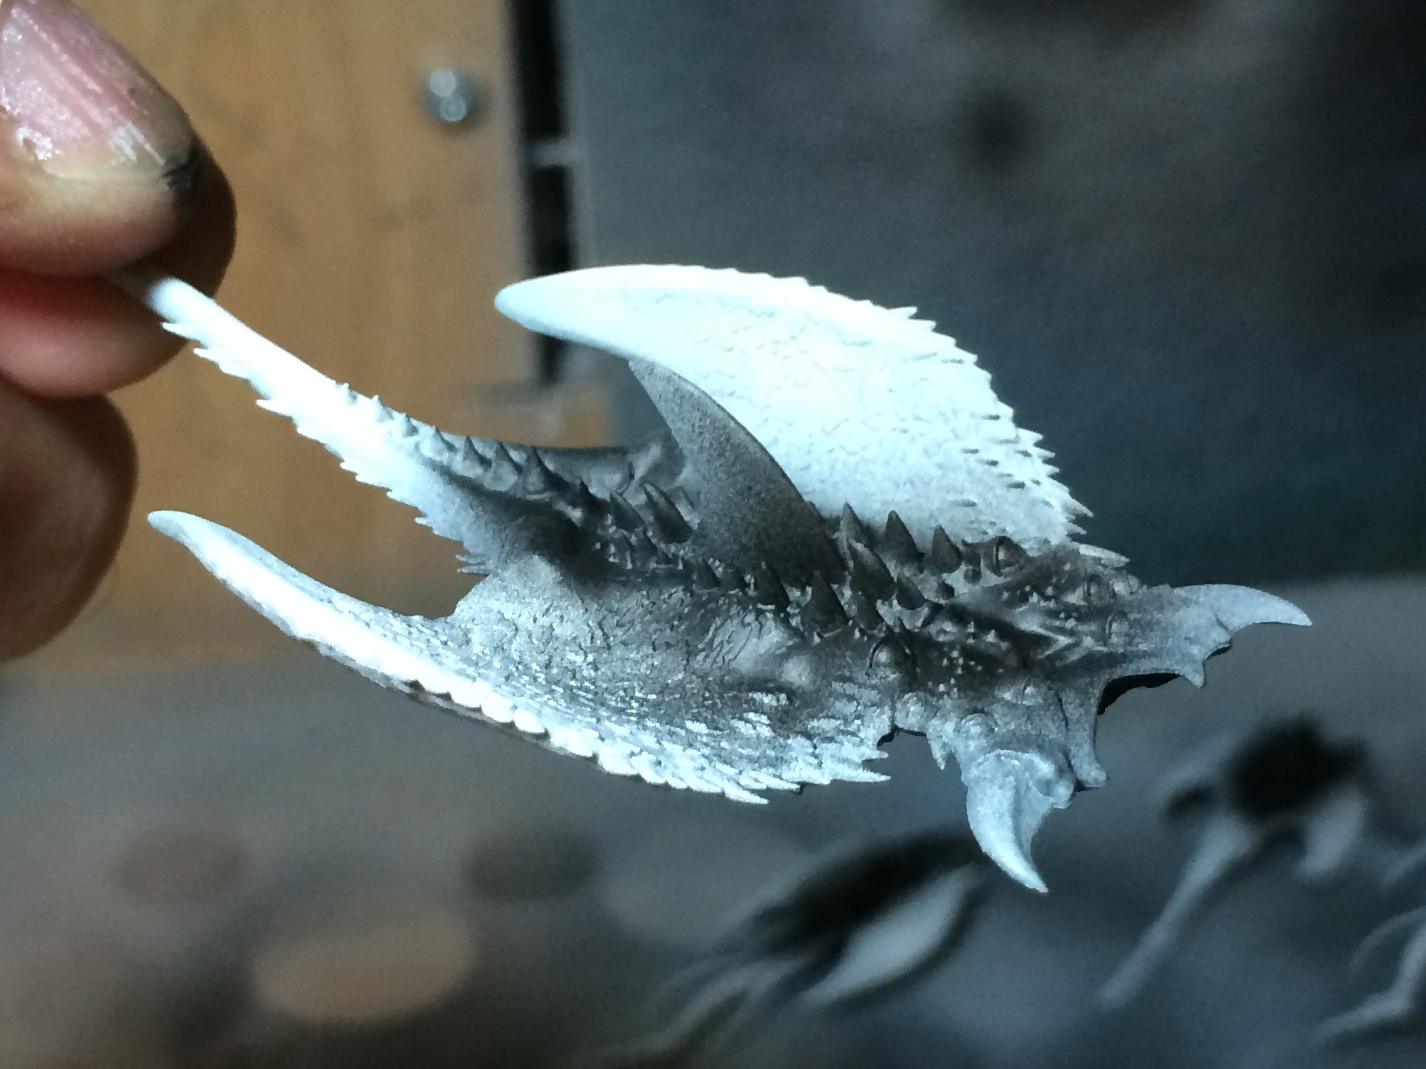
 This application of primer provides a pre-shading. When I move on to painting, I will use a glaze-modified paint, applied through the airbrush, to work with the primer to create high contrast with few colors.
Painting:
In general, when I’m using a “spray glaze” I mix Citadel acrylic paint with Liquitex Airbrush Medium about 1:2, otherwise I shoot for a 1:1 mixture. You can thin with other things, but I use Airbrush Medium. A word of caution, spray glaze requires a light touch. You may have to apply carefully and sometimes in multiple coats. If you notice that the paint is pooling or you can see the surface ripple when you spray then you’ve saturated the model. You can either thicken the paint (it will be less of a glaze and more of an opaque) or wait for it to dry and come back for a second coat.
Finally, when I use a ratio, it is approximate. I don’t actually measure out paint, as Citadel doesn’t provide dropper bottles.
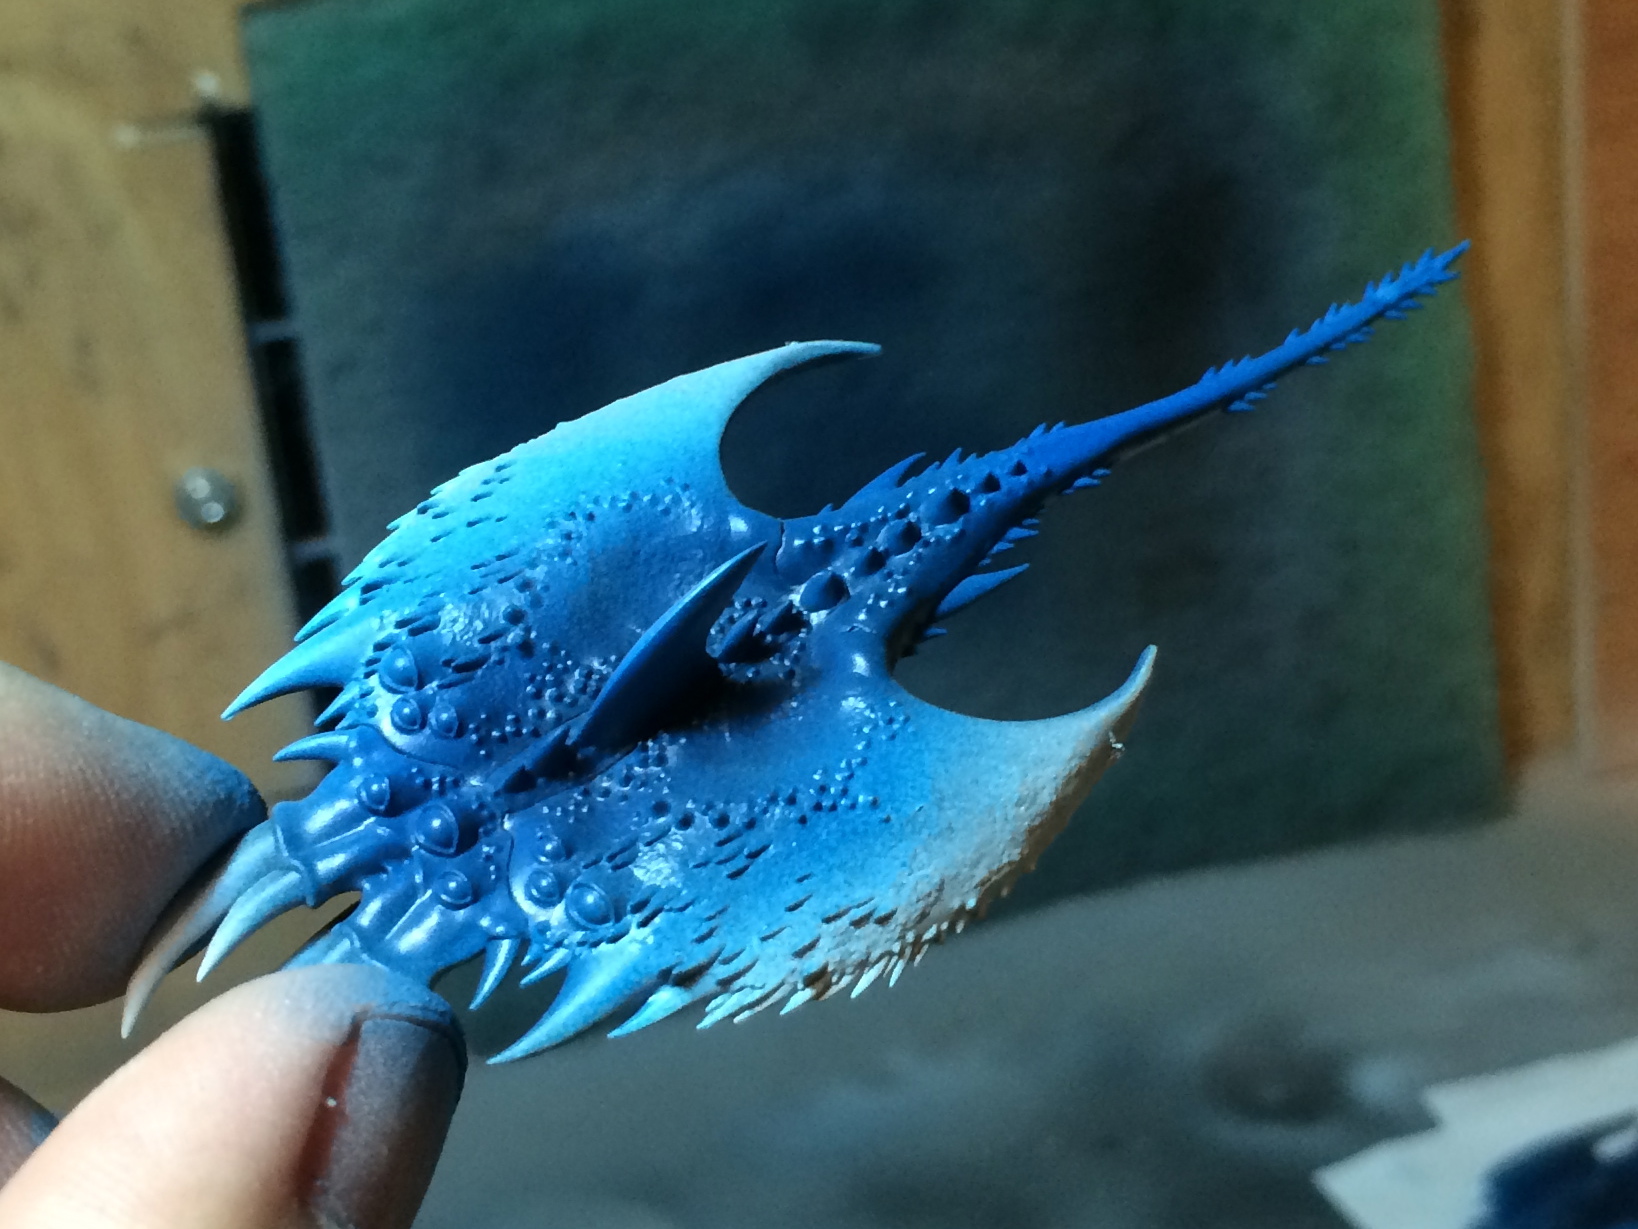
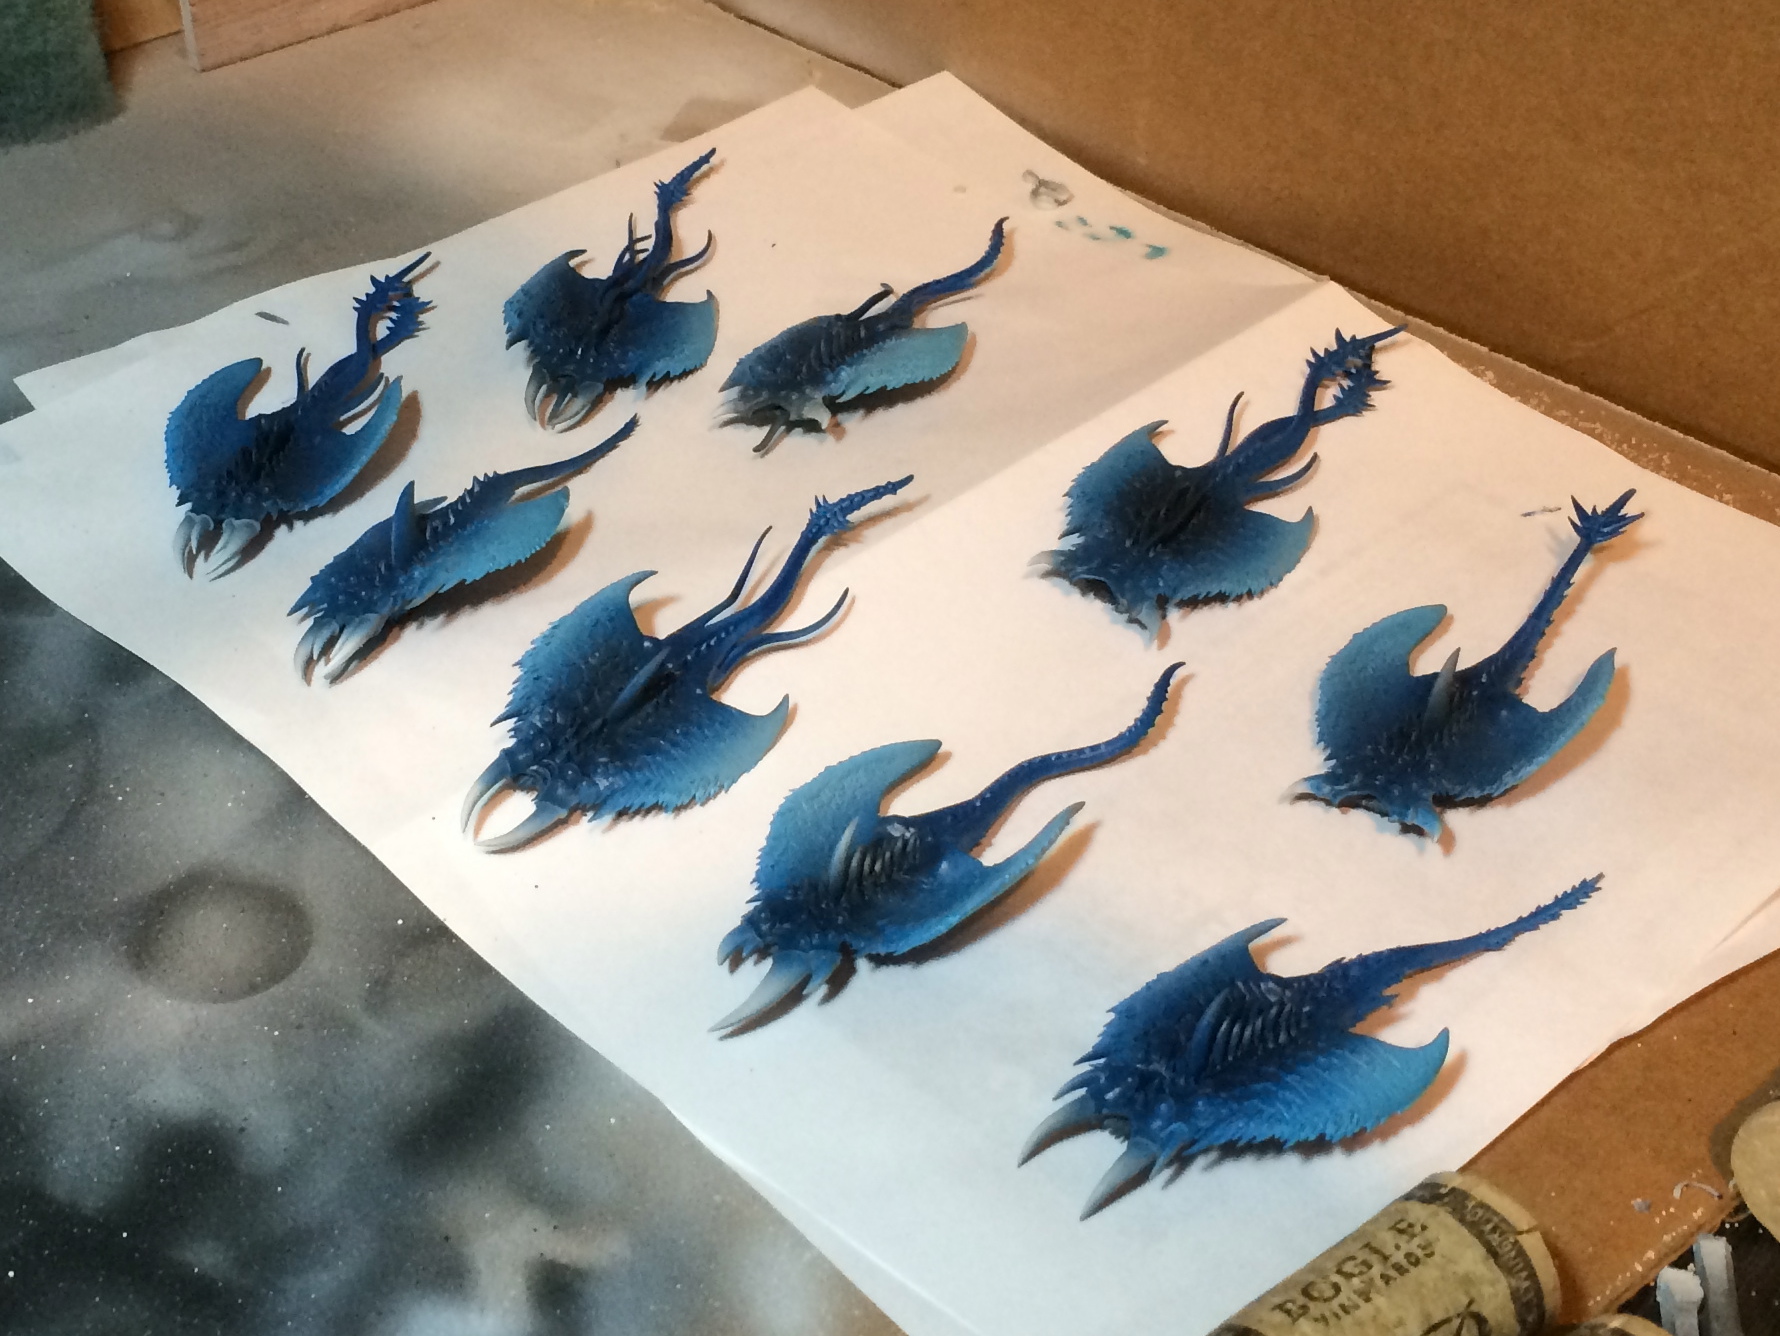
Step 1.) Apply a spray glaze of Regal Blue over the black and into the grey area of the model. I also chose to spray the tail as well. You should be able to see the different shading of the Regal Blue over the different primer colors.

 Step 2.) Begin the transition by applying a spray glaze of Enchanted Blue and Regal Blue (3:1). Be careful not to cover the white edge of the wings. I also did not extend this color onto the tail.
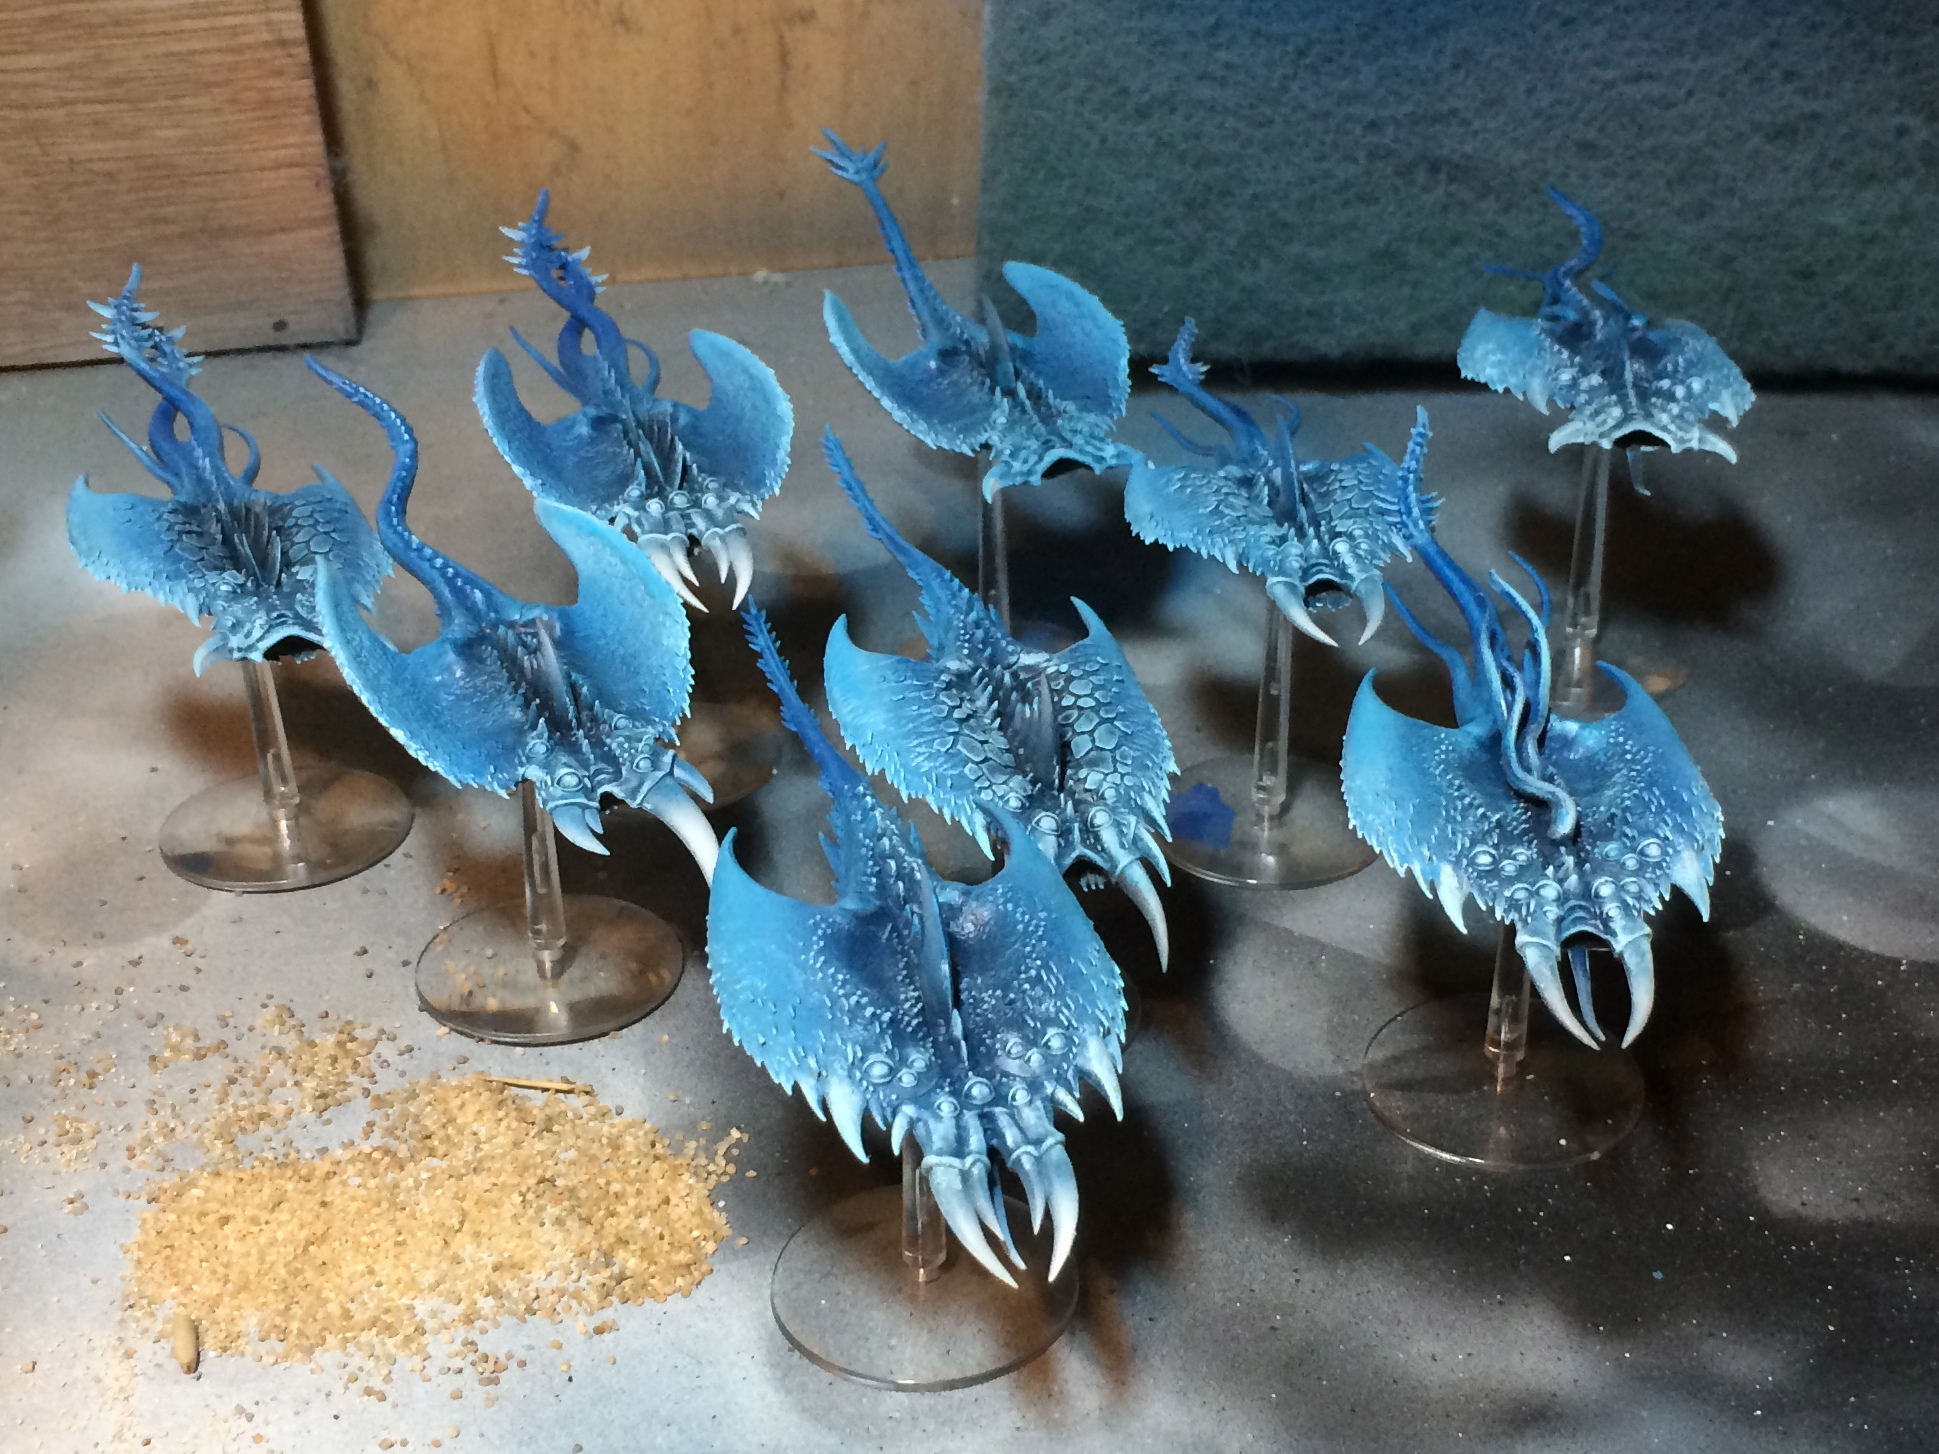
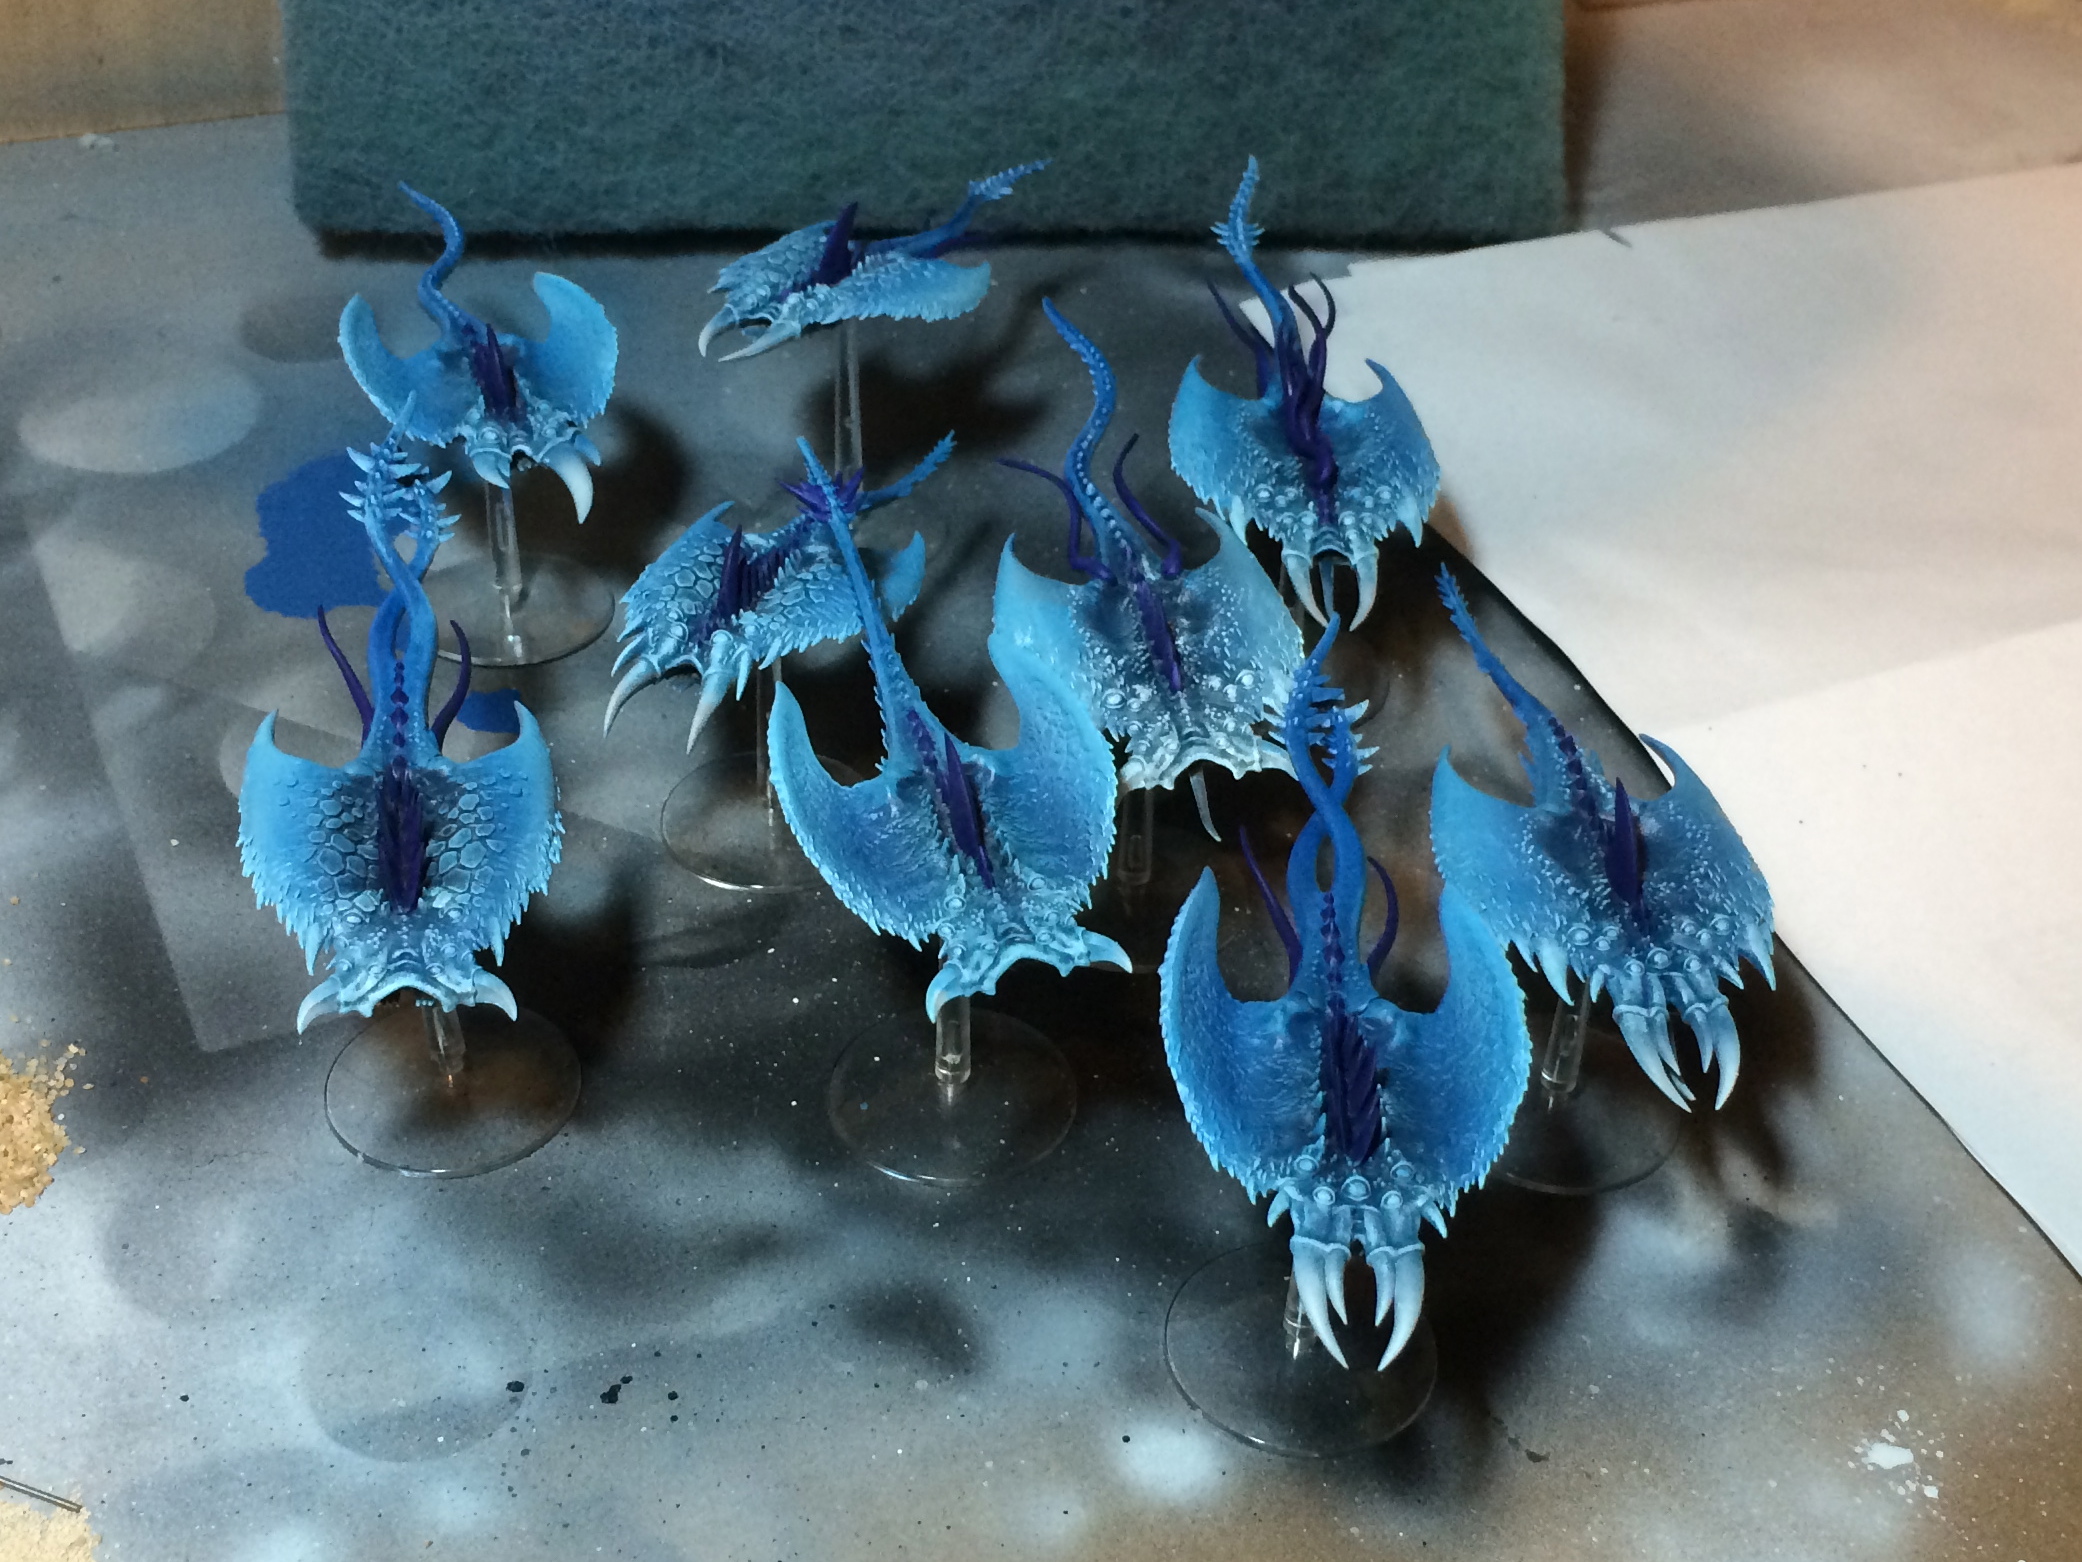
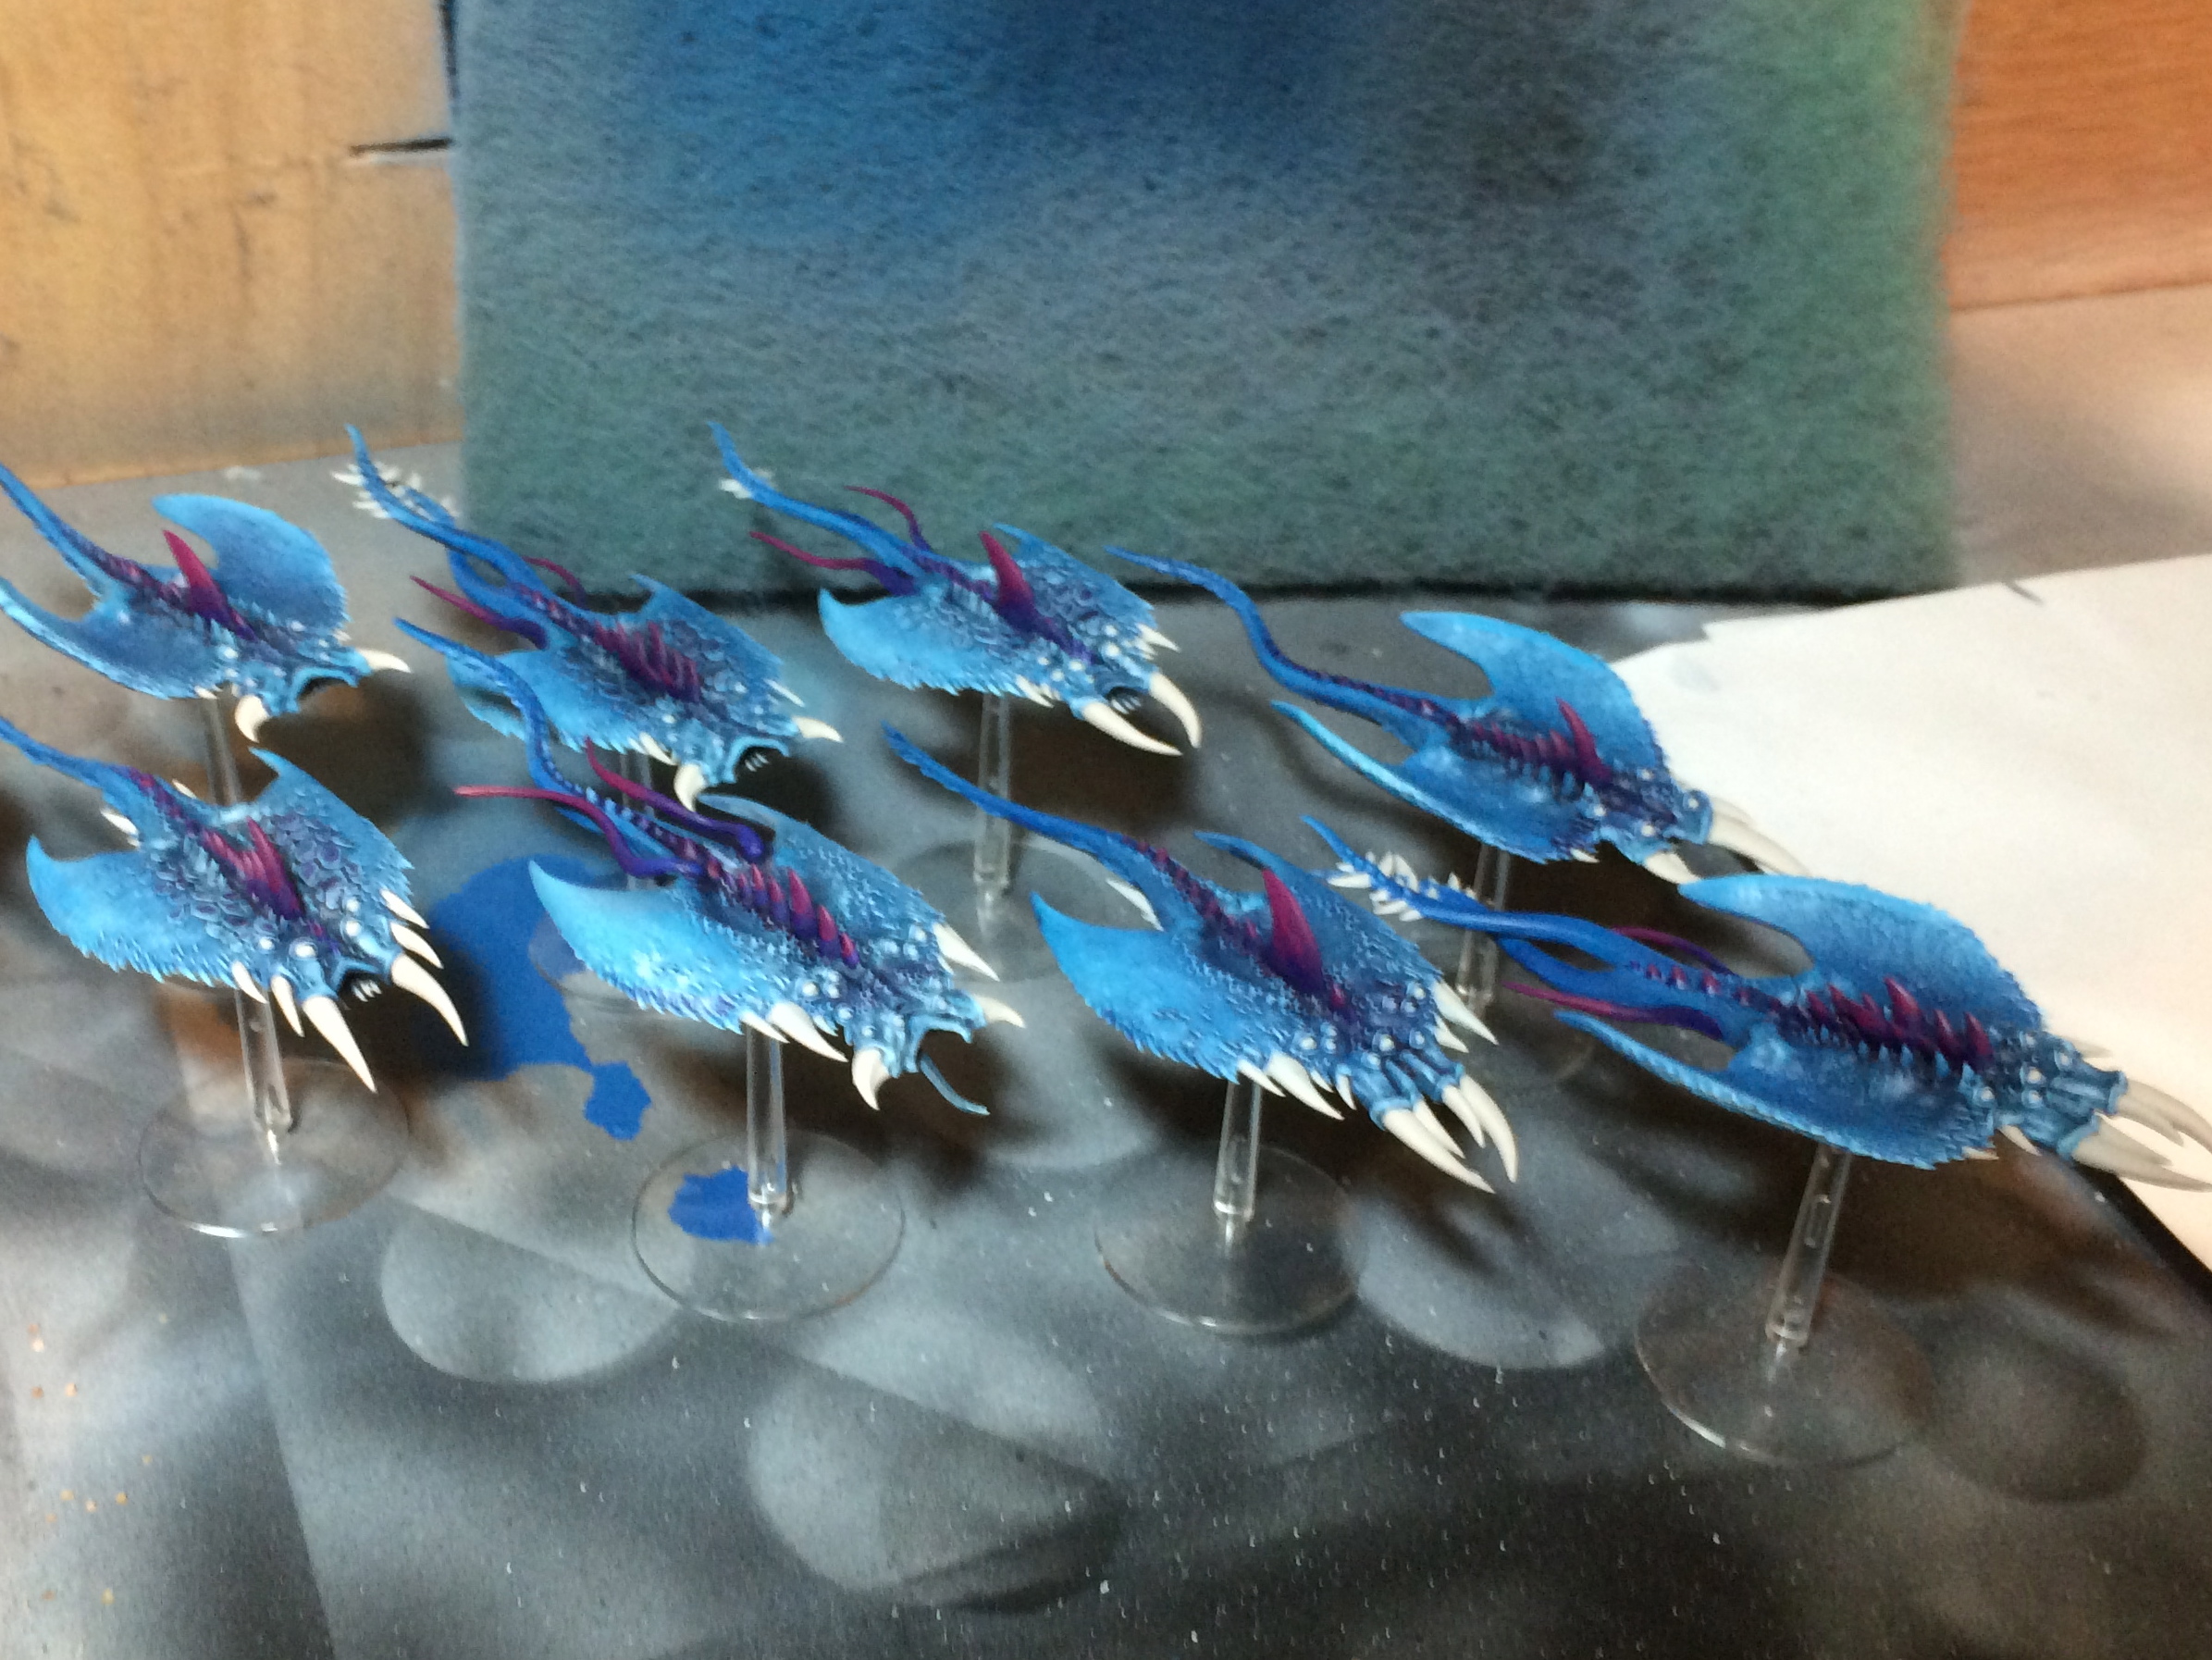
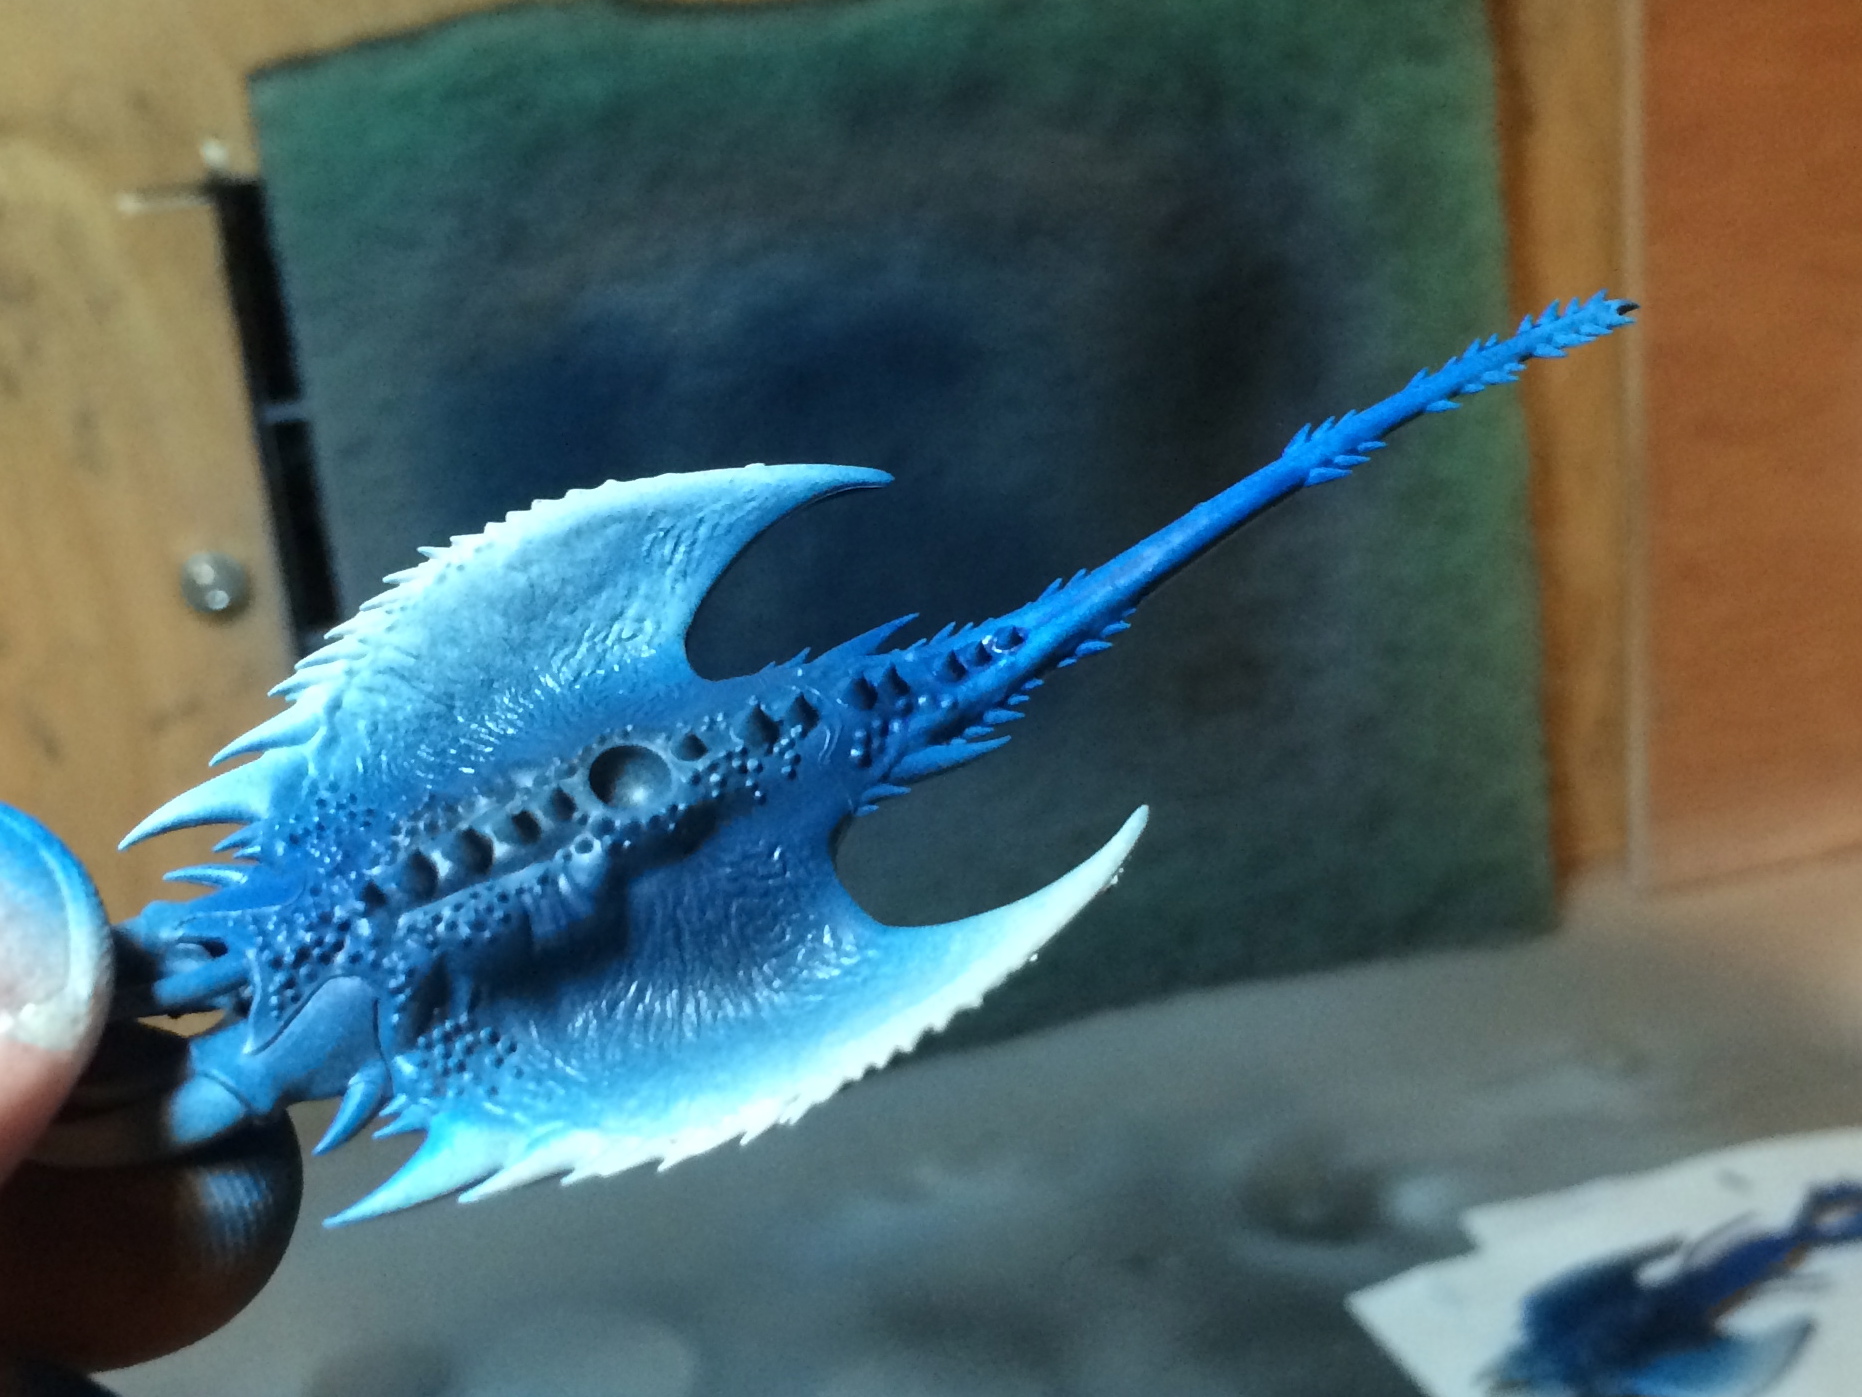 Step 3.) Complete the transition by applying a spray glaze of Enchanted Blue, Ice Blue and Skull White (1:3:1) out to the end of the wings. I also made this glaze a little more translucent by adding a few extra drops of Airbrush Medium. At this point you probably have a slightly wet model, so take a break and let the models dry completely before moving on to Dry Brushing.
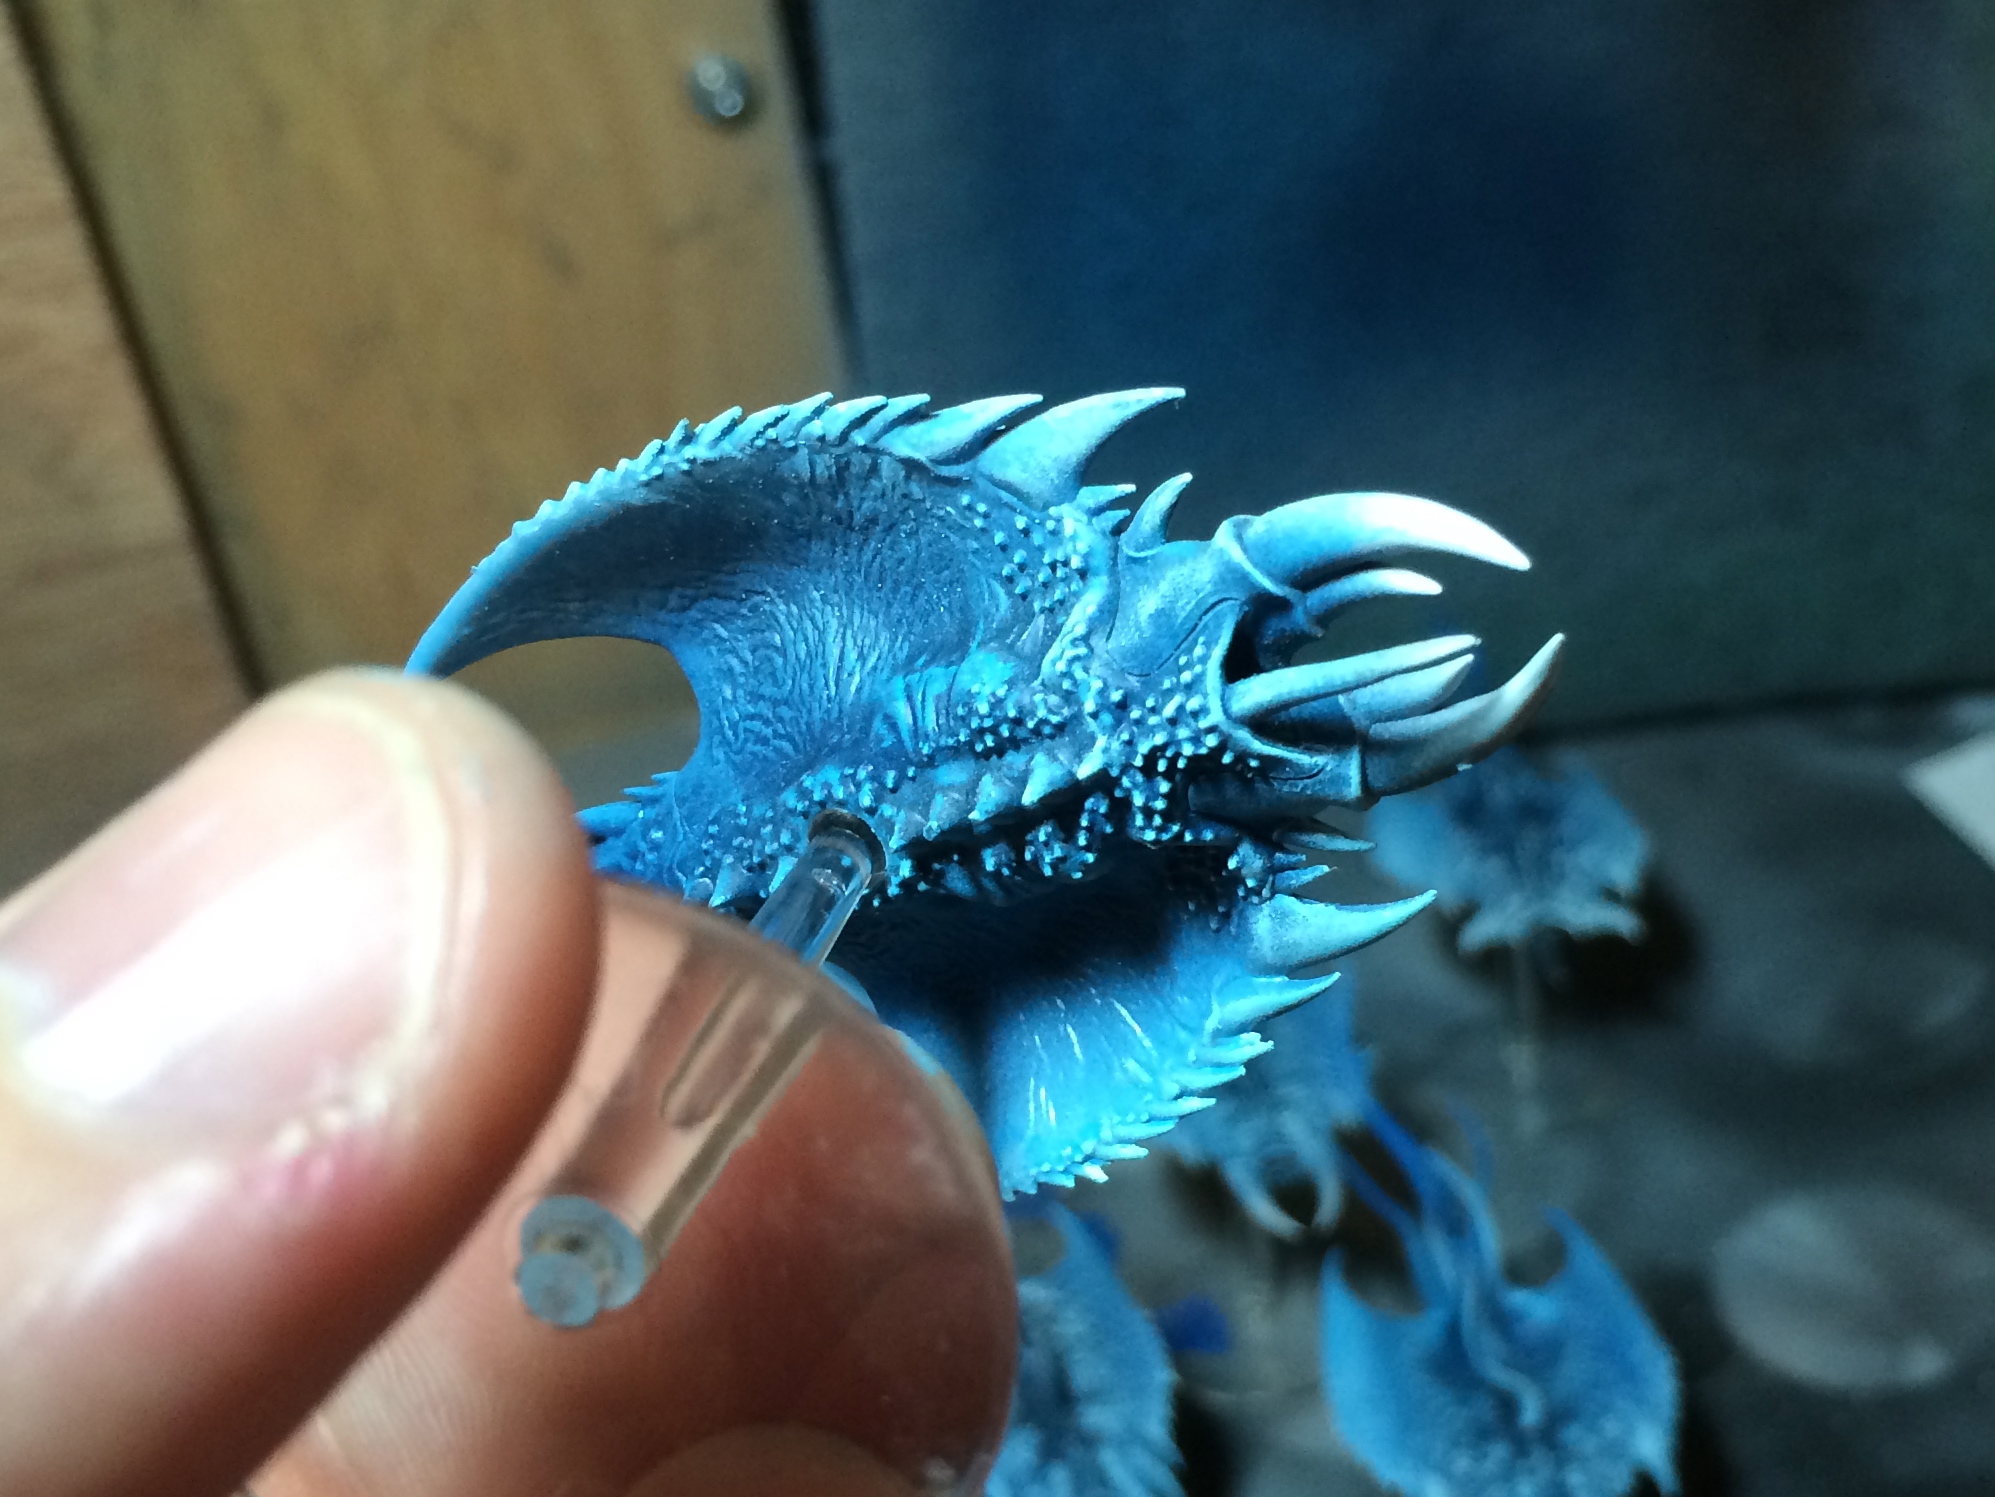
 Step 4.) That’s it for the airbrush; the rest is brushwork. Once the model is completely dry you can move on to drybrushing. I first laid down a heavier drybrushing of Ice Blue all over the model. Make sure you get the edges of the tusks, the eyes and the texture, also make sure you get the rear area where the tail attaches to the body and the details on the tail. It is not necessary to dry brush the dorsal fin(s) or the tusks themselves.
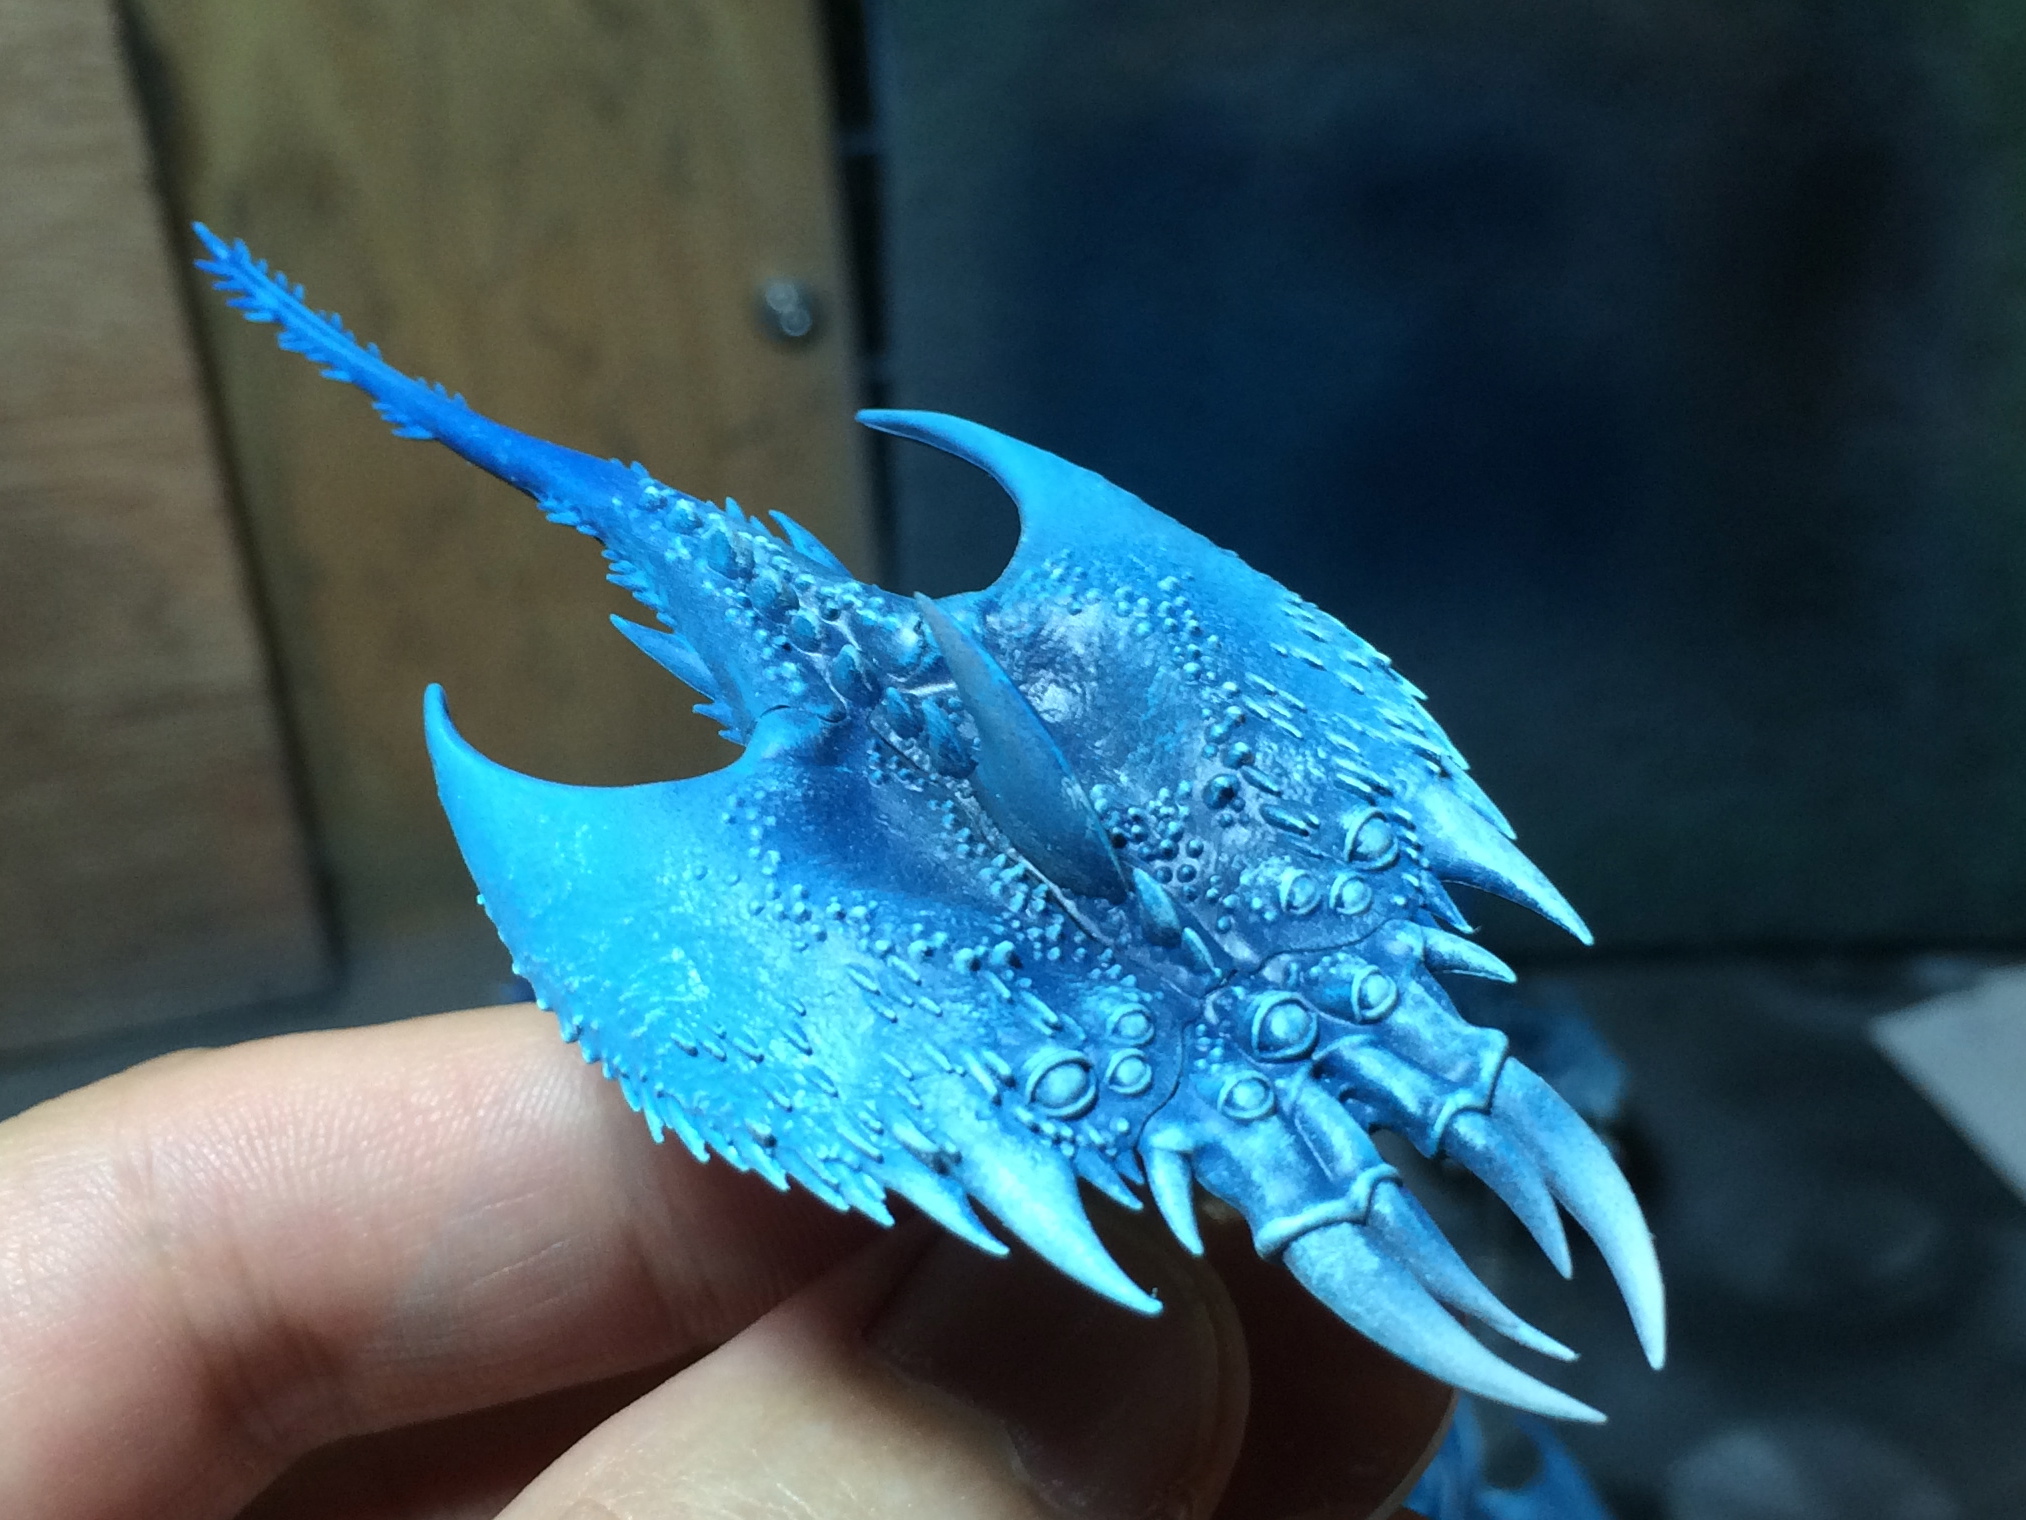
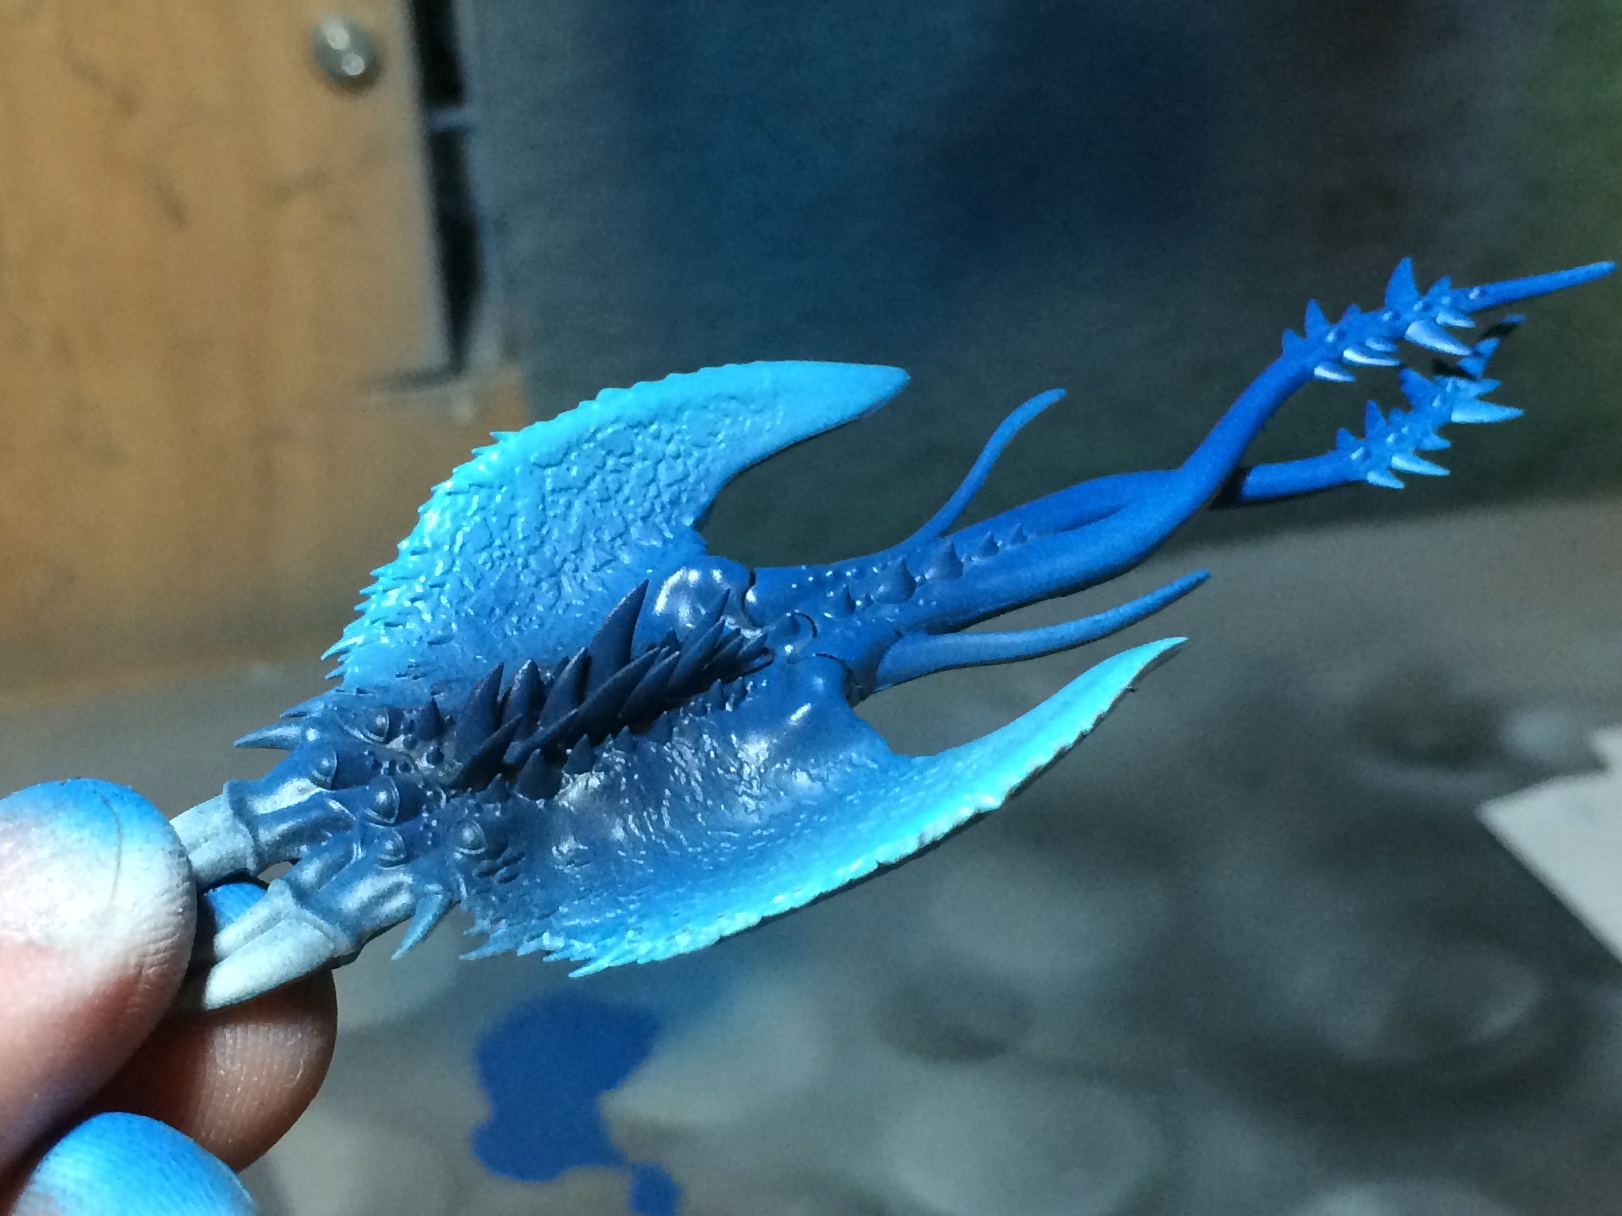
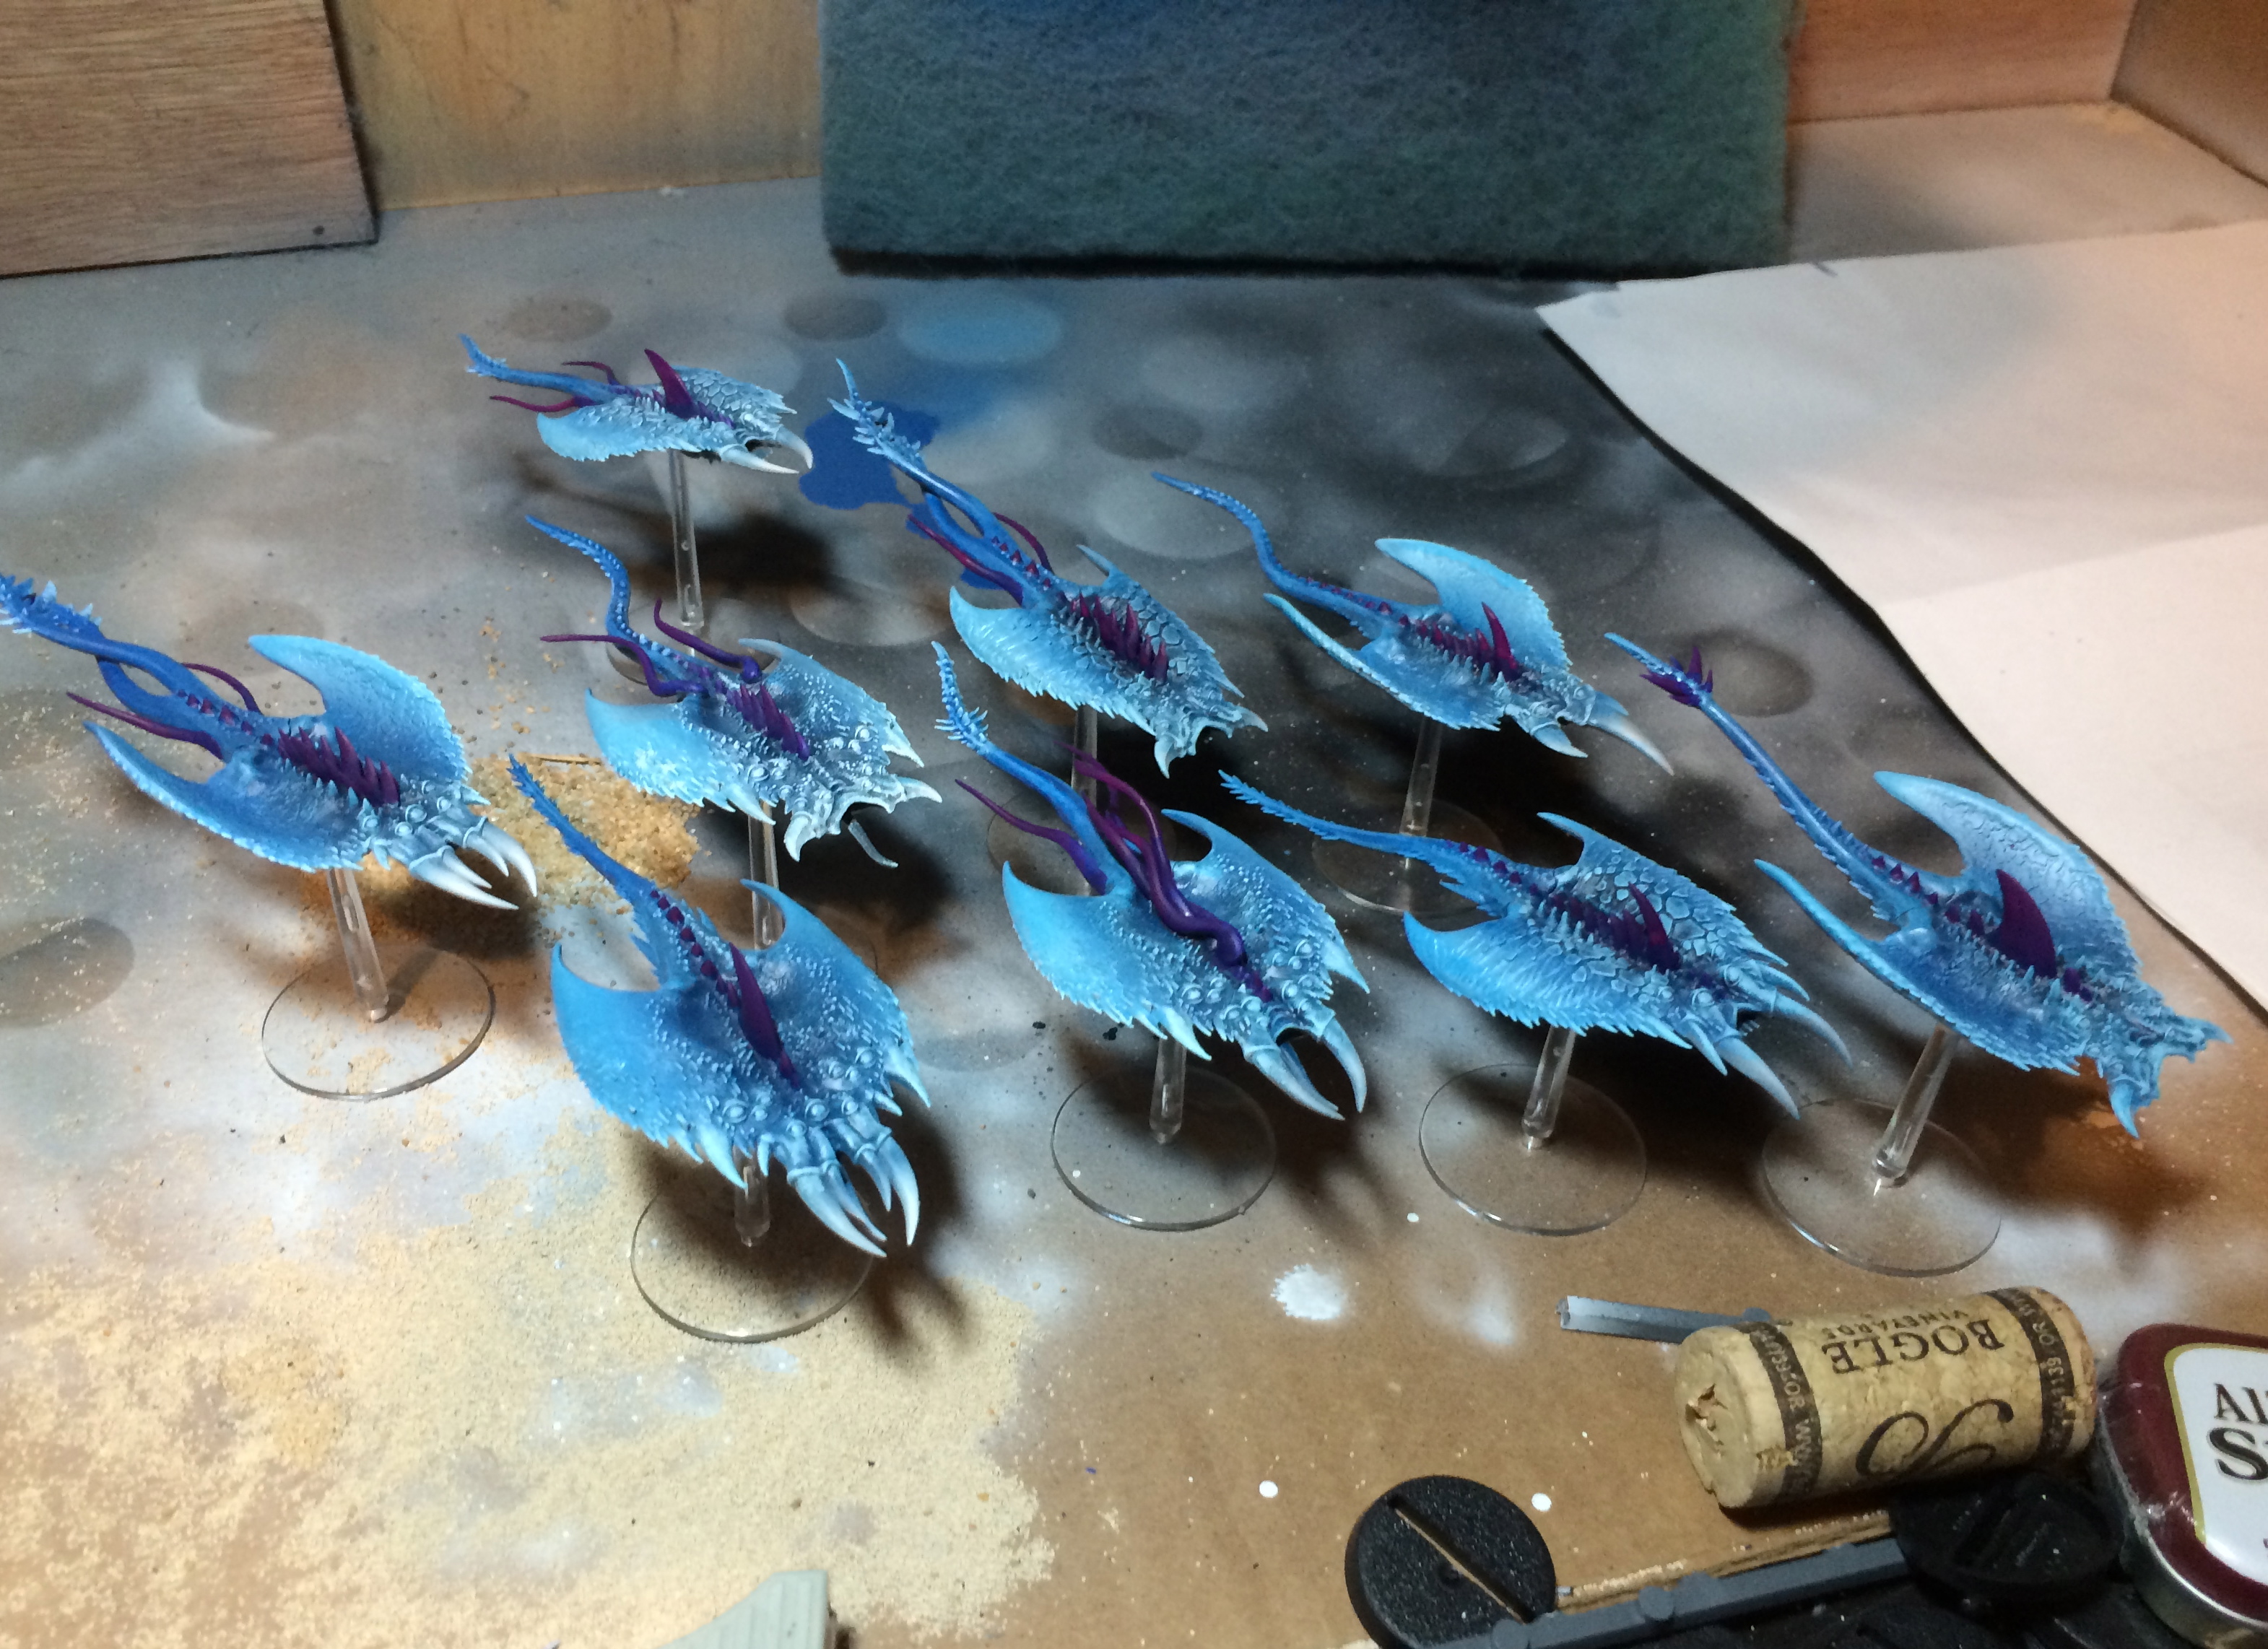
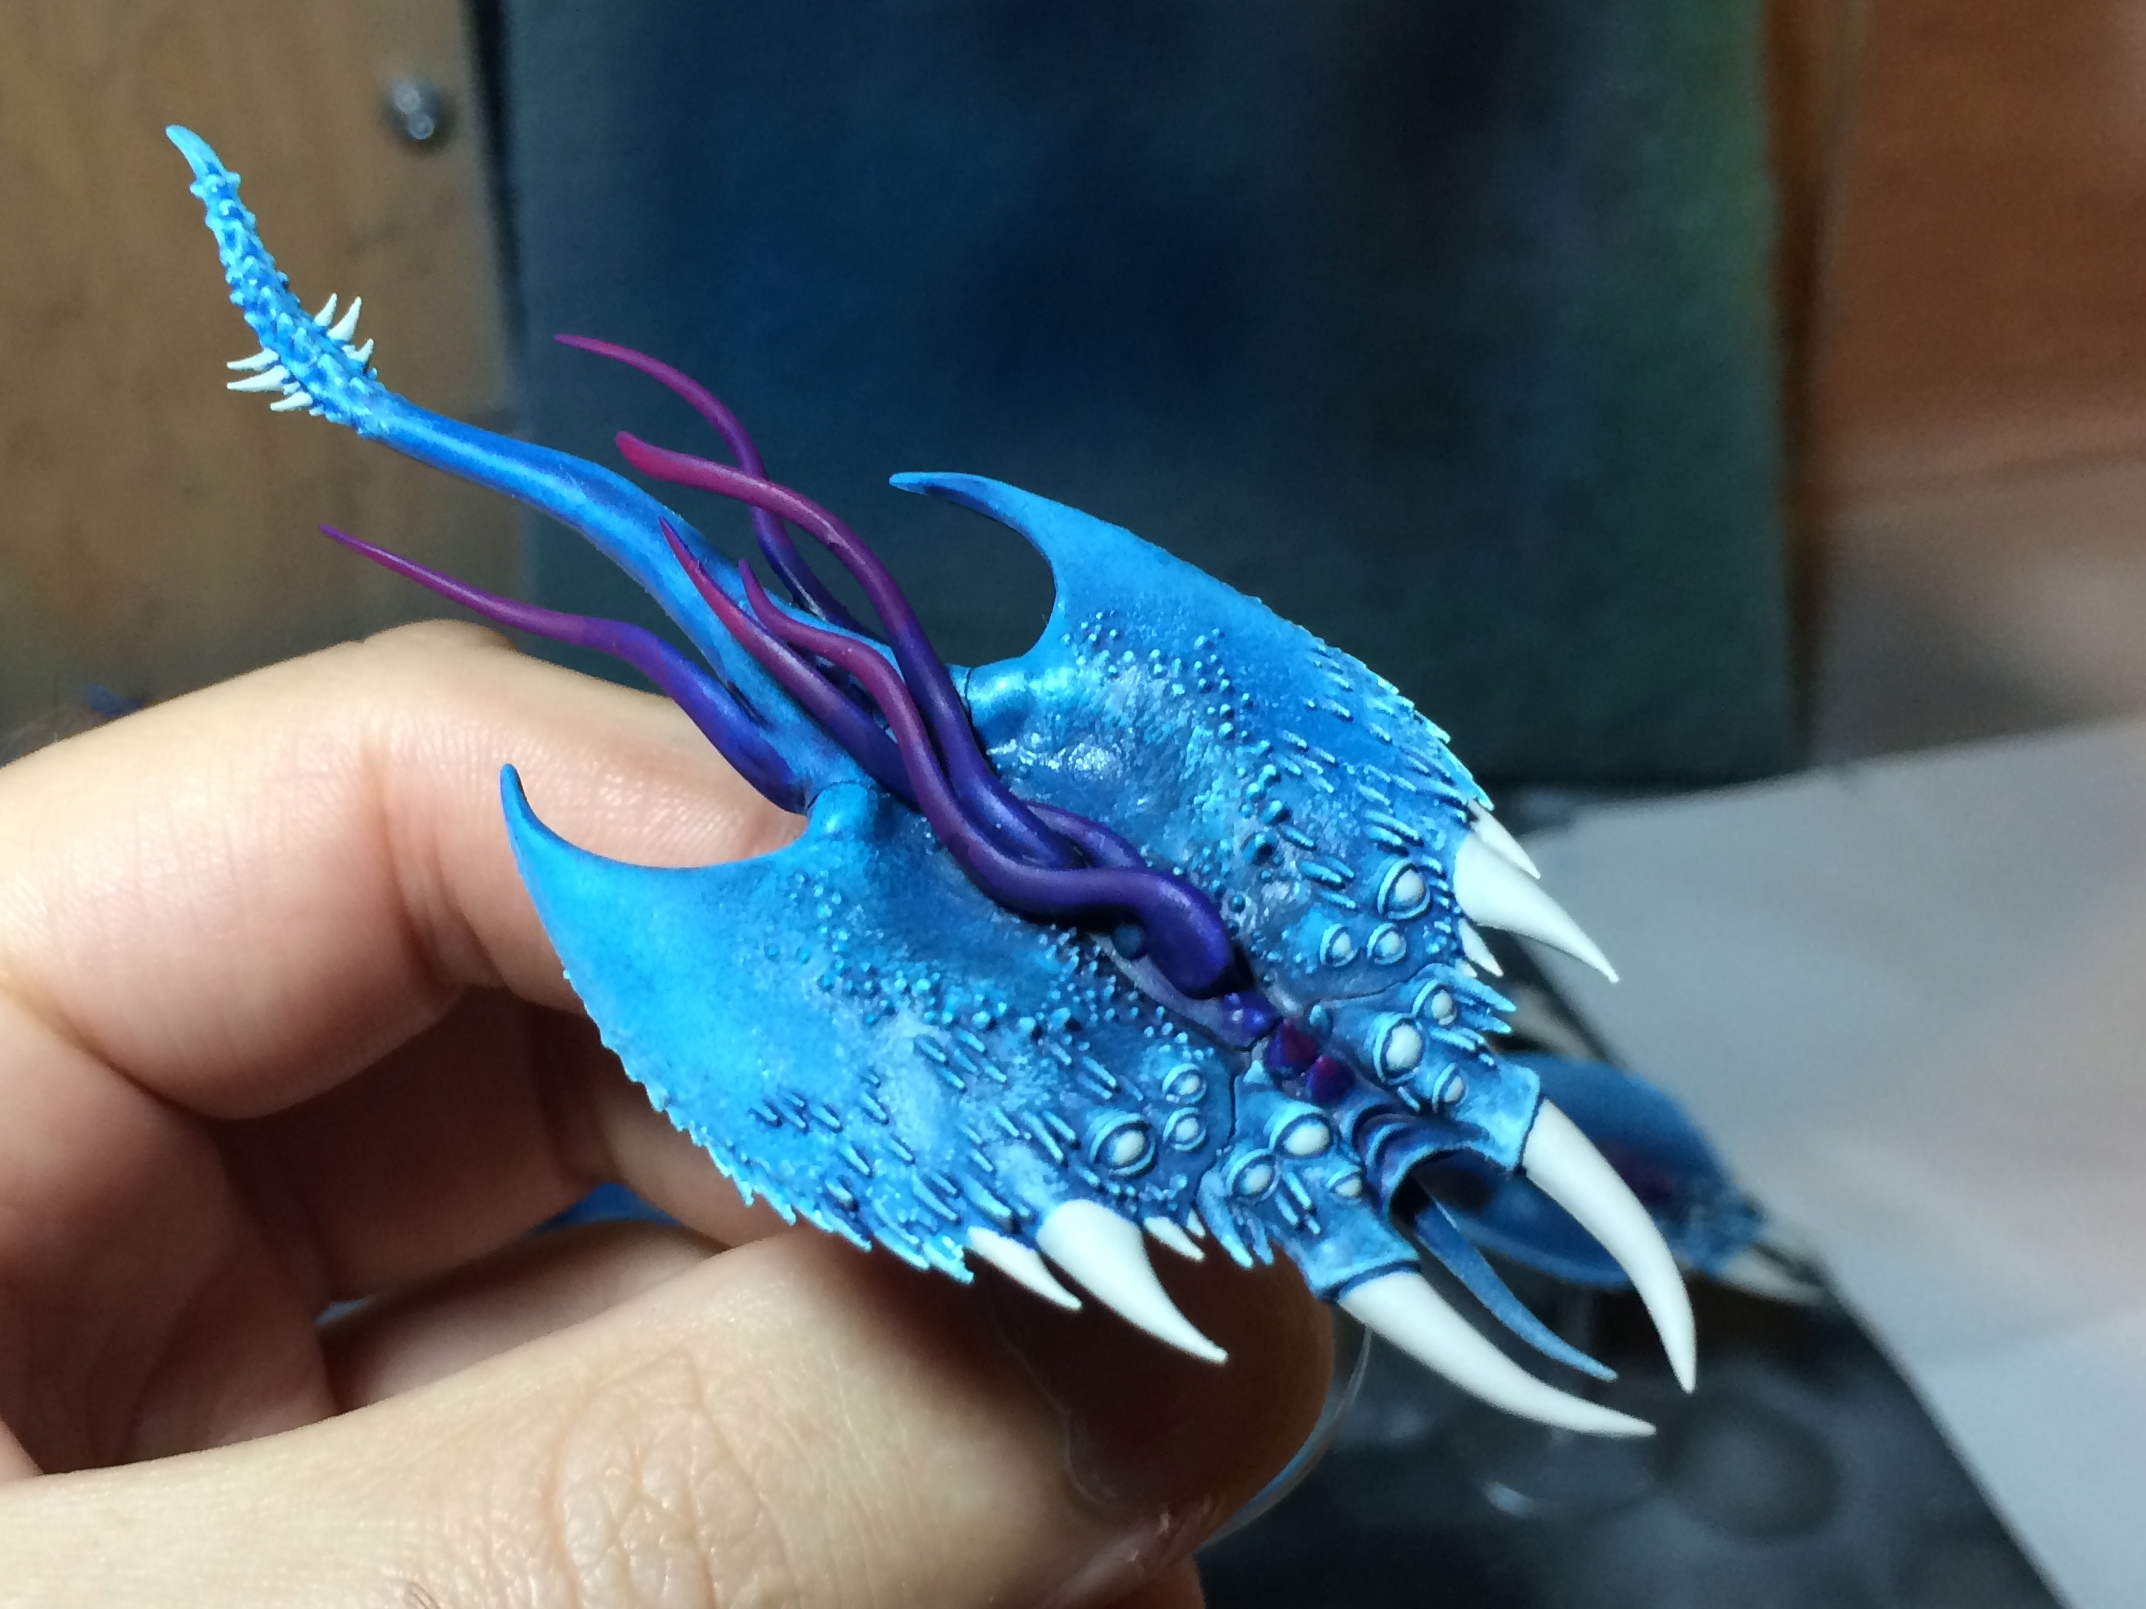
 Step 5.) Come back with a mixture of Ice Blue and Skull White (1:2) and dry brush the edges and high spots on the model. For this coat, take your time and ensure you are just getting the leading edges and the high points. Ensure that your wing edges have a nice bright edging.
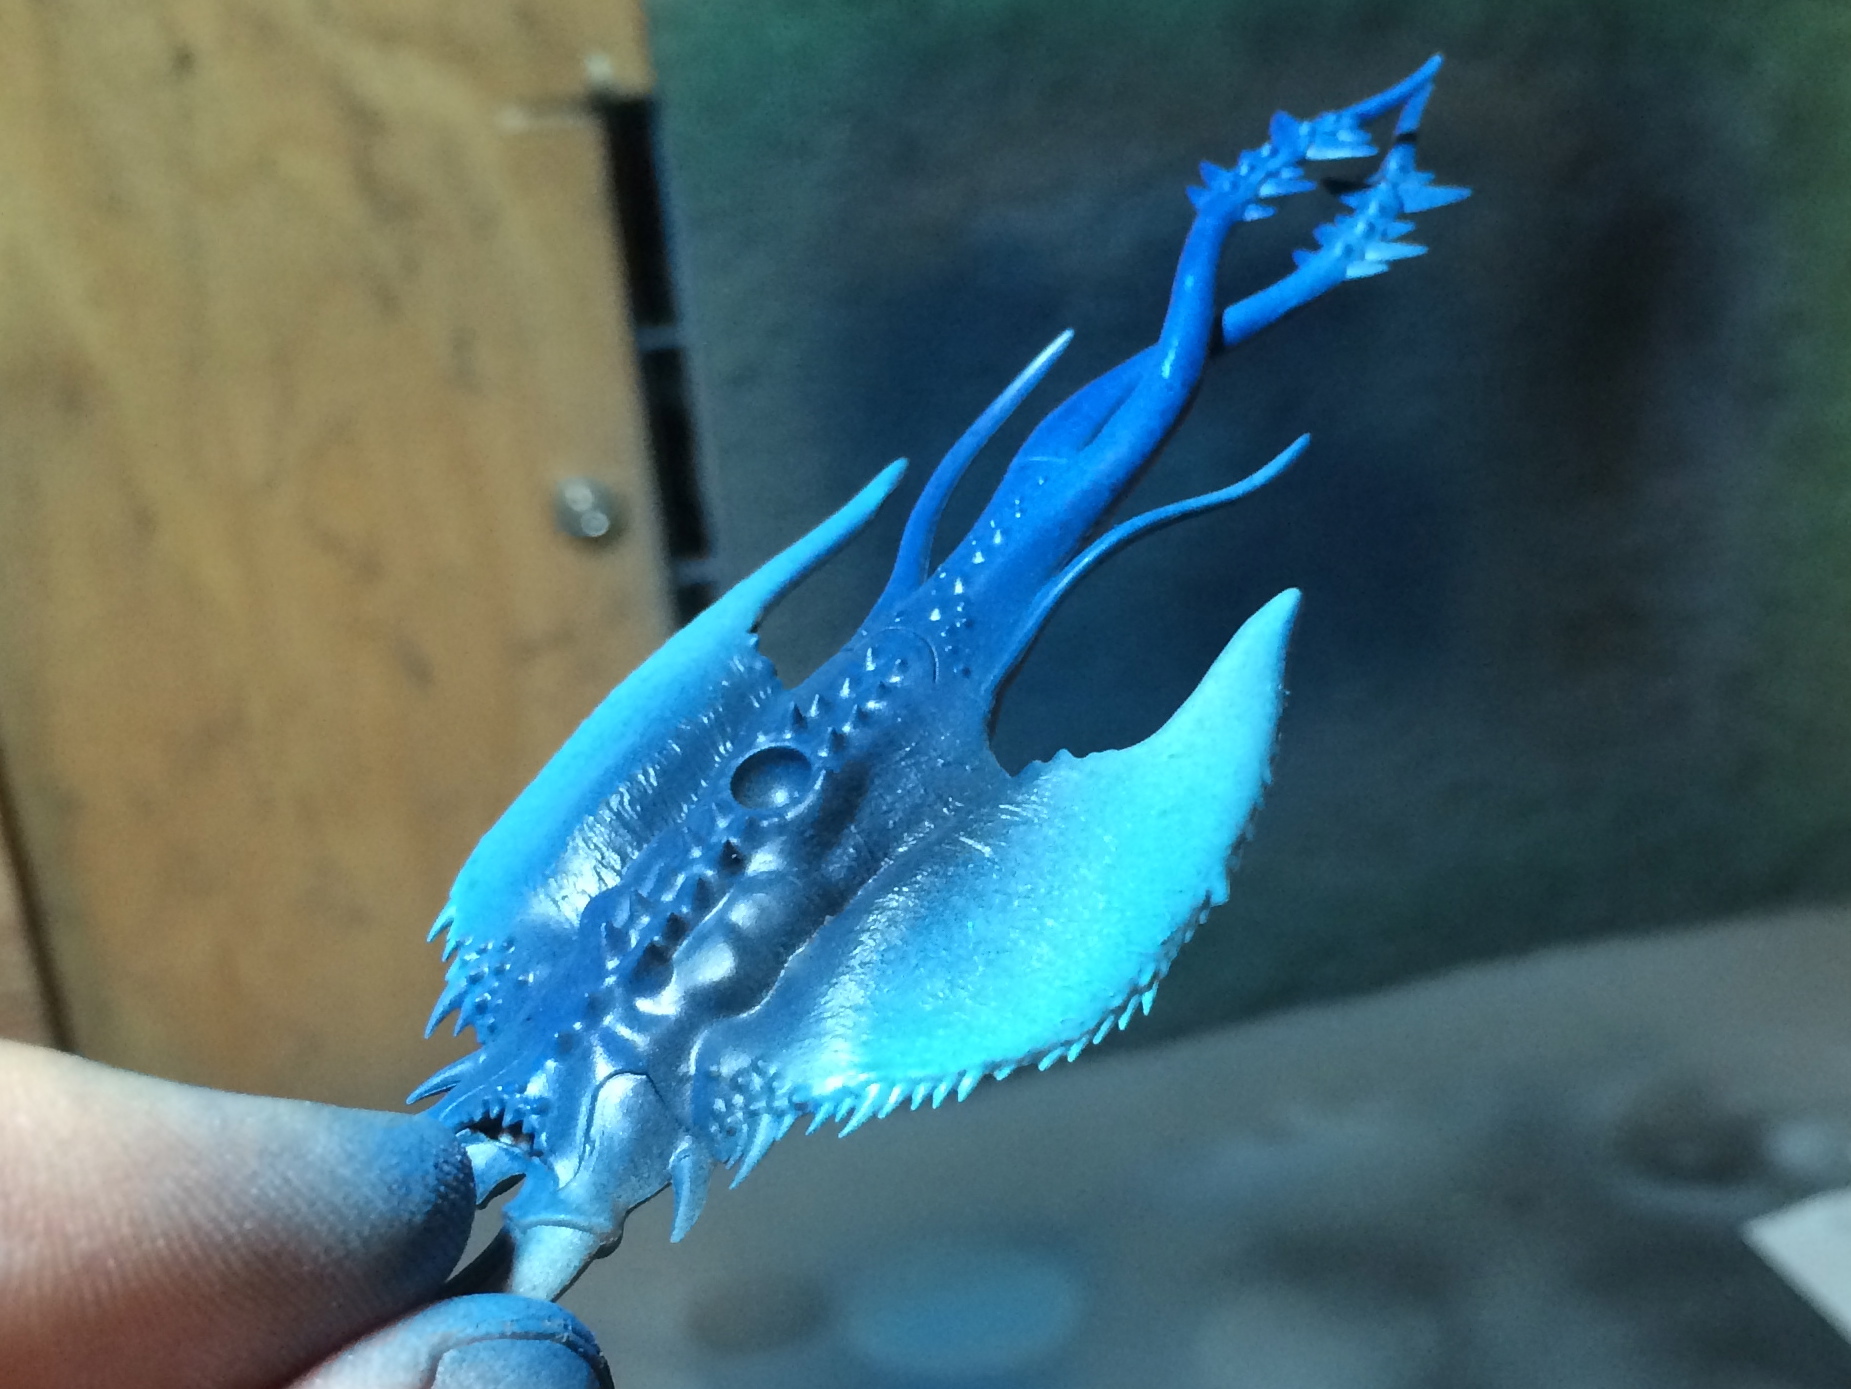
Step 6.) Moving on to the dorsal fin(s) and spines, apply a base coat of Regal Blue and Liche Purple (1:2) using a brush and starting at the base and covering the fins/spines.
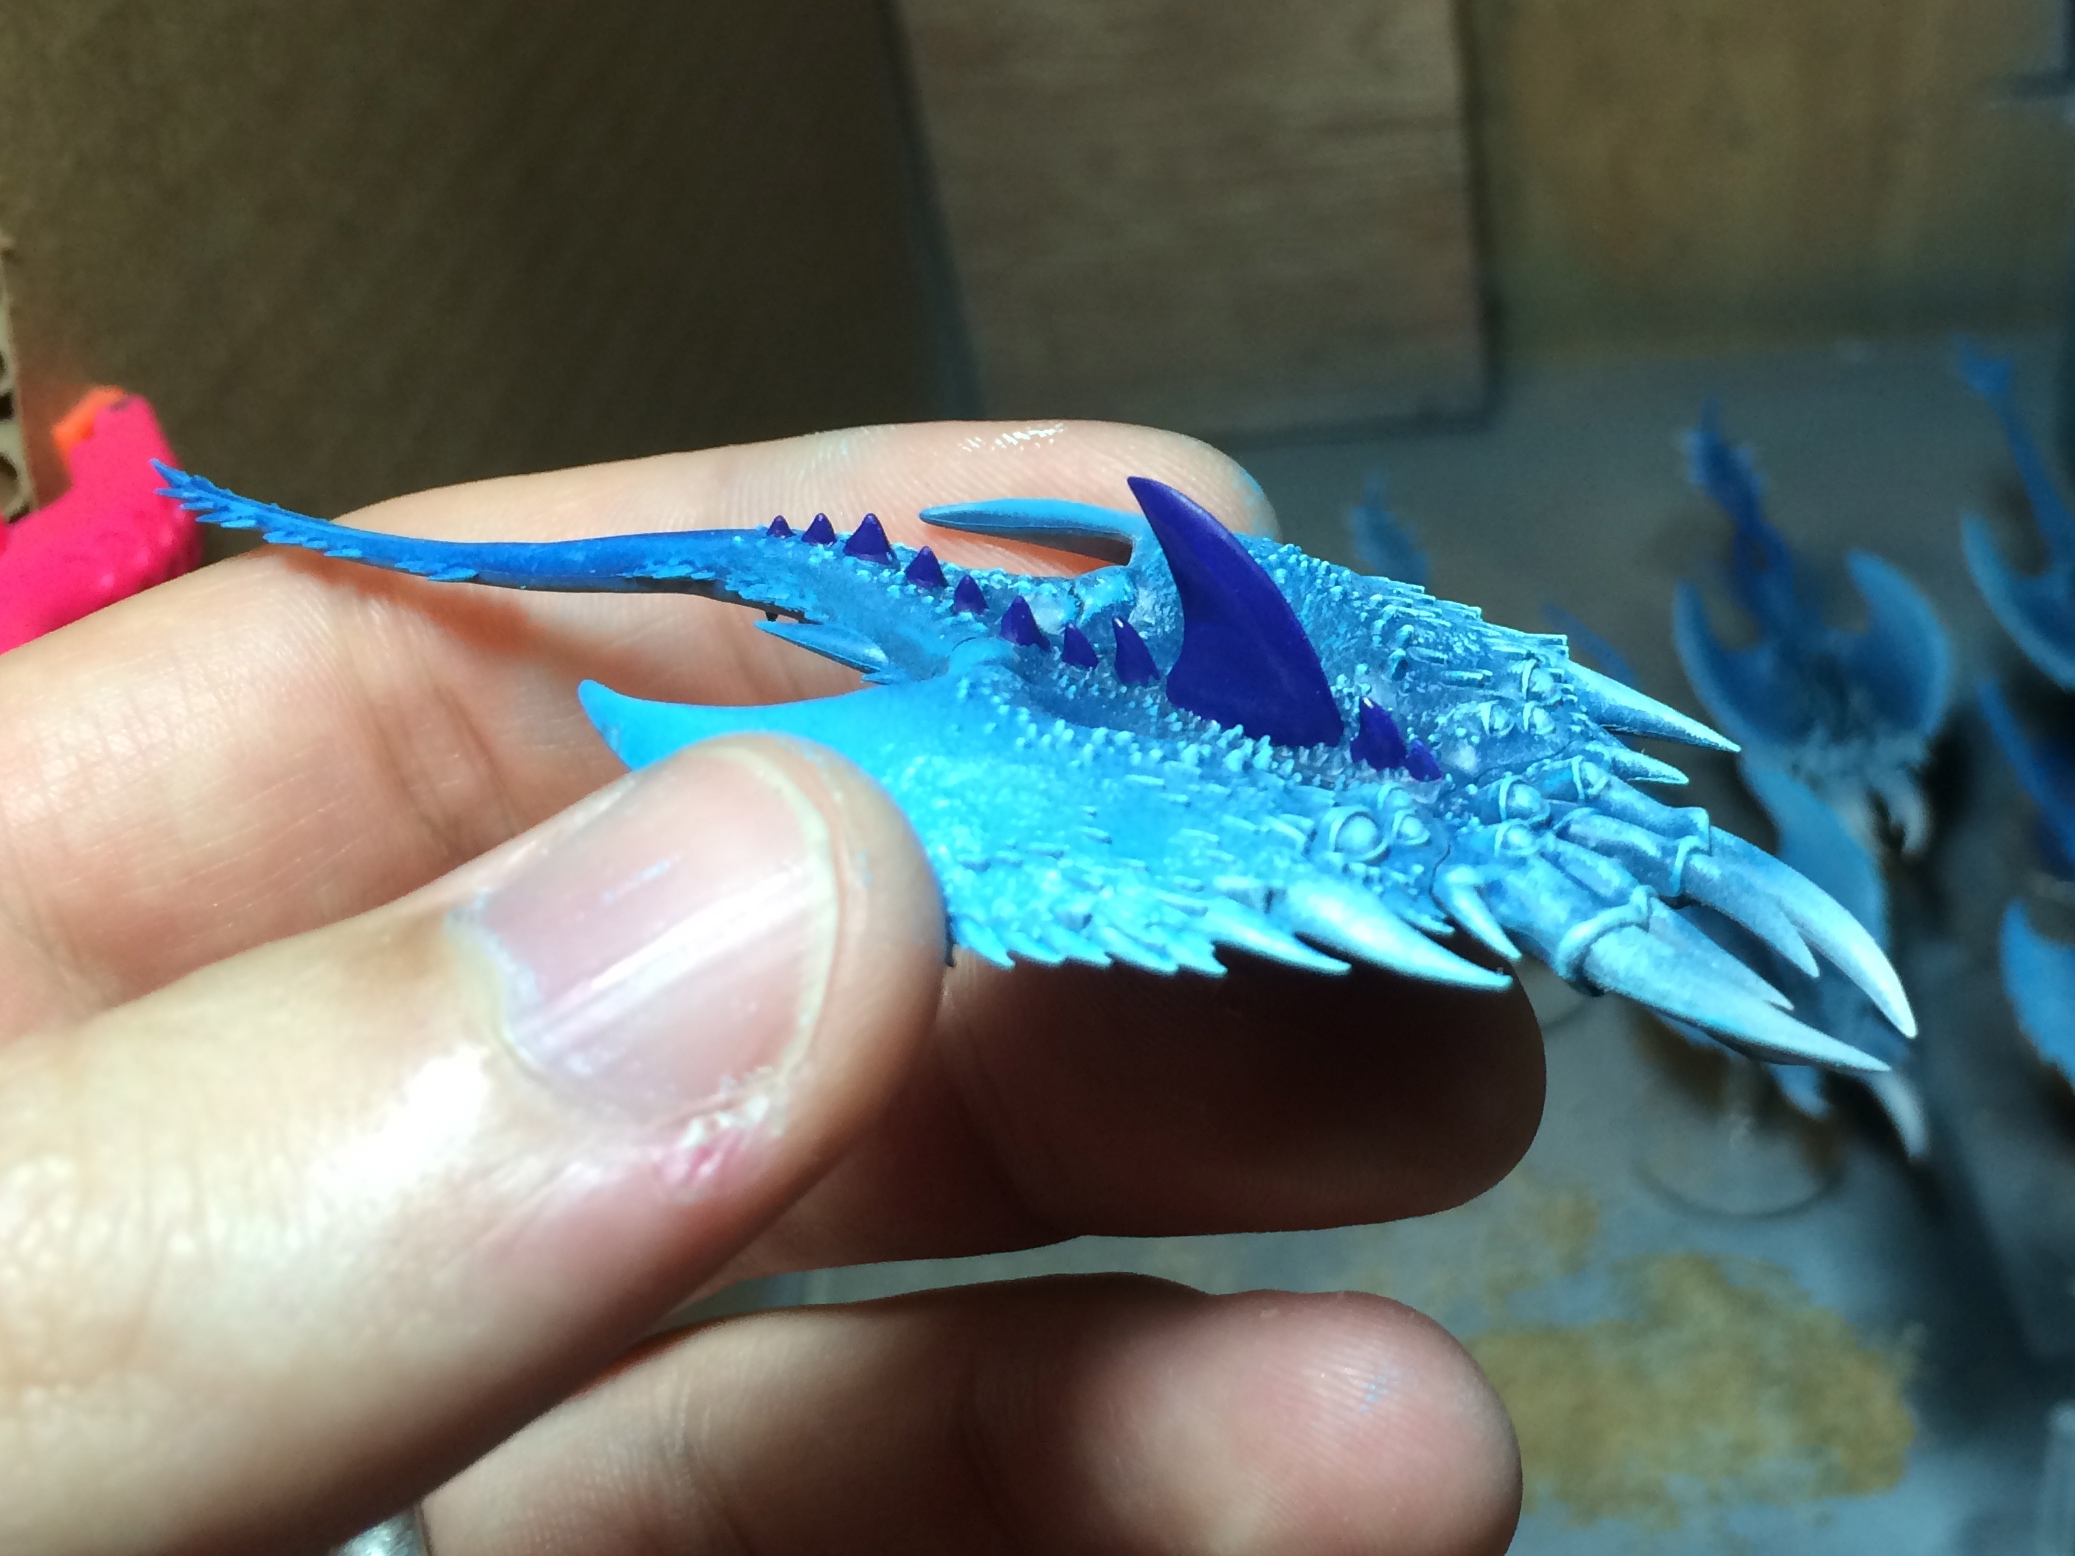
 Step 7.) Blend the darker base into a layer of Liche Purple up the spines.
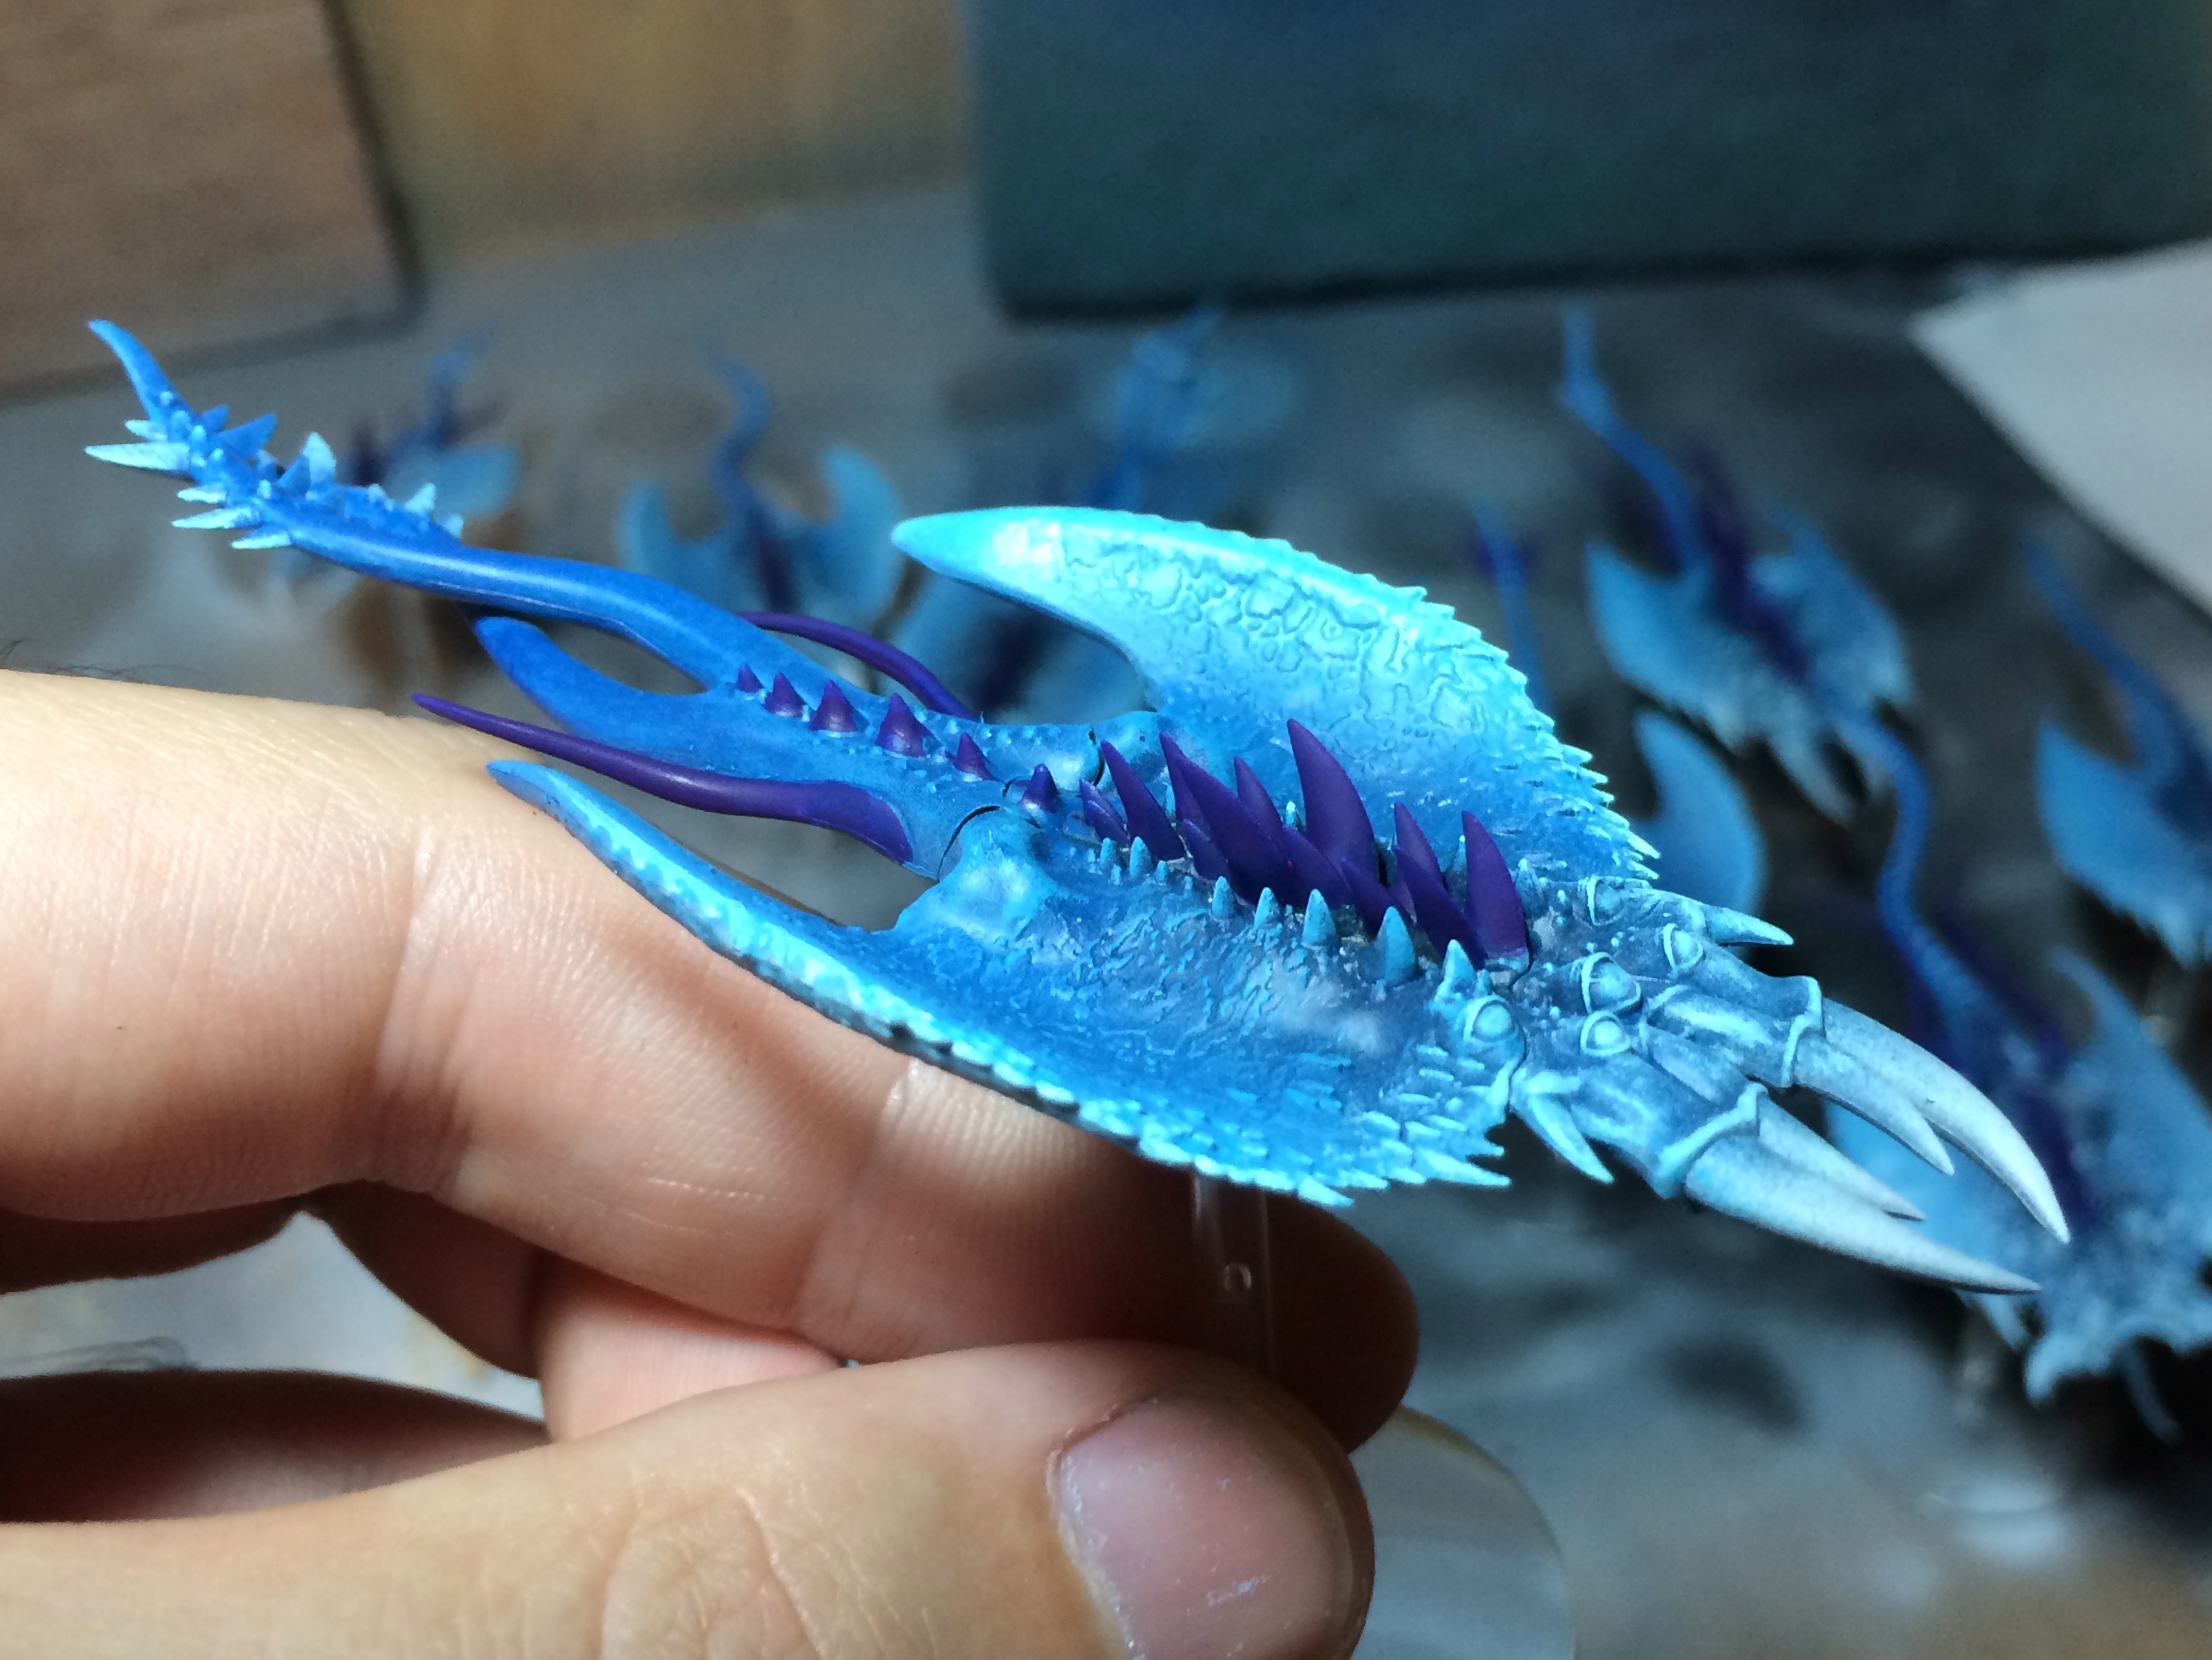
 Step 9.) Blend that transition into Warlock Purple as you get towards the tips of the spines and streamers.
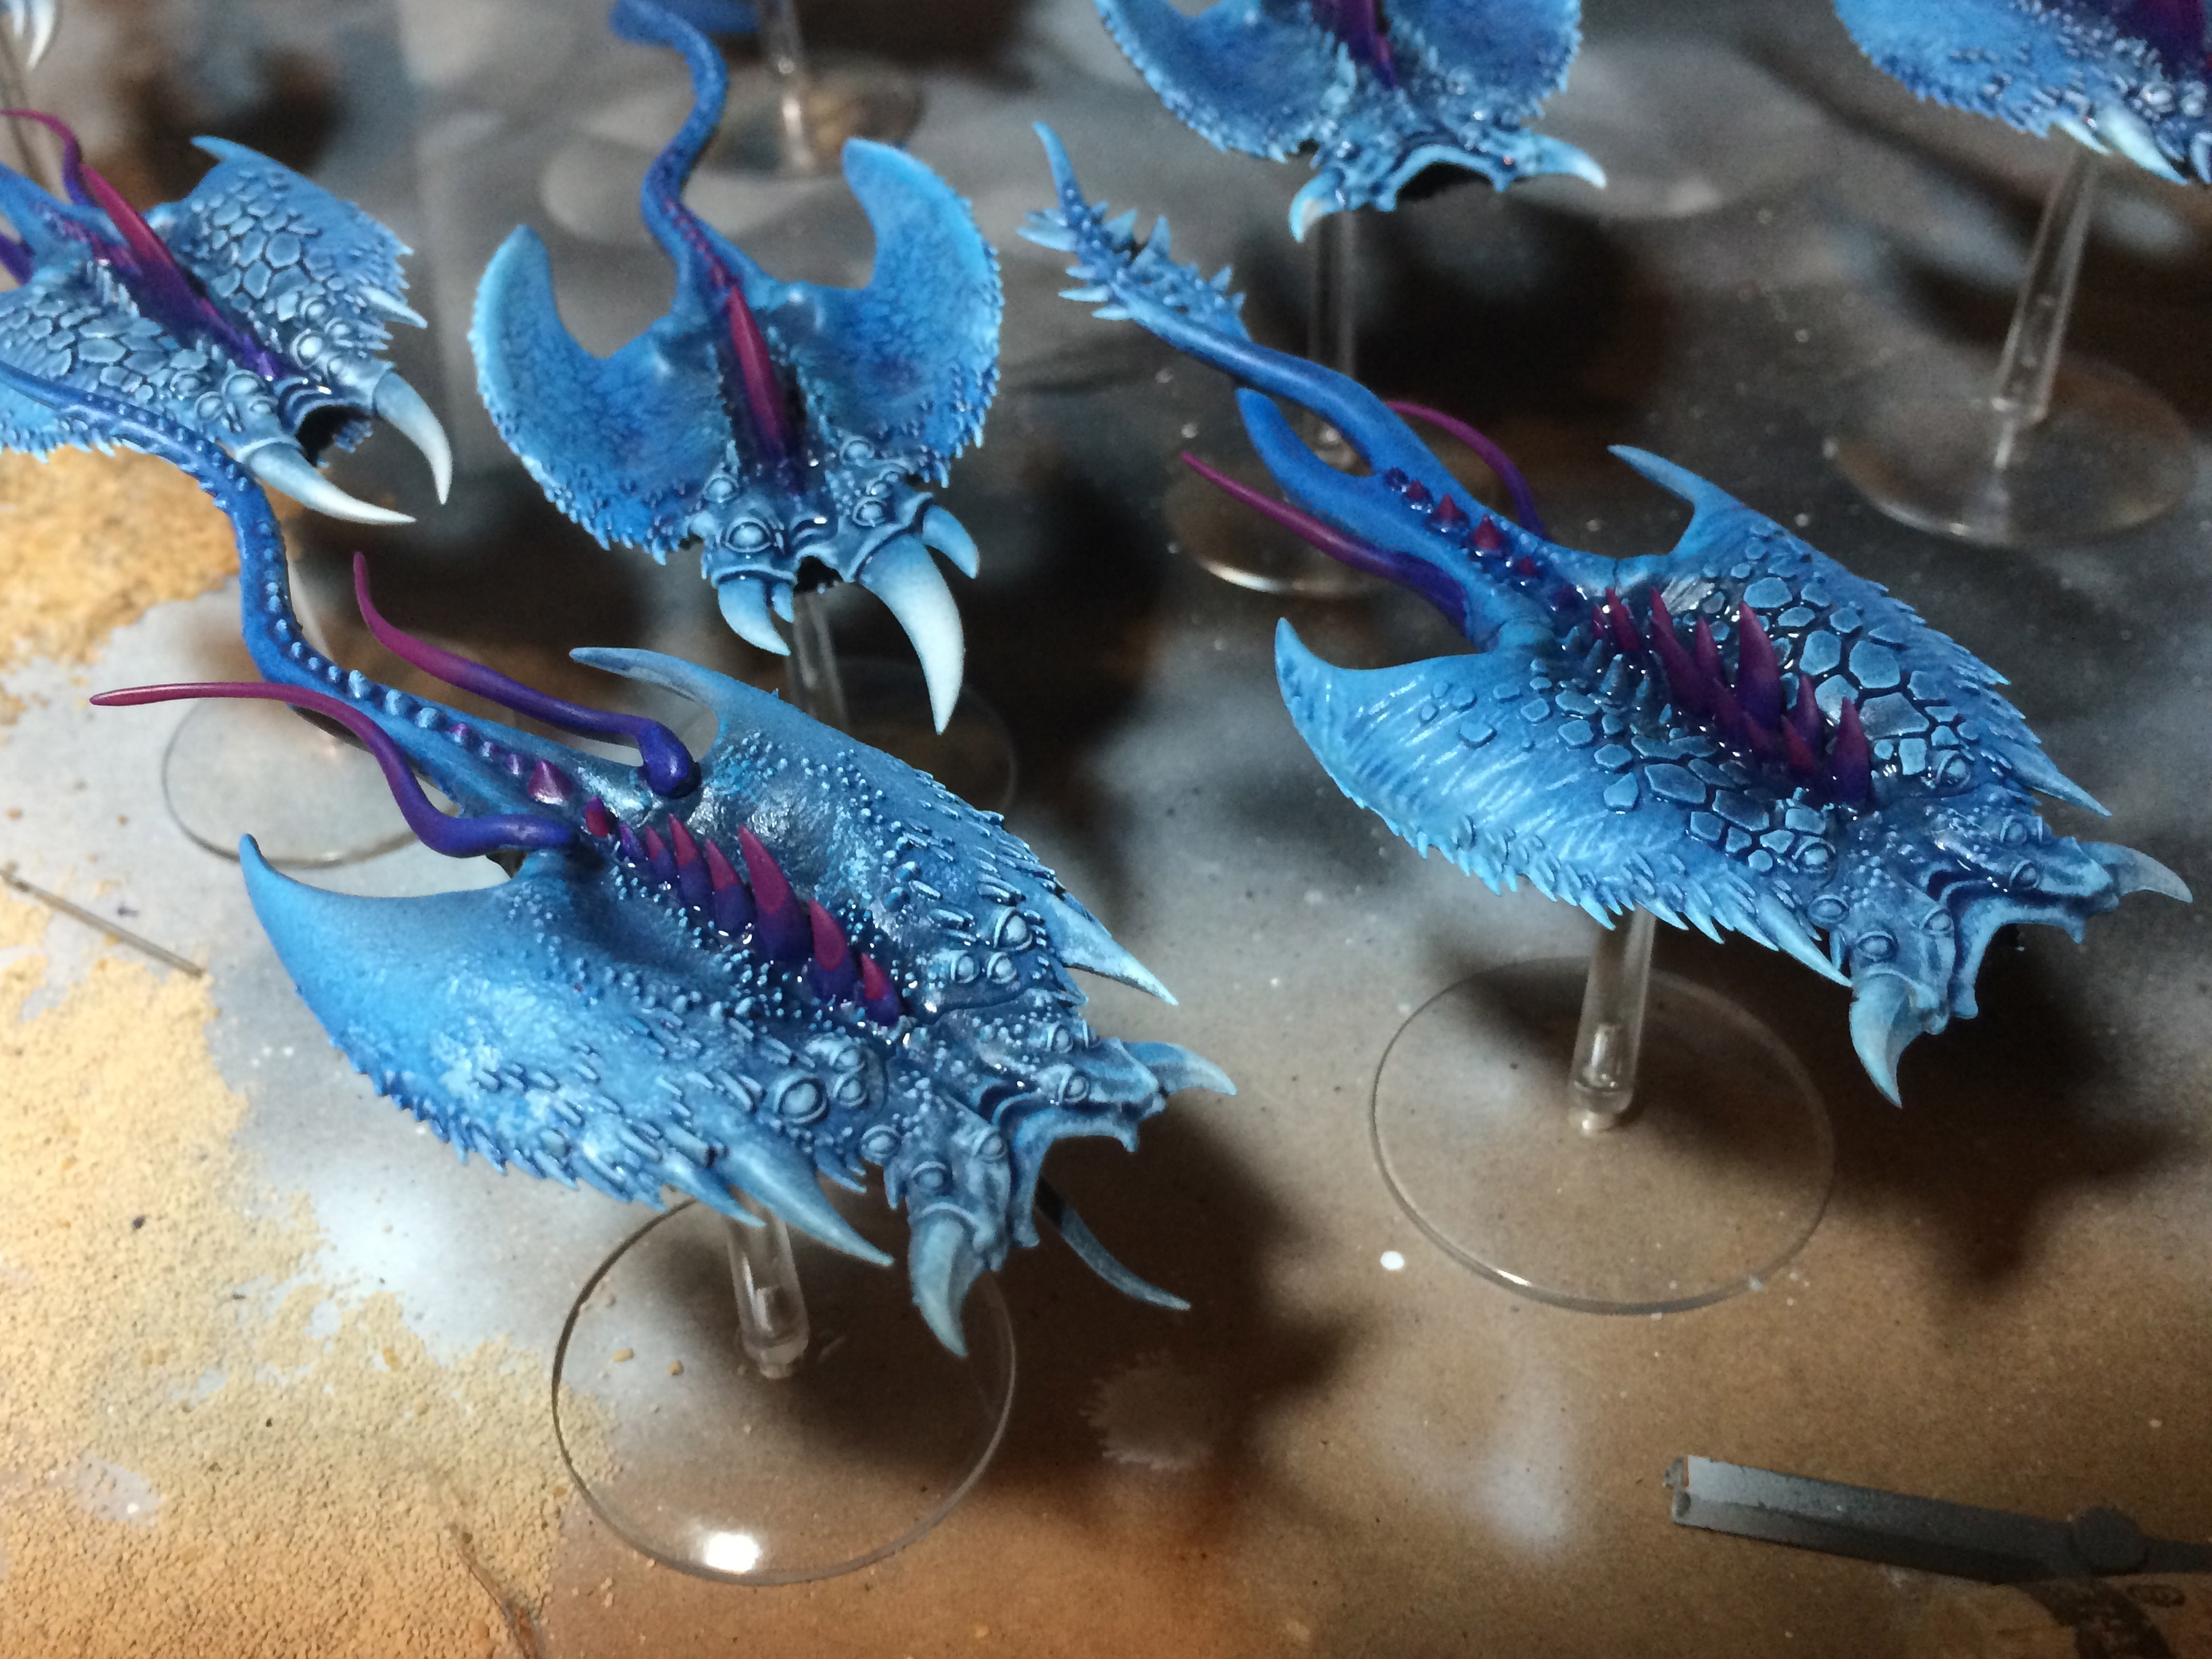
 Step 10.) Apply a post drybrush wash. In this case I chose to wash the entire model after drybrushing to blend the colors together. Since we already used high contrast paints, this will help to keep the model from looking too much like a cartoon. I used a mixture of Water, Leviathan Purple and Asurmian Blue (1:1:1) with a small amount of retarder, on the entire model, save for the tips of the tusks where I held the model.
Step 11.) My pictures for this section went missing. I’ll have to solve that problem later, so here is the rest without pictures, sorry. Once the wash has been applied across the entire model I went back and added more wash to a few details. This time I used a non-watered down wash of Leviathan Purple on the scales and at the base of the dorsal fins. At this point you’re going to have wet models again that will need a few hours to dry.
Step 12.) One last color before we set them down for a bit. I mixed Dheneb Stone and Skull White (2:1) and used this to base coat the tusks, eyes and any other pointy bits you want to pick out. I was careful to leave just a hint of the blue wash at the edge of the eyes and tusks. This will help later to create some depth and separation.
Step 13.) Since you’re going to be waiting on paint drying, yet again, move on to your bases. Remove the white tac from the base holes and glue in the flying stands with super glue. Then apply tufts of Citadel grass to the base (or other fancy bits) using super glue. Finally apply a layer of PVA glue over the rest of the base using an old paintbrush. Dip the base into a container of ballast and set it aside while you finish the rest of the bases.
Step 14.) In order to keep the sand from coming loose later I apply a mixture of water and PVA glue (1:1) to the base using an eye dropper. The correct amount is enough that you begin to see a small amount of standing liquid, but stop before you’ve created a swap on your base. Now you’ll need to set these aside and wait at least 8 hours for them to dry. Go to sleep, watch a movie, go for a bike ride because you’re stuck not working on these models until your washing has dried.
Step 15.) Okay, you can do some other stuff while you wait on the bases. Now we move back to the tusks. I used a special tool: a slightly sub-par brush, which splays at the end. Using it you can get a ‘feathered’ effect at the base of the teeth, which looks more natural than a flat line, and is more regular/fast than doing it yourself, works well for horns also. I used Dheneb stone + a little white, in 3 thin applications.
Step 16.) Apply Blazing Orange to the eyes (where you have white already) and be sure not to get into the recesses or on the eye lids.
Step 17.) Dab a Blazing Orange and Sunburst Yellow (2:3) in the middle of the eye, followed by
Step 18.) Sunburst Yellow in the dead center of the eye
Step 19.) Wash the tusks and other white bits with brown.
Step 20.) Pupils with Chaos Black and a 0/10 spotter
Step 21.) I used a standard sand base (using Fine Buff from Woodland Scenics) and various bits and grasses from GW basing kits.
Awesome job, man! 🙂