
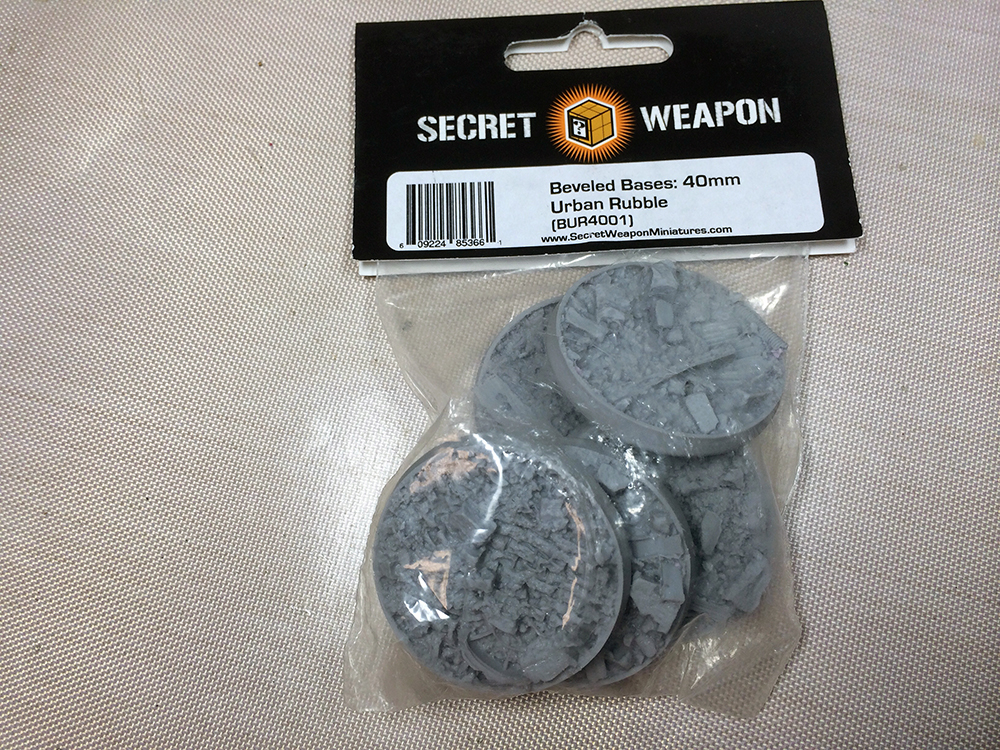
I’m in the process of re-basing my Dark Angels army with a mix of Secret Weapon Miniatures Urban Rubble and Urban Streets themed resin bases. Prior to this project, I was using cork which apparently is heavily frowned upon in painting competitions. Basing is a bit like cleaning and prepping a model in the sense that doing it well likely won’t win you many accolades, but doing it poorly will degrade from an otherwise nice model. The method I’ve started using is fairly straightforward, but uses a few advanced techniques. The tutorial shown here can easily be modified with traditional washes replacing the oil washes, and the pigment phase can be skipped. Furthermore, many of the airbrush steps can be painted using a traditional brush and simply take a bit longer.
Paint Supplies (in order used):
Vallejo Surface Primer Black
Vallejo Surface Primer Grey
Vallejo Airbrush Thinner
VGC Cold Grey
VGC Stonewall Grey
VGC Dead White
VGC Gunmetal Metal
VGC Charred Brown
VGC Brown Ink
VGC Earth
VGC Heavy Brown
VGC Bone White
Vallejo Satin Varnish
White Spirits
Winsor & Newton Winton Lamp Black Oil Paint
Winsor & Newton Winton Van Dyke Brown Oil Paint
Vallejo Matte Varnish
Vallejo Iron Oxide Pigment
Vallejo Dark Red Ochre Pigment
Vallejo Dark Yellow Ochre Pigment
Vallejo Burnt Umber Pigment
Vallejo Light Sienna Pigment
Vallejo Titanium White Pigment
Secret Weapon Miniatures Pigment Fixer
VMA Black
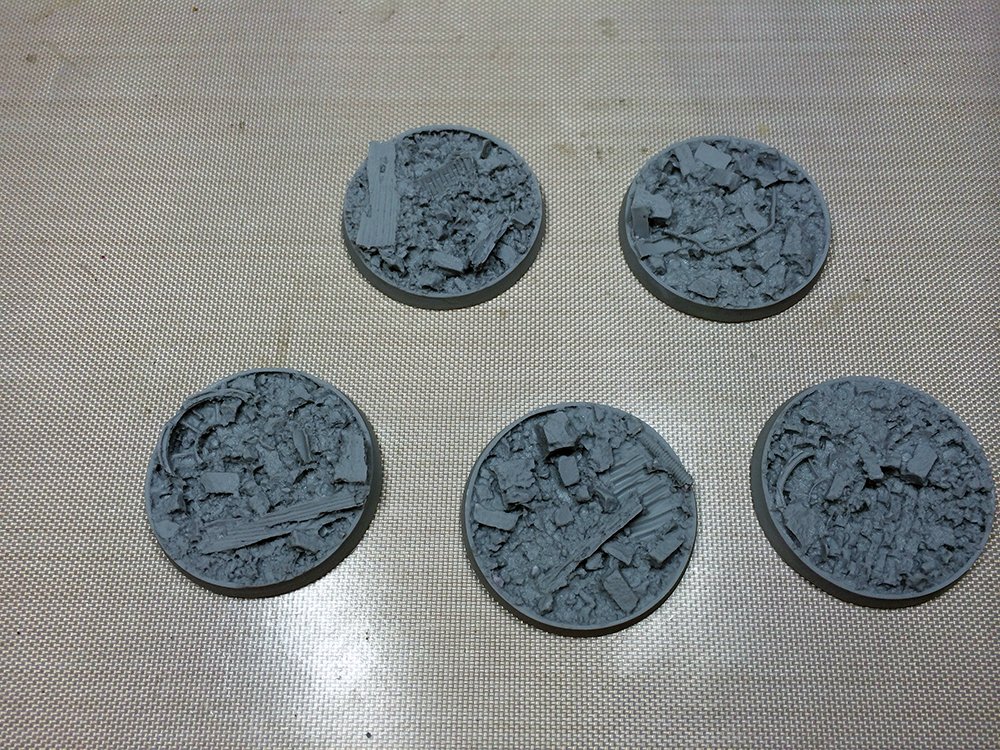
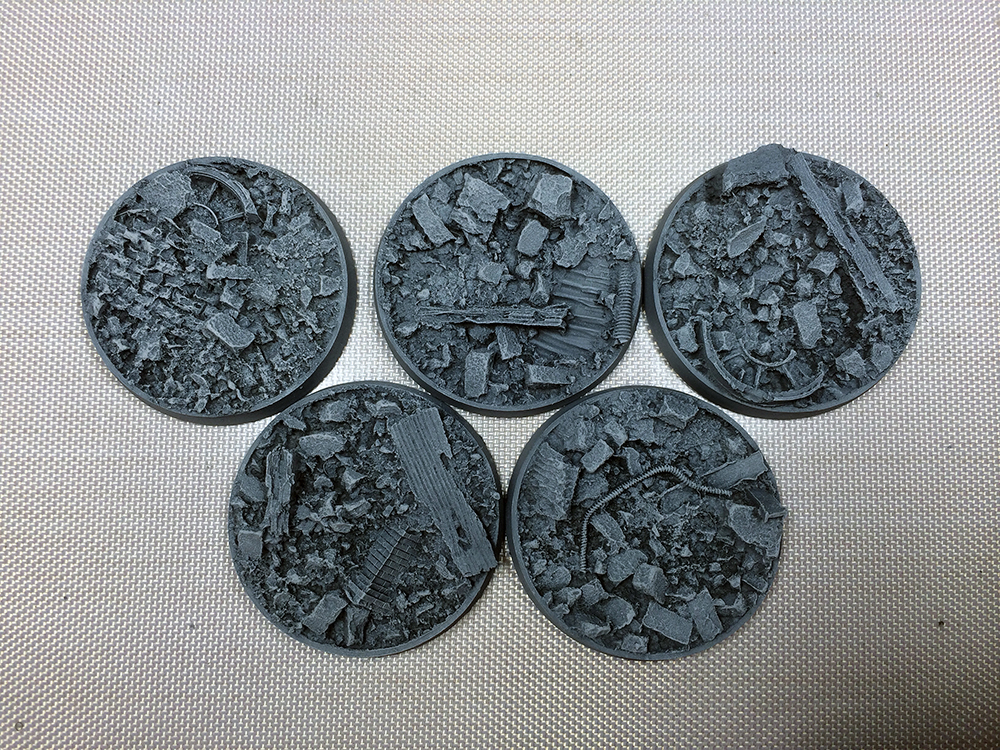
Step 1.) Just about any resin model uses a mold release during the manufacturing process, and SWM bases are no exception. Unfortunately, the properties that make the model not stick to the mold also make paint not adhere to the model well. The remedy for this is simple dish washing soap. Apply soap and lightly scrub all of the bases, then thoroughly rinse. Let the bases dry completely before proceeding.
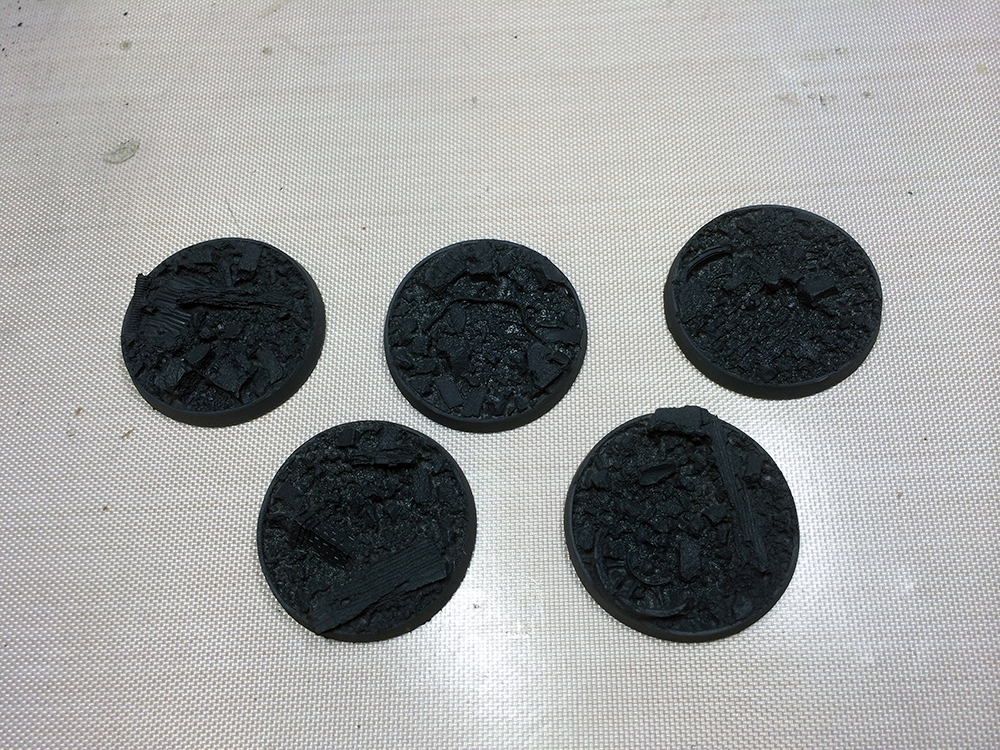
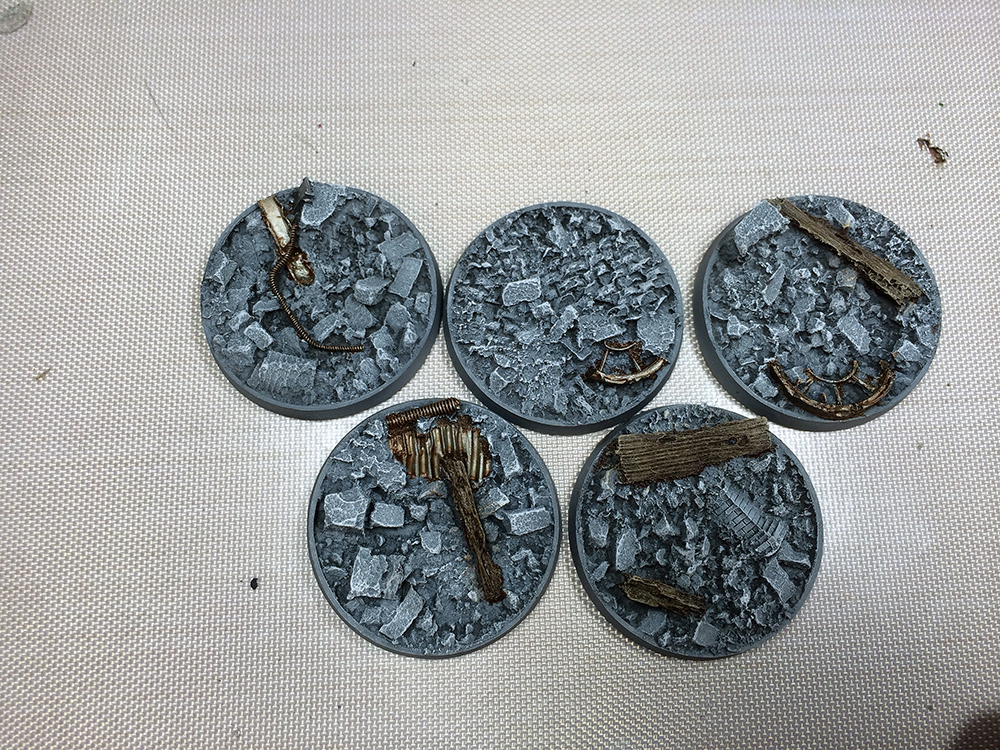
Step 2.) Next, the bases need to be primed to make the surface of the bases suitable for acrylic paint. I took this opportunity to choose a color that would be well suited for the deepest crevices. I airbrushed a 1:1 mix of Vallejo Surface Primer Black and Grey. Oftentimes primer doesn’t need to be applied for full coverage, but in this instance it’s a good idea since it will show through in the hard to reach spots.
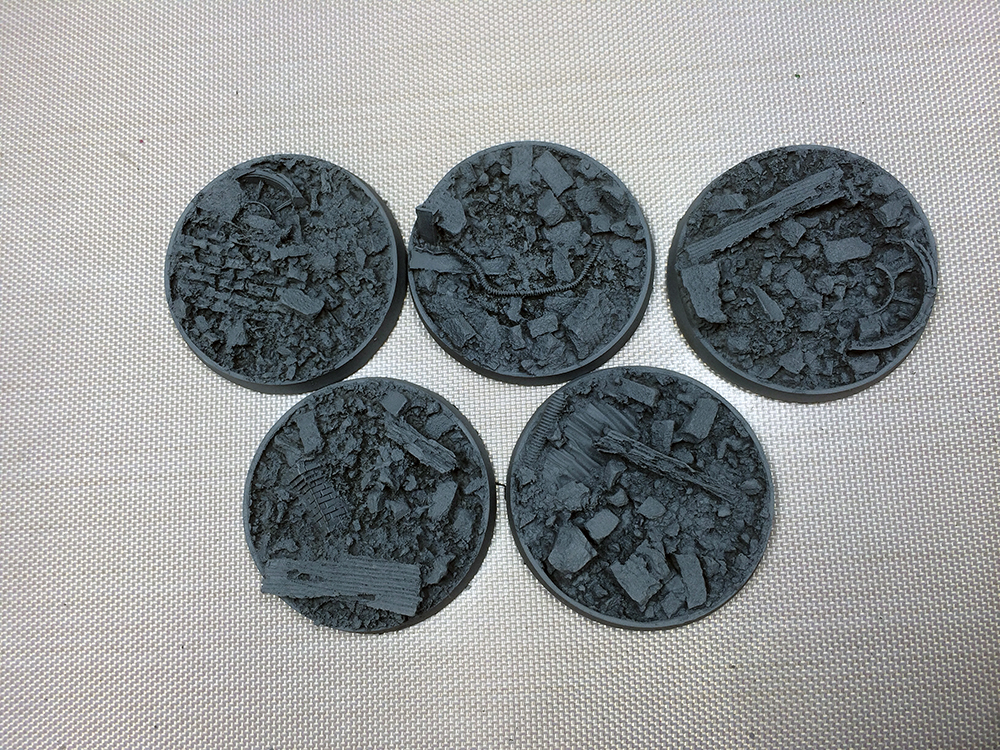
Step 3.) I airbrushed the bases with Vallejo Game Color (VGC) Cold Grey. As with any normal hobby acrylic, this paint needs to be properly thinned to be airbrushed. I used Vallejo Airbrush thinner to achieve a consistency of reduced fat milk. Many people ask for ratios for thinning paint, but the condition of a paint can vary dramatically based on its age and other factors. Oftentimes a 1:1 ratio of paint and thinner works for me, but it can vary a great deal from that mix so use good judgement. This base coat should provide good coverage but does not need to be sprayed into the deep crevices.
Step 4.) Now it’s time for a simple drybrush of VGC Stonewall Grey. This drybrush should be applied everywhere. Remember, not having enough paint on the brush when drybrushing is much better than too much, For best results, I use a very dry brush and go over an area multiple times until I get the highlighting effect that I desire.
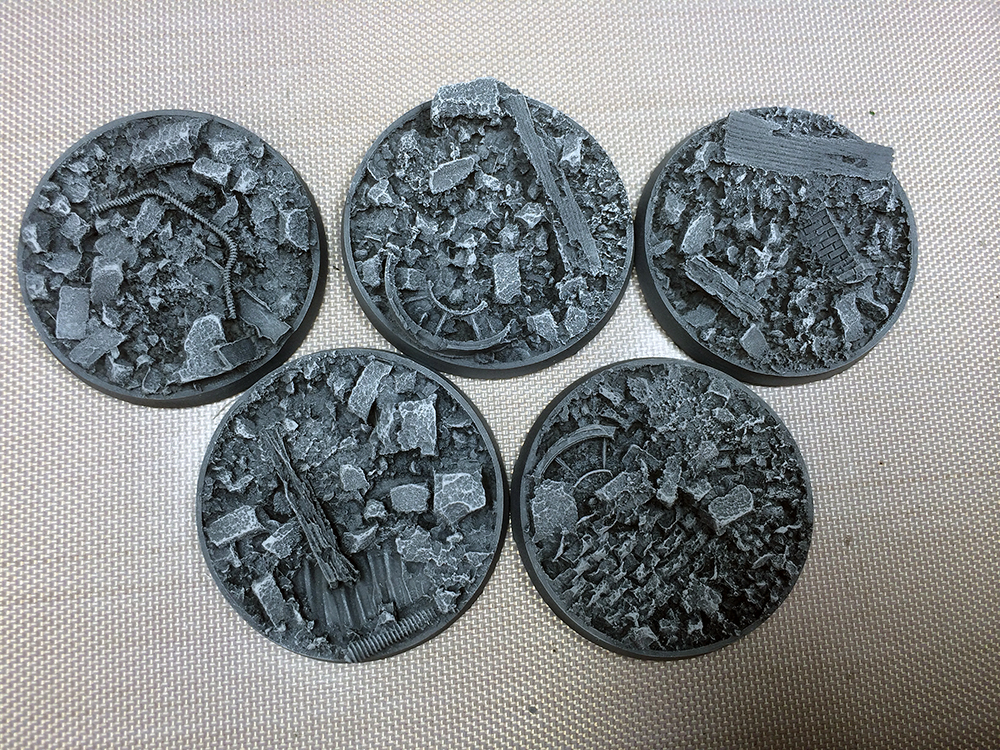
Step 5.) A drybrush of Dead White is then lightly applied. This drybrush should be focused on the highest points and the larger rocks.
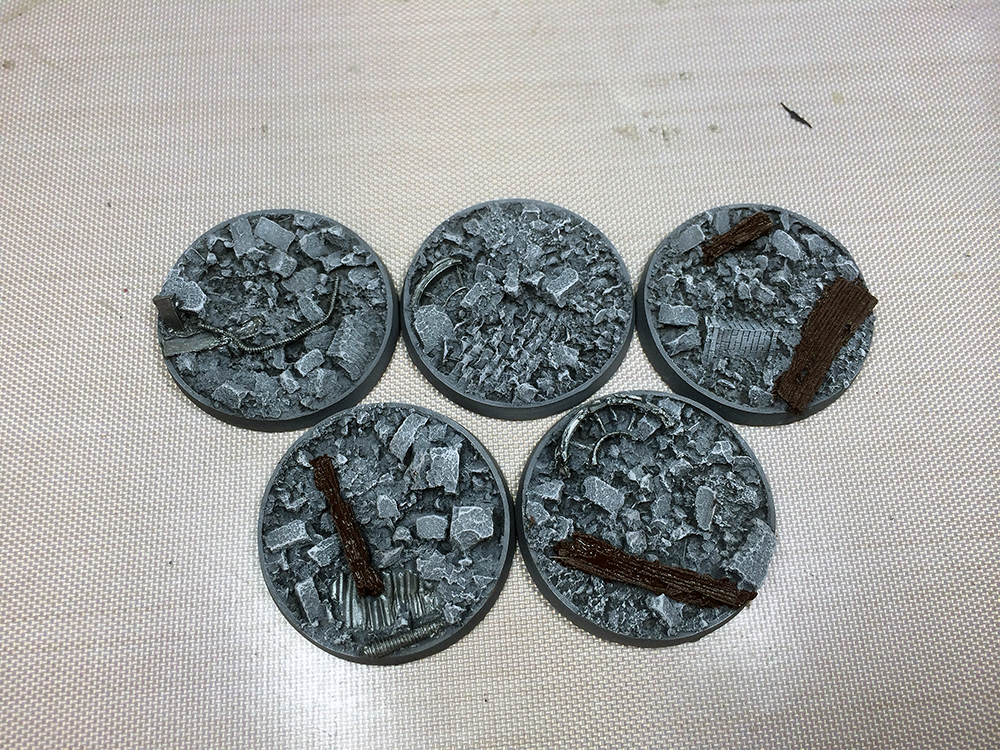
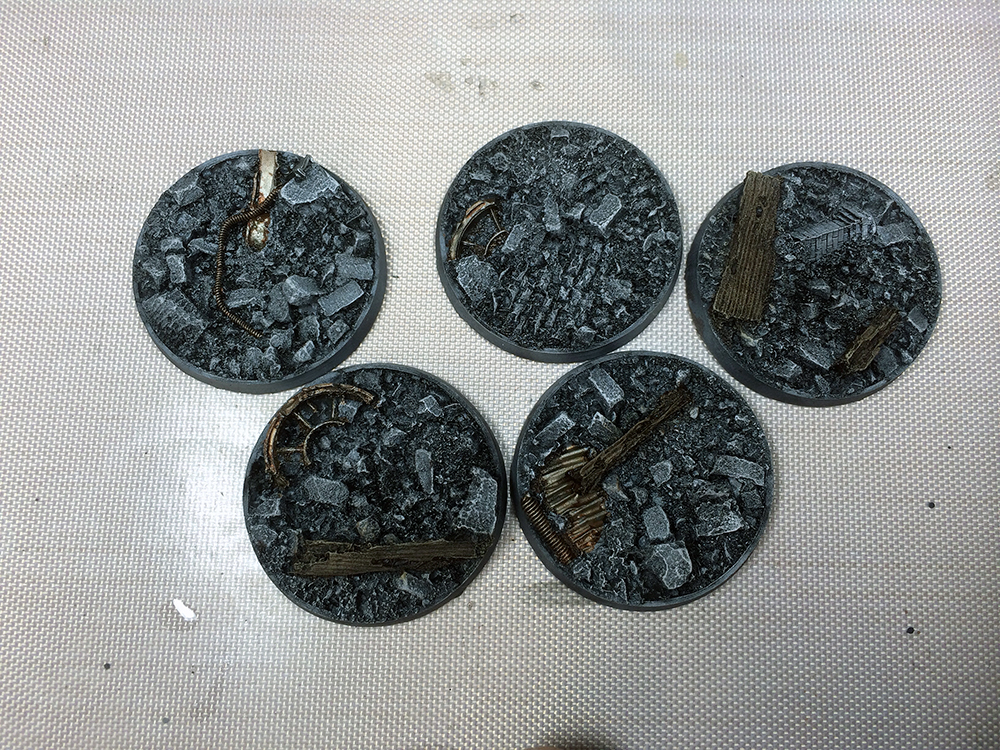
Step 6 and 7.) Now that the rocks are sorted out, it’s time to focus on the other parts of the rubble; the metal and the wood. I base coated the wood with VGC Charred Brown and the metal pieces with VGC Gunmetal Metal.
Step 8.) I applied VGC Brown ink to the conduits and wheels neat. The corrugated metal responded better to the ink being thinned 1:1 with water. This step is optional if doing the pigments later in the tutorial.

Step 9.) The wood is drybrushed with VGC Earth.
Step 10 and 11.) Another drybrush is applied sparingly to the wood using VGC Heavy Brown, focused on the edges. A final drybrush on VGC Bone White can then be very sparingly applied to the corners.
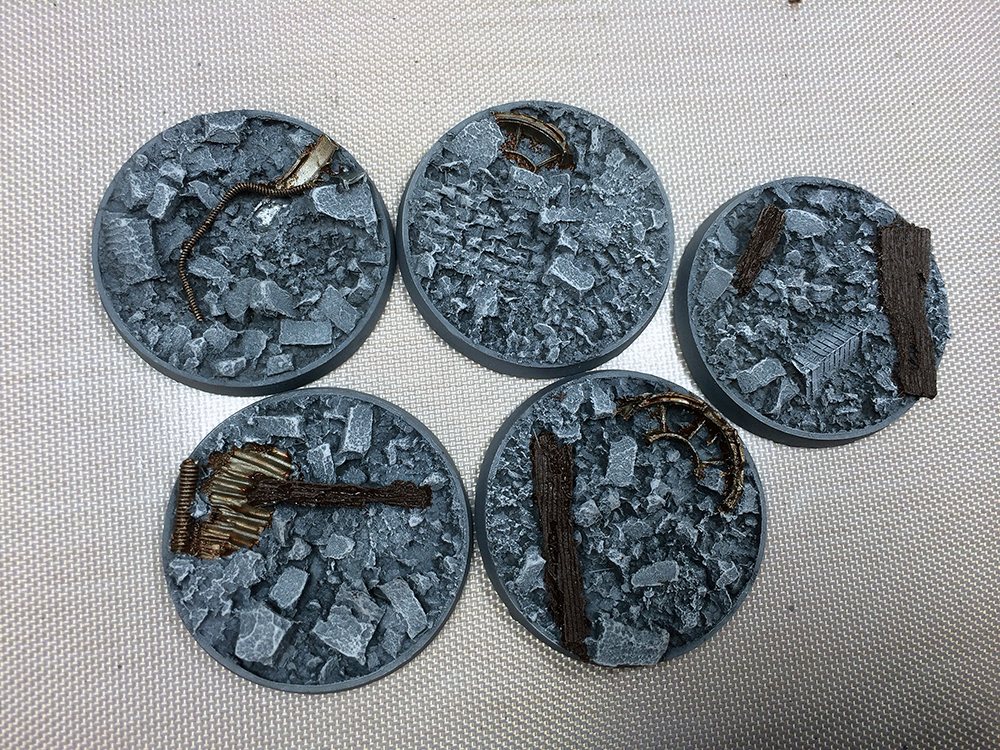
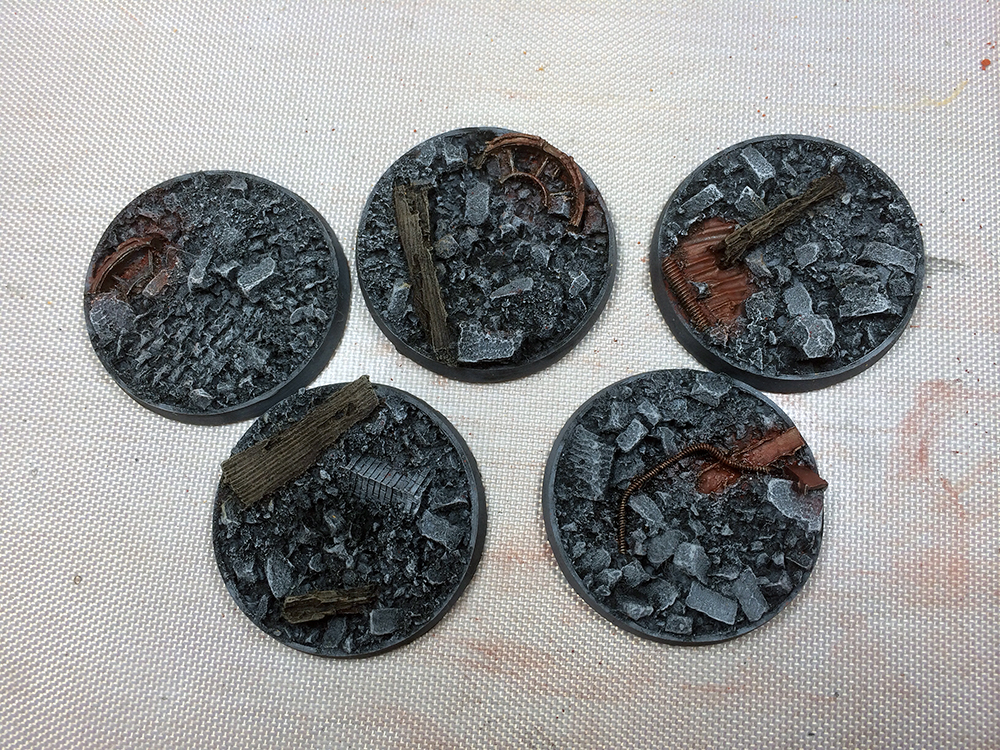
Step 12.) Now to add some depth to the bases in the form of an oil wash. Prior to an oil wash being applied, the acrylic paints need to be protected with a layer of varnish. I prefer Vallejo Satin Varnish for this step as I find Matte Varnish dissipates the oil wash and turns it into a filter, while Gloss Varnish is difficult to cover up later. With the varnish on, the oil paint is thinned with the mineral spirits to the consistency of a normal wash and applied. I used Lamp Black on the rocks and Van Dyke Brown on the wood. After drying for about an hour, cleanup can be done with a Q-tip dampened with mineral spirits. This allows you to remove the oil wash from the highest parts. Finally, a coat of Vallejo Matte Varnish is applied after the oil has thoroughly dried to seal in the oil.
Step 13.) The final steps will weather the base using pigments. I focused first on the metal, applying Dark Red Ochre pigment liberally, followed by a bit of alcohol to hold it in place. When applying alcohol dab on rather than brush on to minimize disrupting the pigment.
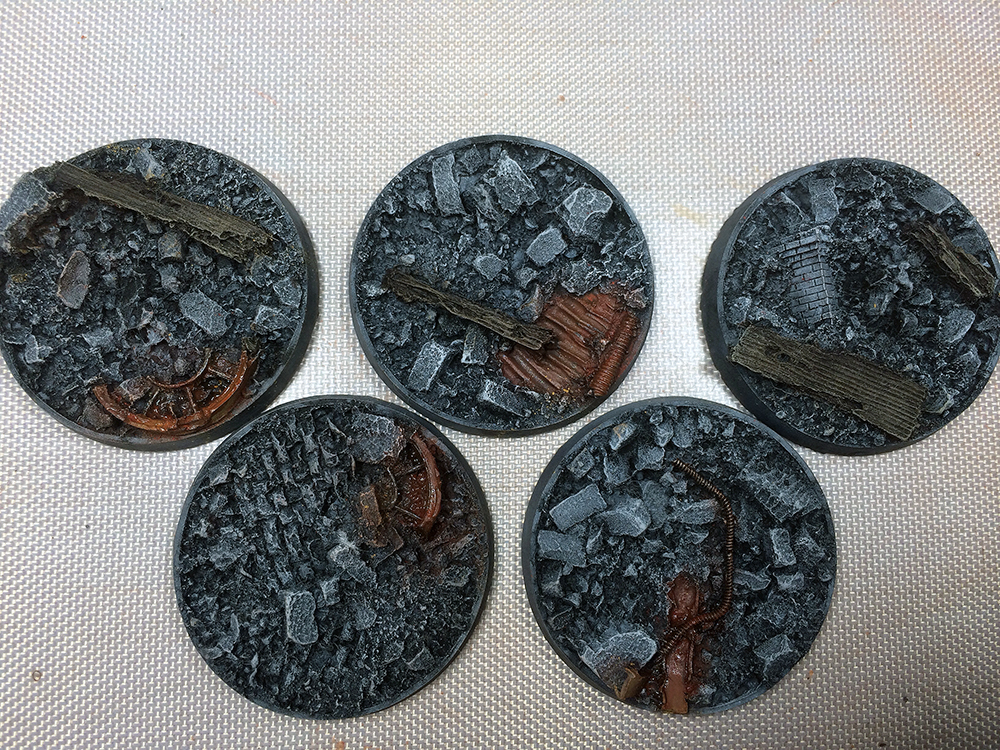
Step 14.) After the alcohol dried, I used Vallejo Dark Red Ochre pigment on the less buried parts of metal and again used alcohol to fix the pigments in place (and after every pigment hereafter).

Step 16.) Dark Yellow Umber pigment was then used on the edges to provide more depth to the rusting effect.
Step 17 and 18.) Burnt Umber pigment was applied to areas that I imagined dirt would be visible, then Light Sienna pigment was applied to give the pigment some natural variation in tone.
Step 19 and 20.) I decided to create an ash effect on the bases to give then the authentic feel of a war torn battlefield. I mixed Titanium White pigment with water and dipped a large brush in the mixture. Using an airbrush at high pressure I then sprayed through the brush causing specks to fly onto the bases. This effect should be used very sparingly and should be practiced a bit before trying on the bases. With the pigment portion finished I permanently fixed all of the pigments by dabbing SWM Pigment Fixer onto all of the base and let it dry thoroughly.
Step 21.) With the bases essentially done, I sprayed Vallejo Model Air Black onto the outside ring of the base.

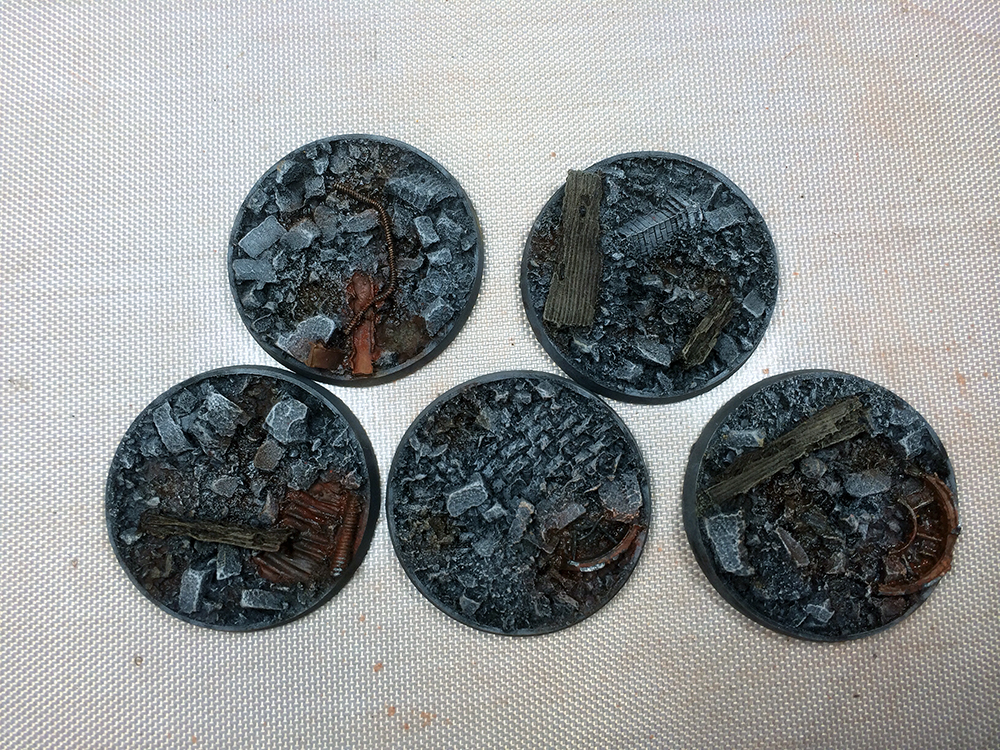
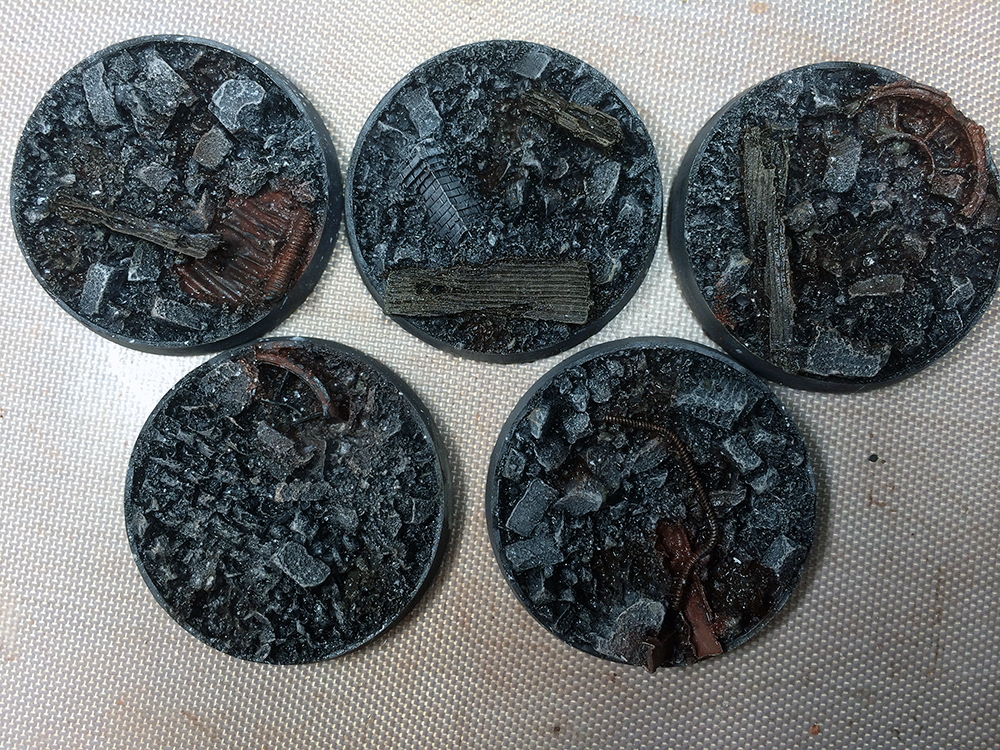
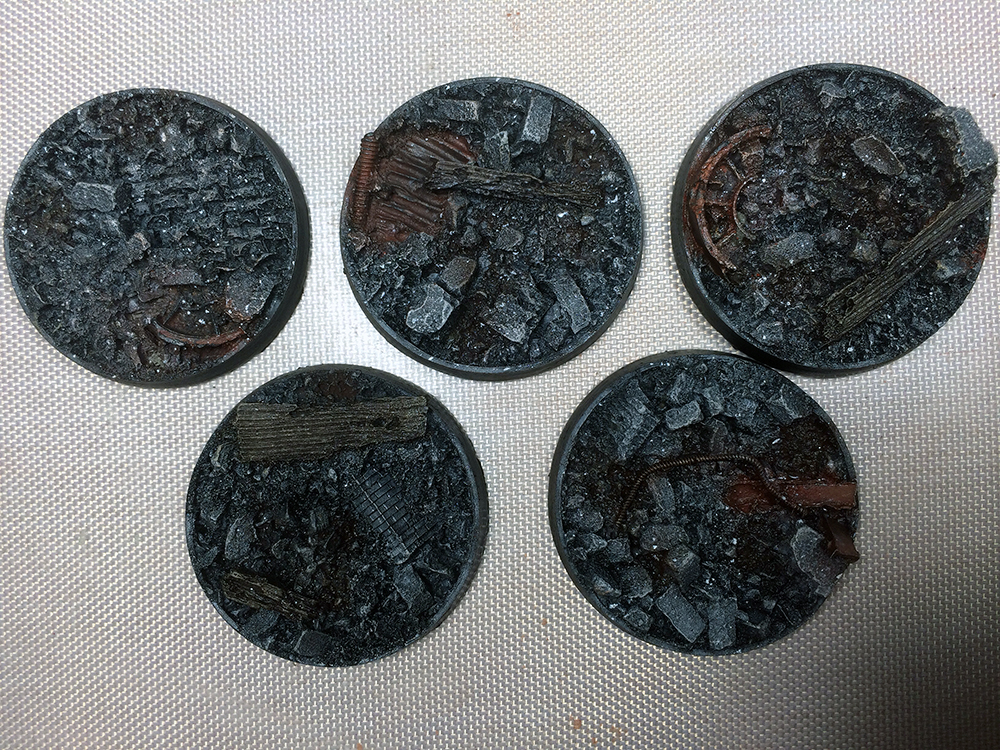
The finished bases look natural and interesting, but not so interesting that they would divert attention from the model.
What about the bricks etc.?